
I want to offer you some product photography tips, based on my experience as a product seller on a wide array of ecommerce websites, because I have discovered that the visual aspects of a sales page have a much bigger impact when compared to the actual text.
While content is quite important, when browsing for a product, people often tend to look at pictures of the product. If these are unprofessional, then chances are that the potential customer will head over to another seller.
With this being said, a big part of having an attractive web page and selling products on websites such as Amazon or eBay is product photography. For most prospective sellers, taking professional photos of their products may be quite challenging, due to an extensive lack of knowledge. Yet, you shouldn’t worry.
Learning how to take professional photos of your products is actually very easy. In this article, we have piled up a couple of tips that will surely help you out in your endeavour and surely increase your sale conversions.
Get a decent camera
One of the most common myths in this field is that you need a great camera to take awesome photos. This is simply false. While having an expensive camera will surely make your photos shine a little more, investing into a decent one that can do the job is enough for now.
Yes, you can start with your smartphone. That isn’t an issue as long as you set up your camera accordingly and actually try. Take a look at your competitors and see the quality of their pictures. This should give you a better idea on what photographing device you should invest in.
Learn to correctly set up your camera
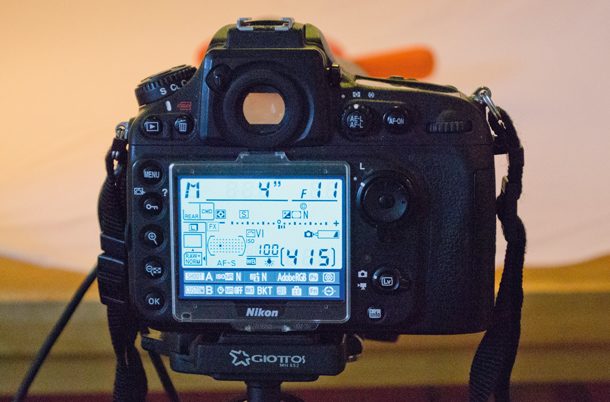
When it comes down to setting up your camera, make sure to select a small aperture, to increase your depth-of-field and quality of the final picture.
Chances are that you wish to take an up-close picture of the product you’re trying to sell. To make sure that the photos end up looking better, you may want to use macro mode on your camera. Not only is this mode great for close-ups, but it also intensifies the colours and details in the picture.
While attempting to do so will likely decrease your depth of field, the detail resulting can be mesmerizing.
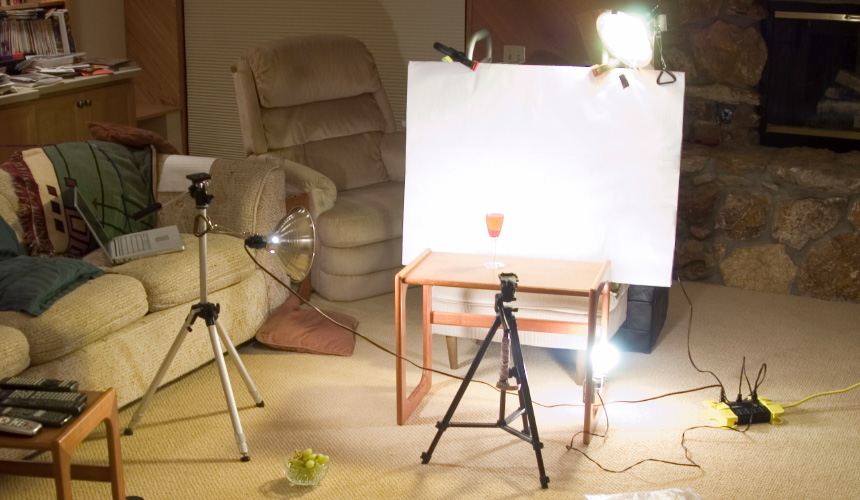
Another smart idea would be to use a tripod, as holding the device in your hands can result in blurry pictures, which you want to avoid. If you do not currently have a tripod, then there are a couple of workarounds. With this in mind, you can set up the camera’s timer, to ensure that the device won’t move upon taking the picture.
There are also a couple of cameras equipped with an anti-shake option (especially smartphone cameras). By turning this feature on, your pictures will look considerably less blurry.
When it comes to product photography tips, then a major tip would be to look at lights. Lights are a serious issue that you should take seriously. On your camera, other than increasing the ISO, you can also attempt to set a slower shutter speed, as this will allow more light in and make your pictures clearer.
Product Photography Tips – Setting up the photo scene

Depending on the size of the product that you’re trying to photograph, you may need a small, medium or large scene set up. As most items look better when surrounded by a white background, you should consider purchasing a white background for your wall, alongside with backdrops which can be used to eliminate shadows.
Investing in a quality table to lay your object on can also be a smart idea, especially if you can get a smart colour contrast by combining white with a caramel shade, for example.
There are also times when your object may look better in its natural environment. For example, a mouse always looks better when close to a computer setup, whereas a sofa looks better when photographed in the living room.
As most of us do not have access to photographer studios, getting better lightning can be quite difficult. One solution would be to invest into a ready-made, small-scale studio. These packages consist of background pictures, a wall, lamp and stand.
Experiment with product positioning
The principle behind this statement is quite simple, and I’ll explain it with the help of a simple example. As humans, we all have a favourite photo angle. While most people like their pictures taken from the front, showcasing their body and face, others like them slanted, or angled from the top.
To help you with some ideas, the world’s most popular photo angles include the high, low, slanted, eye level, aerial, close up, long, medium and wide angles.
While you don’t necessarily have to upload a single picture of your product (in fact, that’s not recommended at all), you should have a primary photo, which showcases your product best. Most people like to see all varieties of the product being sold and pictures from all sides prior to making a purchase.
If you have the possibility to offer prospective customers a 360 view of the product, then that’s even better, and will surely increase your percentage of conversions.
You can also consider the idea of supporting your products by using other objects. Don’t be afraid to experiment with supports, stands and other objects that can better showcase your product.
Always be accurate with what you show
Last but not least, it is essential for product sellers to avoid posting misleading photographs. If intentional, this may provide some more clients at first, yet, the practice will severely hurt the reputation of the seller. To avoid misleading photographs, make sure to always place disclaimers, letting people know the exact specifications of the products you’re selling.
Based on everything that has been outlined so far, following these product photography tips will score you a larger number of customers on your products, while also positively increasing your reputation as an online seller.


These are great ways for taking amazing pictures. The acting natural and pretending you are not having a picture taken are the best-looking pictures in my opinion. Thanks for sharing
Thanks for sharing informative article, I really like this post.