
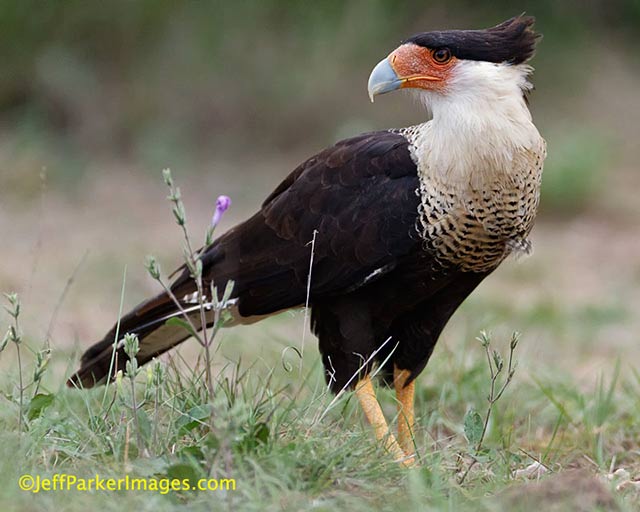
Crested Caracara
Watch how effortlessly a hawk plucks a tiny mouse from a field and you’ll understand why the bird is called a raptor. The word “raptor” comes from the Latin “rapere,” which means “to snatch, take or carry off.”
This style of hunting—snatching prey and carrying it off—unites all raptors. The group includes: hawks, eagles, falcons, owls, vultures, kites, and osprey.
What else do raptors have in common? The tools of a great hunter such as: strong, sharp talons for capturing prey and a hooked bill for tearing into meals. They also share the gift of keen eyesight; some raptors, such as Golden Eagles, can see a mile (1.6 kilometers) away.
Watching these magnificent birds flying free offers wildlife photographers one of nature’s most mesmerizing experiences. But, photographing non-captive birds can prove difficult, and even seasoned pros can grow frustrated when trying to get good photographs of untethered raptors. Not only are wild raptors extremely leery, but their amazing eyesight means they usually see you before you see them.
For me, however, experiencing these winged wonders in their natural habitats makes this wildlife photography challenge worth it.
To help make it a little easier, I’ve created the following tips:
1. Burst Mode is Best
When birds blink, their second eyelid (called a nictitating membrane) opens and closes, which can result in strange looking images. Since an in-focus eye is one wildlife-photography “must,” burst mode ups your chances of capturing keepers. It also helps collect quick action, such as birds fighting over carrion, landing, and taking off.
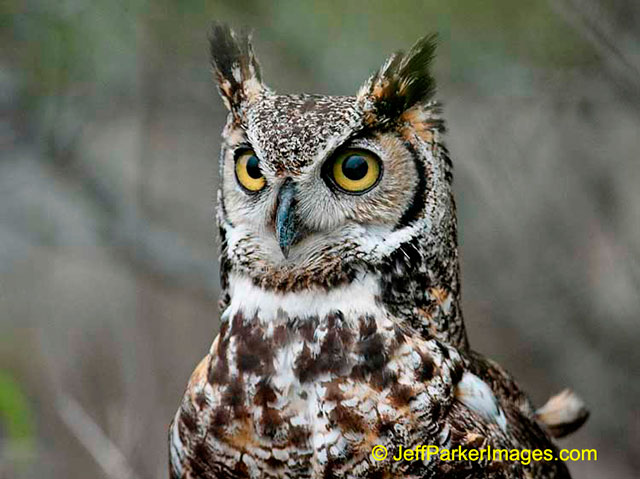
Great Horned Owl – yes, owls are raptors.
2. Wary is the Word
Nobody had to teach raptors about stranger danger –these birds are born nervous! Quick movement catches their eyes the most. In and out lens movement may even give them pause. Act like a statue, staying as still as much as possible. Nervous birds will look at you; if one does, FREEZE! If not careful, your actions will scatter your subjects — for the rest of the day. Allow raptors to relax after you create your landing shots. A raptor on one foot signifies a relaxed bird. A bird stretching its wings might make you think he’s relaxed, but not necessarily! If he has been sitting still for a length of time the opposite is probably true — he’s probably preparing for take-off.
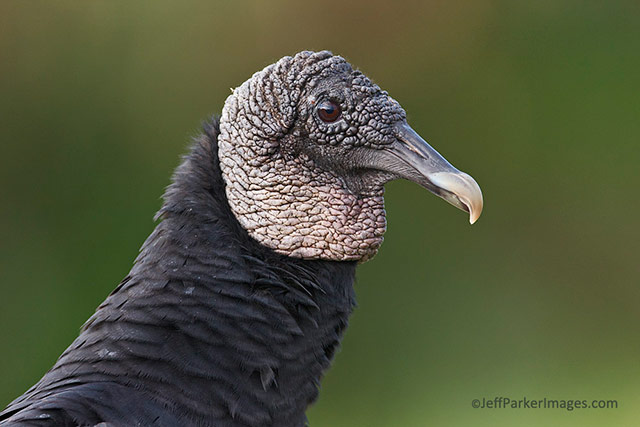
Black Vulture
3. Keep Concealed
There’s a reason we use the phrase “eagle eye”: raptors will see you before you see them (see tip #2). Your best bet is to work from a blind. Often a vehicle works well as a blind, especially if you bring your biggest lens and sit extra still for a while after shutting off the engine. Since I’m talking about photographing non-captive birds, plan on staying far away from these subjects.
4. Remain Silent
Raptors can hear well – very well! Vertically offset ears located just behind the eyes help hone in on sound location. Some species get extra ear-range from facial disk feather arrangement. Your voice and your shutter — especially non-stop actuation — could cause the birds to leave for the day. If you must talk, keep your voice down. And use short bursts when shooting.
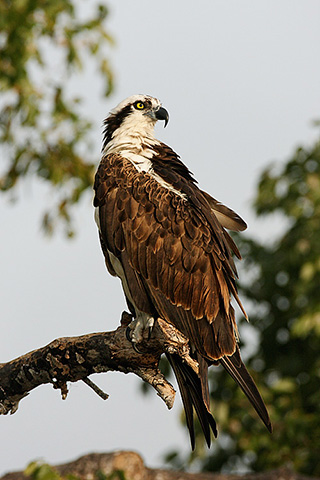
Osprey
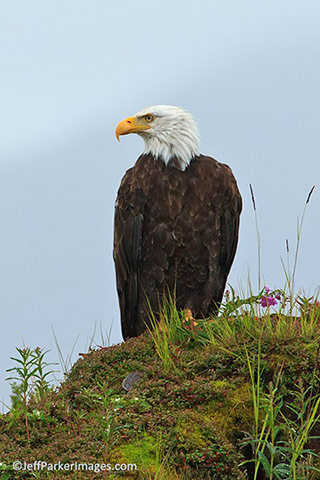
Bald Eagle
5. Lookout for Hunting or Landing Maneuvers
Focus on where a bird is headed before it arrives. That head-down position typically means they’re on the hunt for food.
Like airplanes, most birds (including raptors) take off and land into the wind. Considering when the light’s best for photography, an a.m. east wind and a west wind in the afternoon, means you’re in luck!
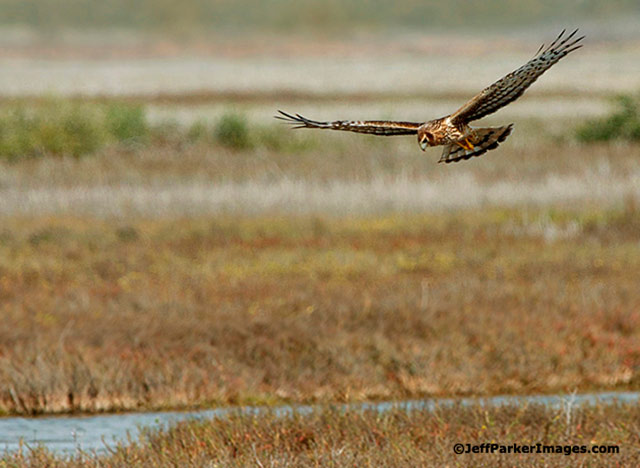
A Northern Harrier is on the hunt for food.
6. Prepare for Lift-off
You get some of your best action shots as birds leave. So be ready for take-off. Good news! Raptors also prepare and will give you plenty of signs that they’re about to lift-off. A bird looking into the breeze and/or crouching is a bird about to depart. So too is a bird that defecates.
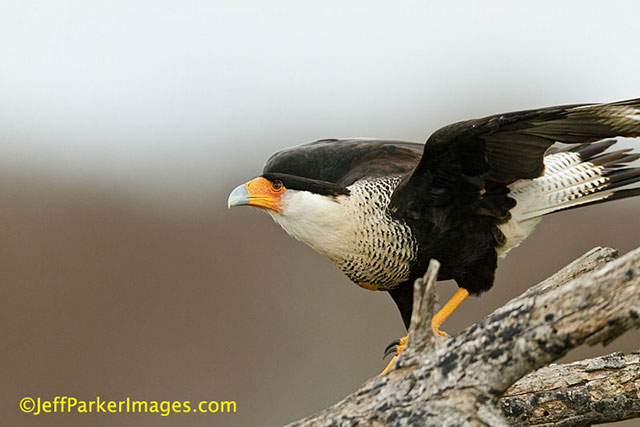
A Crested Caracara gives the clue that it’s ready for take-off.
7. Practice Patience
Patience pays big dividends in wildlife photography, especially when photographing raptors. Don’t fire away at a perched bird just sitting there. You’re creating lots of boring images and running the risk of running off your subject with the sound of your shutter. Wait for natural behavior, the kind of show a relaxed bird puts on: stretching, preening, calling, and eating. Wait for him to do something before making your photo.

A Crested Caracara chases off a Turkey Vulture.
Follow these tips and you can take pride in knowing you didn’t merely “snatch” yourself a picture, but created those great wild raptor images!
by Jeff Parker
All text & photos: © 2013 Jeff Parker Images. All rights reserved.
Leave a Reply