
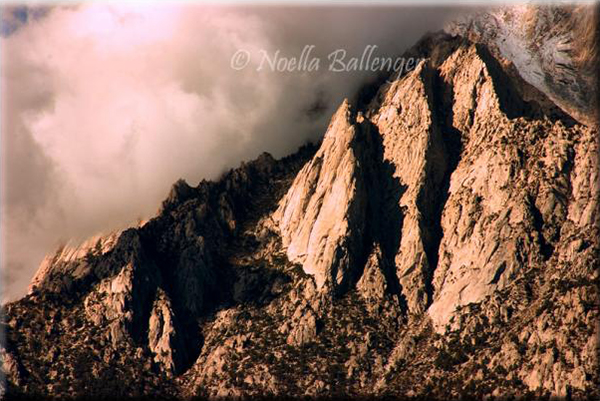
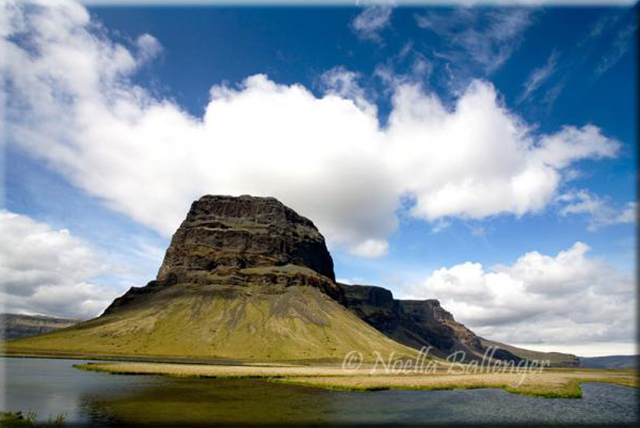
Sierra Nevada Mountains, California
Even if you are on an easy hike and reasonably close to civilization, get in the habit of paying attention to where you are going and where you have been by noticing natural landmarks.
Be prepared when you go on a photographic adventure in the wilderness. The things you do and the things you carry with you could save your life.
Recently, I heard about several situations in which nature photographers put themselves in jeopardy by not using good sense. As I discussed the safety issue with friends, we shared ideas on factors to be kept in mind when you’re making images in a wilderness setting.
During the years when I provided workshops, I gave participants a stock pre-trip lecture about not leaving gear lying around for others to trip over, walking away from their camera bag so strangers could grab and run, not reaching into rock crevices without looking (you never know what you’re disturbing), and the necessity of telling someone when you’re going to go off on your own. These are basic safety tips. However, photographers can tend to forget other precautions, as well, in the quest for the perfect photograph.
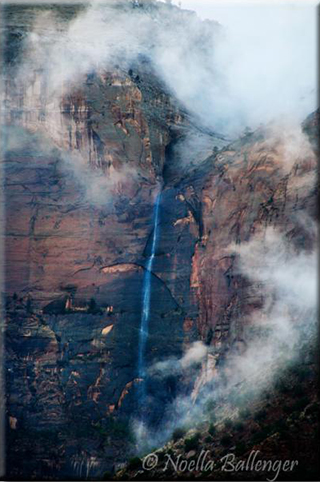
A storm is coming in over the rock formations at Zion National Park in Utah. Be sure you carry the necessary gear needed in order to stay warm and dry.
One of my very good friends and a great stock photographer confessed to me the story of one time when she went into the Sierra Nevada Mountains on a beautiful fall day. At the top of Monitor Pass (elevation over 8,000 feet), she decided–on the spur of the moment–to hike the Pacific Crest Trail. So, wearing shorts, a thin shirt, and hiking boots, she set out for what she planned to be an hour or two. Although the weather and photography had been wonderful when she started, a really cold wind came up suddenly, and the lovely puffy, white clouds above her grew black and menacing. She had progressed at least an hour’s walk away from the car when rain began to pound. She guessed she knew the way back, but she didn’t have a map of the area to be sure. By the time she reached her car, she was soaked and extremely cold. What had begun as a beautiful day, finished as a near-disaster.
What did my friend do wrong? First, no one knew she was in that area of the mountains. She had no wilderness permit and had not stopped at the ranger station to check in, monitor trail and weather conditions, heed wildlife alerts, etc.
Second, her attire was not suitable for what she had in mind. Mountain weather can change in an instant. No matter how beautiful the day, you need to be prepared for the worst at all times. She did have a pack with a jacket, rain pants, hat, and gloves in the car. She also had basic food snacks, water, and a space blanket in the same pack. However, she left her emergency gear in the car, because she wanted to carry only her camera gear.
Third, she never bothered to note the turns she made or the landmarks that identified the path she took at each fork, although she didn’t know the trail. She never turned around to look back so she could recognize the correct way back to the car. To get out of the rain and cold, she simply ran back the way she thought she should go. She was just plain lucky she didn’t take any wrong turns and get lost. Also, running wasn’t her best choice, since she was taking a chance of slipping on the wet ground as she ran. Had she carried her pack, she could have put on additional weather protection and checked a map. Suffering the extra weight of her pack would have been more sensible and safer. She certainly didn’t plan ahead.
Another photographer, the son of a good friend, stopped at a friend’s home and told him he was going to do a day hike in Zion National Park. On his adventure, he did almost everything right—almost.
First, he went to the ranger’s quarters and filed a plan for a day hike. In addition to specifying the time he was planning on returning on the day-hike plan he left with the ranger, he let his friend know when he thought he would be back. Second, because it was winter and he’s an experienced hiker and camper, he knew enough to take his sleeping bag and small tent. These are survival essentials. Third, he was wearing winter clothing—several thin layers that he could shed or add as conditions changed. Fourth, he took food and water with him as well as a good flashlight with fresh batteries. What he didn’t do correctly was come out when he was expected. He became engrossed in photographing the wonderful scenery, didn’t watch the time, and stayed out too late. He decided it wasn’t safe to return in the dark (that was smart), so he camped out overnight. Because he didn’t come back when he said he would, his family and friend didn’t know what had happened to him. Fearing the worst, they called the rangers, and at first light the next morning, a rescue team started up the trail to look for him. He was on his way down when they met. A great deal of anxiety could have been avoided if he had followed the time plan he had indicated.
Unfortunately, most nature photographers tend to have one-track minds, focusing on the photography while ignoring safety and common sense basics. Here’s a checklist of the absolute minimum safety equipment you need to carry with you. Yes, we always have lots of camera gear to carry, but obeying these tips may save your life and allow you to photograph another day.
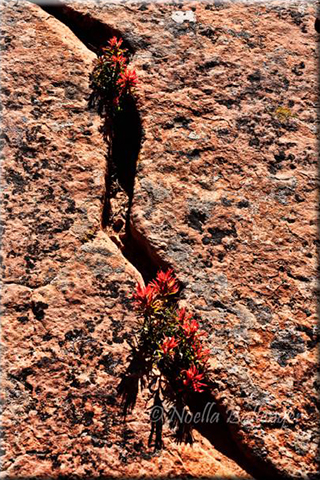
Indian Paintbrush, Zion National Park
It’s easy to get distracted by all the beautiful details in the rocks. Just be sure to check those cracks for any unwanted critters before you get down close and personal with your subject.
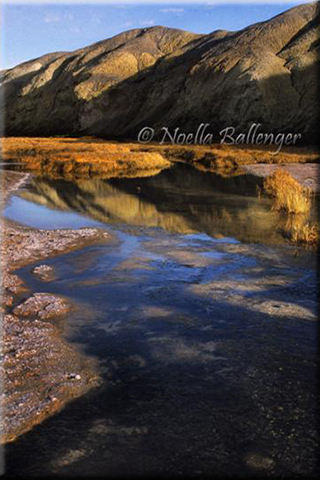
Salt Creek, Death Valley
Be sure to carry plenty of water with for your adventure. It is unsafe to drink from mountain streams – lots of “bugs” in that water that could make you sick.
THINGS TO DO AND CARRY WITH YOU … JUST IN CASE:
1. Check in and file plans with the local rangers whenever you’re going to hike a wilderness trail. In addition, leave a note in the front window of your car indicating the trail you’ve taken, and contact a friend to let her know where you’re going and what time you expect to return. Be sure to follow your plan!
2. Carry rain gear. (In a pinch, a simple large garbage bag can substitute as a rain poncho/coat.) Also carry a space blanket (a small, isolative/reflective blanket that looks like folded aluminum foil) just in case you become stranded and need to stay warm.
3. Food and water are essential. Take at least one food item you wouldn’t eat unless you were really hungry. (An expert mountaineer I know carries a half dozen dog biscuits in the bottom of his pack. They’re strictly emergency food, as they taste terrible, but they’re very high in protein and fat–just what you need if you get in trouble.)
Iceland – Be prepared and alert. Hire a guide if you are in unfamiliar territory. It is well worth the money as they can get you to places that are wonderfully photogenic. They will also do it safely.
4. Include a small first aid kit … and know how to use it.
5. A cell phone (although service is usually spotty), a GPS (Global Positioning System), and a trail map are all very good things to have with you.
6. Hike with a friend. This is a super plan. Sharing the photographic views makes them even more special.
7. Be observant. As you’re hiking up a trail, turn around and look back now and again to note landmarks. If you do, when you return, you’ll be able to recognize where you are. When you come to a split in the trial, build a small stack of rocks or make a rock arrow as a guide. Your sign doesn’t have to be big or elaborate, but it will help.
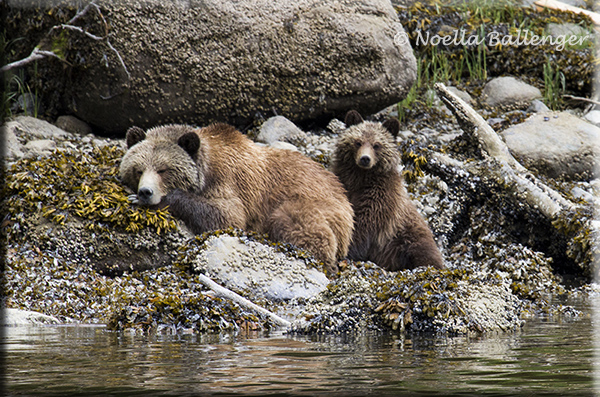
Grizzly Bear and Cub, Canada
Pay attention to your surroundings and know the character and habits of the wildlife you photograph.
8. Make sure you’re wearing comfortable and suitable gear. I shutter (pun intended) when I see people starting up a trail wearing flip-flops. Your feet are really important and need to be cared for properly, so wear adequate shoes or boots.
9. Learn about survival, first aid, and sensible wilderness techniques by taking classes, reading books, and talking with rangers and others in the know.
10. BE SURE TO CALL HOME OR YOUR FRIENDS WHEN YOU COME OUT, SO THEY WON’T WORRY AND PANIC. ALSO CHECK BACK WITH THE RANGER TO LET HIM KNOW YOU’RE OUT AND HAD A GOOD TIME.
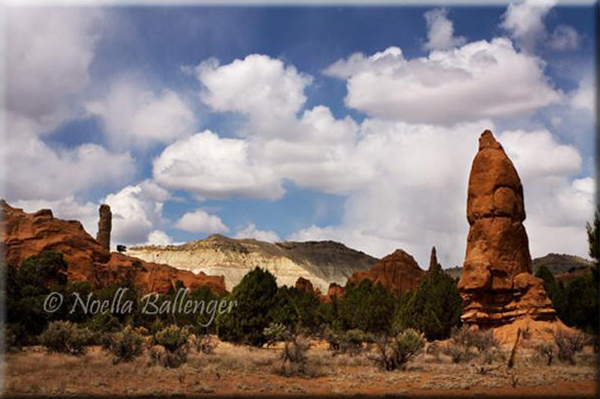
Kodachrome Basin, Utah
Don’t forget to apply at the ranger station and let them and others know where you’re going and when you plan to return.
If you decide to use a 4-wheel-drive vehicle to get to a destination, there are some additional safety tips for you:
~ Be absolutely certain your car is in tip-top condition. You don’t want to become stranded and have to be towed.
~ Know how to do things like change a tire, dig a wheel out of sand, or winch out of a ditch. Have the right equipment and supplies with you to cope with difficult situations and the know-how to use your resources efficiently.
~ Be sure you know how to operate in 4-wheel drive. (I took lessons before I tried driving anything serious on my own.) Know how to “read” the road and know when to get out of your vehicle and walk to see the problems.
~ Know your limitations. Know when to say “no!” Rather than having to get out of trouble, don’t get into it in the first place.
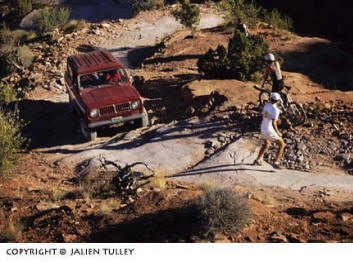
As luck would have it, we had the chance to film a car coming up and over Elephant Hill. It was unbelievable! I really have to give that driver credit for his ability, calmness and courage. We decided not to try it just yet. Moral of this story: Know your own limitations and know when to say no.
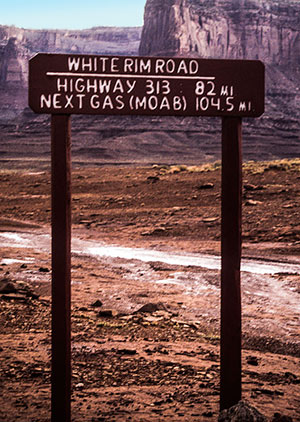
Be sure the gas tank is full when you start your journey and how many miles it will take you. Know how far it is to the next gas station.
There are many more safety ideas that should be considered when you’re going on a quest for magnificent photographs. But keep in mind that your camera is not a magic shield that will keep you out of trouble. In fact, my camera gets me (or wants to get me) in trouble all the time. It’s up to me to put my safety first. Then, and only then, will I be able to return time and time again to take my photographs and really enjoy doing it.
by Noella Ballenger
All text and photos: © Noella Ballenger. All Rights Reserved.
Leave a Reply