
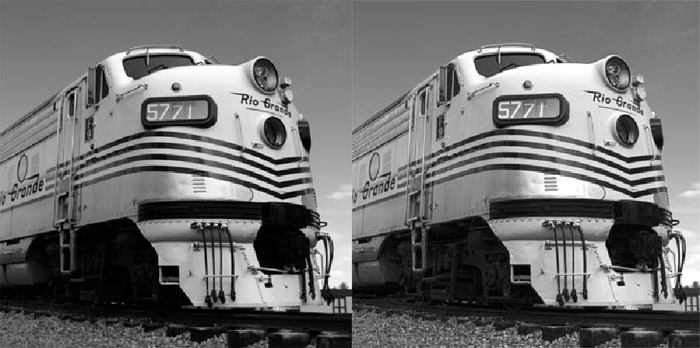
Results of the HDR Zone System: I wanted to capture a diesel locomotive at a local train museum showing the bright sunlight details on the front of the engine as well as holding detail in the dark, shadowed wheels. By creating a Zone III exposure for the wheels I was able to hold detail in the entire image. Compare the wheels in the image on the left (not zoned) with the zoned image on the right.
The venerable Zone System in photography is a means by which the variations in film and darkroom printing controls could be systematically standardized to produce excellent photographs on a consistent basis. It has been around for about 70 years and was formulated by Ansel Adams and Fred Archer.
By reviewing the original Zone System methods you will have a greater understanding of how it applies to the new High Dynamic Range (HDR) imaging techniques of present day.
The Zone System Basics
Unlike today, there was so much variation in films, papers, and developers with little quality control, that Adam and Archer implemented a variety of tests and light metering routines that led to repeated quality results.
In fact, color film used to ship with a data sheet that told you at what ISO speed and color filter correction pack should be used to start the testing process. In other words, Ektachrome 64 daylight film might have an actual speed, based on testing in Kodak’s labs, between approximately 32 and 100.
Black and white films often showed wild variability from batch to batch and always required testing until at least the 1960s. At some point film makers started using much tighter quality controls and as the days of film’s reign over photography came to an end the rated speed of film was almost always right on.
It wasn’t just the film that was tested though. For example, there were tests for the potency of fixer, the replenishment rate for developer and the minimum time to get the best shadow detail in a print. For serious black and white darkroom photographers this testing still exists today.
The most important test for serious Zone System photographers probably revolves around the time it takes for film to reach one stop more or less density in developer at a standard temperature. (Remember that film developer produces vastly different results at different temperatures.) Two of the key components in the Zone System are development ‘expansions’ and ‘contractions’ which let the photographer predict exactly how the highlights in an image will print based on their exposure reading and their difference from the shadows in the original scene.
The film-based Zone System helps you control tonal ranges of 6 to 10 stops. These zones typically represent one whole stop of the tonal range. The range of tones that can be captured with any device can be down broken into 10 zones. Each zone represents a range of tones in the highlight, midtone or shadow area of your scene or print. These zones are numbered from 0 to IX, with 0 defined as the darkest black, to IX being considered as completely white. Zone V is the gray, or midtone, between these two extremes and some photographers use a gray card by which they can meter and calculate their exposures.

Zone System Scale
0 through IX is called the dynamic range and III through VII is called the Textural Range.
In reality the whole range of zones is really a continuous gradation from the darkest black you can produce to the whitest tone available.
It is important to understand that each of these zones is not really an individual tone, but a value that falls somewhere in the range that represents that particular zone. The zones are continuous and this is simply and easier way to think about the zones.

Here you see one zone and it demonstrates that the zone includes a small range of tones, in this case they are lower midtones.
The line in the middle of the image above shows the center point of that zone. While each zone comprises a range of tones, the center of the zone is often considered the tone that is typical of that zone. Later, when doing meter readings for Zone III, Zone V and Zone VII, you will find that many times you have to make multiple readings to find the tone in your image that is best for each exposure.
Zones III and VII are the two most important zones. Zone III would be the darkest area in your photo where you would want to maintain detail, so you would spot meter off this area and set your camera to give two more stops of exposure. Zone VII would represent the lightest highlighted area of the photo where you want to maintain detail, so you would spot meter off the light area and close down two stops and set your exposure. This approach still works today with digital exposures.
Note: There is a big advantage to the HDR Zone System. It works just as well in black and white as it does in color. While the zone scales you are looking at are all black-and-white, they represent equivalent tones in color. Even if the darkest area where you want detail is deep red or green, the tone you are looking at when you make your decision about which shadow area you wish to use for Zone III will be based on how dark or light it is, regardless of color.
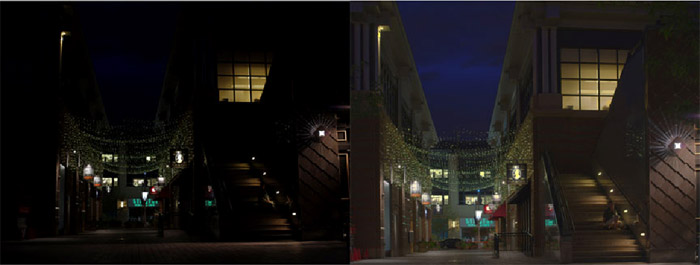
The Baker Street Grill–10 p.m. in Lakewood, Colorado: On the left you see the image as it was made using standard HDR bracketing. It loses about 5 stops of range in the photo. On the right the image was made using the HDR Zone System presented at a 9 ½ stop range. It allowed me to control the vast range of contrast in the scene.
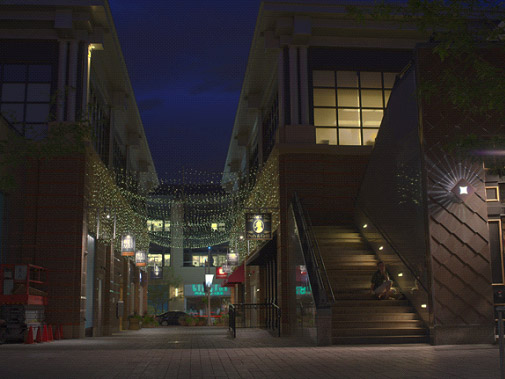
An average exposure of the photo presented nothing but a few lights with no detail showing in the sky or on the stairs where the model sits. The sign in the center of the frame was read as a Zone VII placement and the bricks on the left hand side of the frame were the Zone III.
HDR Imaging & the HDR Zone System
HDR Imaging & the HDR Zone System High Dynamic Range (HDR) imaging relates to the difference in the contrast between the lightest and darkest color values of a photo. When we speak about the ‘dynamic range’ of an image we are referring to the entire range of tones in the subject or image. HDR imaging, as referred to in Adobe Bridge, is a technique for expanding the range of a single exposure by combining different image captures to extend the range possible with a single capture from your camera chip alone. While the goal of the digital zone system is to expand the range of tones in your image, the key aspect of the system is to use the HDR feature of Adobe Bridge to expand the range of tones in your image in a way that is tailored to the dynamic range of the scene you are photographing. Many HDR techniques simply bracket and then use these random exposures to artificially expand the range of tones in the image. We are going to make meter readings that will allow us to create custom exposures to obtain maximum detail in the ‘textural range’ of the image. To produce an HDR photo, multiple exposures of the same subject are taken at different shutter speeds, resulting in a greater range of whites and blacks. Because HDR produces a higher range of contrast than what your camera is capable of producing, the Zone System method is very applicable in producing HDR Zone System images.

This photo, made in Tucson, Arizona was captured during the day. The problem here was the long range of tones between the clouds (which were illuminated by the sun) and the shadow of the fence in the left foreground. Again, the image offered a range of around 7 stops. Too much for an average HDR treatment.
When technology moved toward the digital HDR imaging process, the array of darkroom variables were no longer an issue. However, there is one concern that is common to both the traditional Zone System and the HDR Zone System. We need to know what our equipment is capable of producing and how we can push those limits. By using testing charts for resolution, we can determine whether our lenses are working to their advertised potential. We can also test with diagnostic tools, such as color charts, to see if our camera, lens, computer and printer system is working together as well as it can.
You will find that there are some limitations to the HDR Zone System no matter what specific methodology you use. For example, you will seldom find someone photographing a football game using anything like this system. Because it is necessary to make multiple readings, calculate exposures and expose at least two frames for every finished image, you must be working with stationary objects such as, buildings, rocks and other things that are not going to run away.
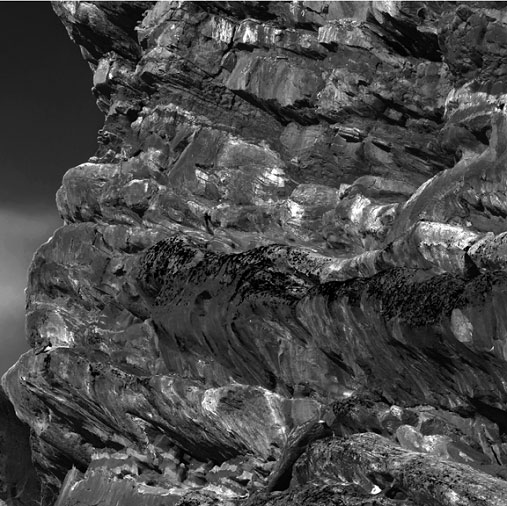
The black and white photo of Red Rocks Park outside of Denver, Colorado was exposed using a Pentax Digital Spotmeter reading the white rock strata as a Zone VII highlight and the shadow at the top right hand corner of the image as the Zone III shadow value. By placing the lighter tones on Zone VII I was able to expand the tonal range of the final print and create better contrast while still holding detail in the shadow value.
Note: Keep in mind that the images above were all made using three exposures then merged using HDR software. They are not heavily manipulated in Photoshop. Other than rendering the files in black and white in a couple of cases, they are presented as ‘straight’ images.
It may seem that if you decide to pursue this HDR Zone System that you will be spending a great deal of time testing and examining all aspects of your digital photography system. You will. There is really no way around it, so make it a fun process, because once you understand the basics of the HDR Zone System you can approach any tradition subject and capture it as you would have done using film and a darkroom. Finally, there is a way to create fully scaled images using digital equipment.
by Thomas Harrop, M.S.
Article and photos: © 2011 Thomas Harrop. All right reserved.
Leave a Reply