
© 2010 Edwin Brosens. All rights reserved.
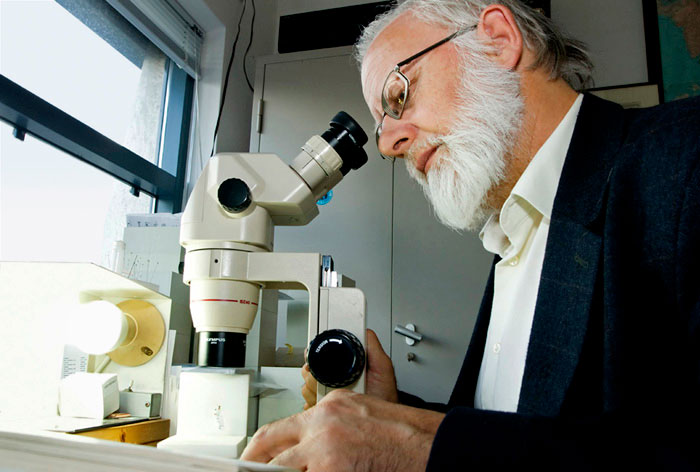
Professor Kees van Achterberg
Sony Alpha 700 + 20/1.8 lens + Flash, F/10 @ 1/40 sec
For decades, the communication between scientists and the public has been characterized by long-distance criticism and many heated discussions. Photographs can provide a better understanding of the important work scientists do and the influence their work has on our daily lives—especially in the case of large projects dealing with biodiversity. However, before we can start shooting photos, we have to know and understand how a scientist looks at the subject he or she is studying.
If you don’t already know a scientist personally and wish to find one, visit the nearest museum or institute, make an appointment with the scientist working there, and explain your idea is to shoot a series of photos of his/her research. Look for someone who is studying a subject you find interesting, because you need to be interested in order to represent the work appropriately. Otherwise the photographs will be empty and won’t tell a story. Your images must be able to translate the work of the scientist for the public.
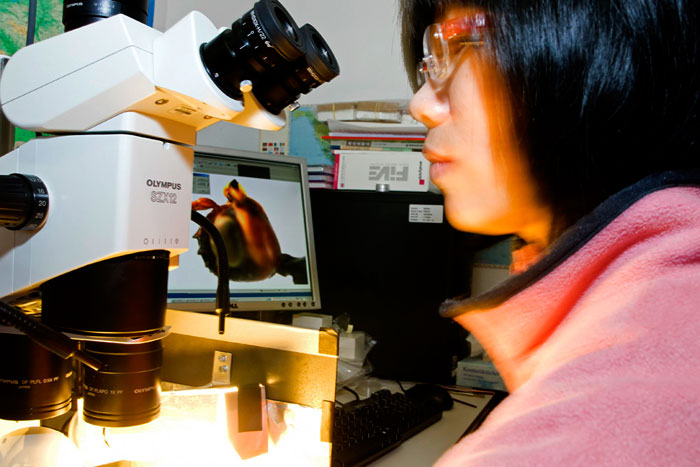
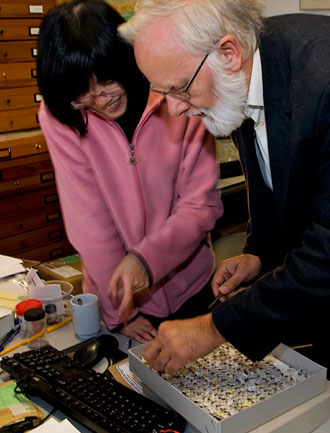
My own first contact with a scientist happened in 2007. I had done an exhibition at the Natural History Museum, Rotterdam, Netherlands, after shooting photos of a parasitic wasp. I asked the Latin name of the insects, and the museum representatives sent me to Professor Kees van Achterberg of NATURLIS Leiden, Netherlands. He also teaches at the South China Agricultural University at City Guangzhou, China. Every year a few students from China visit the NATURALIS for their educational research, and Kees helps them. Last year, I had an opportunity to shoot photos of student Chun-dan Hong of China and Kees during their research of parasitic wasps from Russia.
© 2010 Edwin Brosens. All rights reserved.
Chun-dan Hong
Sony alpha 700 + 20/1.8 lens + Flash, F/16 @ 1/13 sec
© 2010 Edwin Brosens. All rights reserved.
Kees van Achterberg and Chun-dan Hong
Sony alpha 700 + 20/1.8 lens + Flash,
F/10 @ 1/8 sec
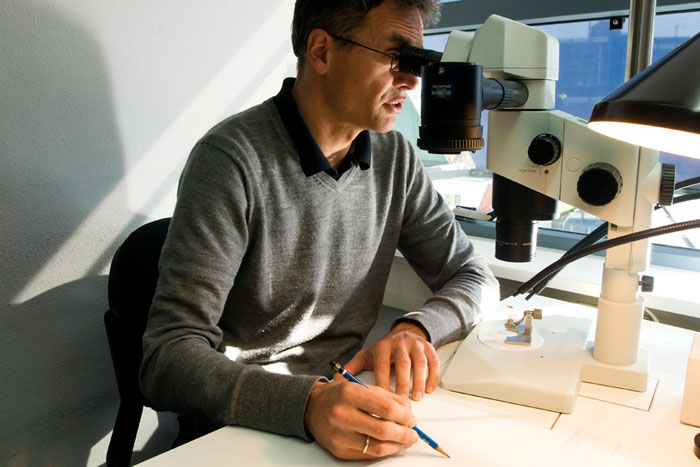
For the above and to the left, I used a Sigma 20/1.8 mm wide-angle lens. With my Sony Alpha 700, I have 1.5 x 20 = 30 mm lens, so I get a natural perspective in the image. A Sigma 10-20 mm/3.5-5.6 will give an unrealistic image, because it blows up the perspective. While photographing, I try keep as close as possible to the subjects to get a great perspective in the images. But I have to take care that I don’t irritate them as they work. Otherwise, their behavior would change, and for the rest of the day I could forget getting them back to the natural reactions they had been showing.
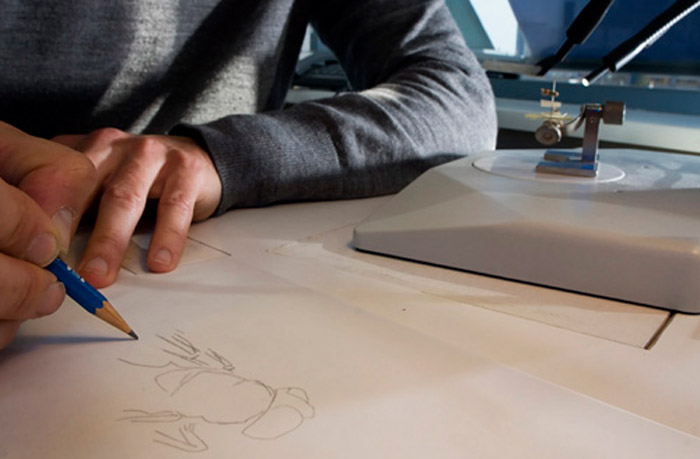
Be sure to explain to the scientist what you would like to photograph and the goal of your photos before you begin your session. A few weeks ago I had an opportunity to shoot photos of Erik-Jan Bosch, one of the four scientific illustrators of NATURALIS Leiden Netherlands. Before I visited Erik-Jan, I e-mailed him about my goal and how I would like to photograph his work. During the time I was shooting photos, it was a sunny day, which I used for the photographs. As you see on the image, Erik-Jan was sitting behind his Olympus stereo microscope to start his first drawn set-up. When he looked through the microscope, he could see both the insect and the paper with his pencil in one view. (The microscope has a special modification so illustrators can work like this.) The sunlight came from the right side through the window and lit Erik-Jan, the microscope, and the paper. The conditions were great for photography. The sunlight produced shade in the image and that, together with the right perspective, brought the image to life and revealed Erik-Jan’s Erik-Jan passion. I made certain have my camera at the same level as the center of the microscope as I watched continuously through my viewfinder, waiting for the right moment to press the exposure button.
© 2010 Edwin Brosens. All rights reserved.
Erik-Jan Bosch, Scientific Illustrator NATURALIS
Sony alpha 700 + 20/1.8 lens + Flash, F/14 @ 1/20 sec
By getting lower with the camera (around 10 cm above his desk), I was able to frame the insect under the microscope into a single image with Erik-Jan’s drawing. The fact that Erik-Jan’s head doesn’t appear in the picture is not a problem, because the subject is the drawing and the insect. I had to take great care not to touch the table with my body. An illustrator is never amused if you accidentally move the table. The work he does is on the scale of millimeters. I used my flash-gun wireless to light up the insect; otherwise, it would be invisible in the image. Never take too many photos of a scientist from a single position; it makes him unsure if his image is coming out well.
© 2010 Edwin Brosens. All rights reserved.
Erik-Jan drawing the insect that’s mounted on the plate of his microscope.
Sony alpha 700 + 20/1.8 lens + Flash F/14 @ 1/80 sec
© 2010 Edwin Brosens. All rights reserved.
Erik-Jan behind his computer.
Sony alpha 700 + 20/1.8 lens + Flash, F/14 @ 1/13 sec
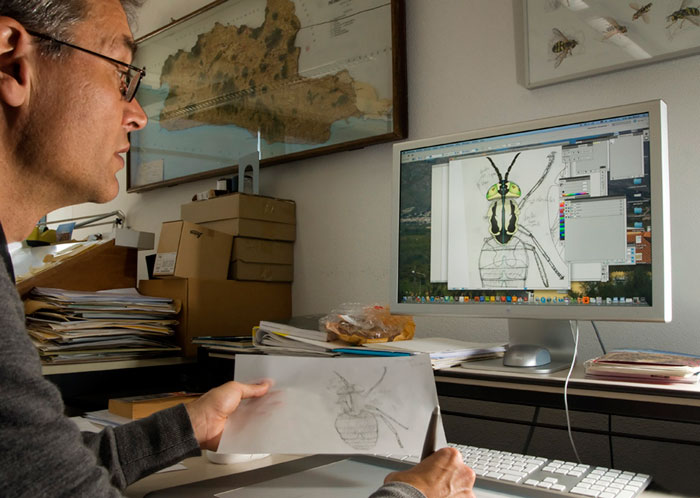
After drawing the insect, Erik-Jan scans the drawing into his computer. He can use the digitalized image to color the insect. I was almost sitting on the ground to get a good angle to catch Erik-Jan and the computer monitor in one shot. However, it is difficult to get this in one shot, because when your distance to the illustrator is too large, you lose the detail in the drawing. So it is better for you to move step by step as you approach the illustrator, and constantly watch through the viewfinder of your camera, searching the image for the right composition. Then press the exposure button of
your camera very fast, because what you see in that moment will be lost in a second or less!
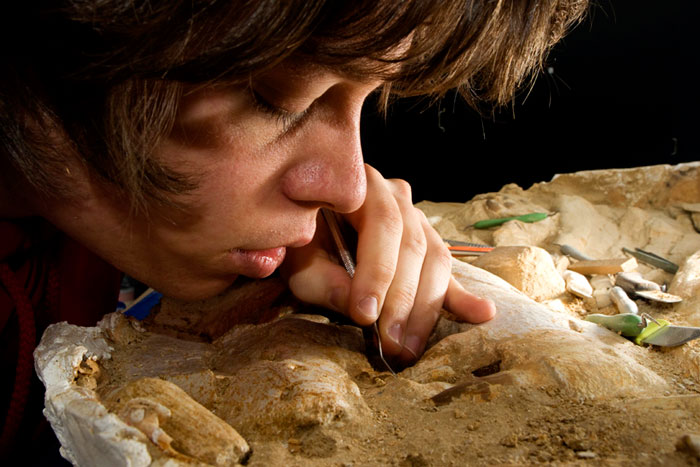
Over the last six months, I have been taking photos of fossils at the Prehistoric Times Museum in Boxtel, Netherlands. Two months ago I met student Frank Van Dorp from the University of Utrecht. He was at the museum to begin research on a 70 million-year-old Mosasaurus from Marokko. He started the research for his master script. It will take him around seven weeks before he will complete just the upper mouth of this eight meter long animal. I asked Frank if it would be okay if I took photos during his work. He was pleased that I asked because the images could be used for his script and the media.
I used two flash-guns to get light into the image where I expected it should be. I tried to get as close to Frank as I possibly could so that in the image, Frank disappears with his mind into the world of evolution. Keeping my eye against the viewfinder, I waited as silently as possible for the right moment. Suddenly, Frank looked at the fossil and the time had arrived. I pressed the exposure button and caught the moment.
© 2010 Edwin Brosens. All rights reserved.
Student Frank van Dorp working on Mosasaurus.
Sony alpha 700 + 20/1.8 lens + Flash, F/14 @ 1/60 sec
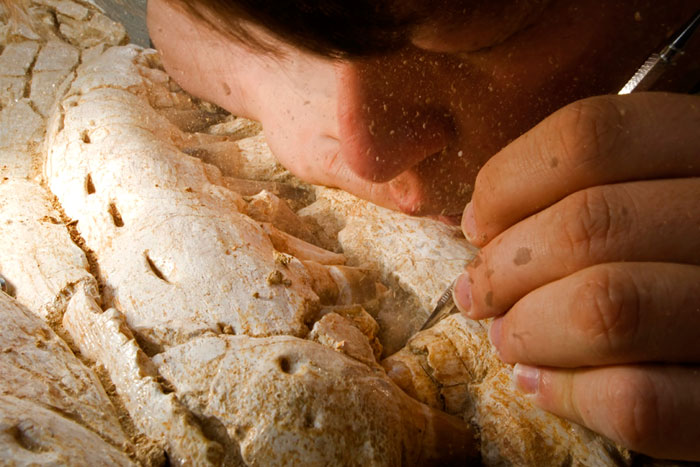
Two weeks later when I was visiting Frank again, I was able to shoot a photo of him removing sand from the fossil. After removing the sand with a hook, he blew it away and I used a strobe flash technique to freeze the airborne sand. To use a strobe flash technique, you need a flash-gun that allows you to set multiple flash pulses named in Hertz. You’ll want to learn, understand and practice this technique before you go out into the field. It only works with a flash mounted on the camera body or with a cable connection to the camera. When Frank blew the sand, some landed on my camera. It was important for me to remove the dirt immediately after I took the photograph. Like rain, the dust of sand can damage your equipment.
© 2010 Edwin Brosens All rights reserved.
Student Frank van Dorp working on removing dust from a Mosasaurus.
Sony alpha 700 + 20/1.8 lens + Flash, F/14 @ 1/10 sec
A few weeks later I used my Sigma 10-20 mm / 3.5-5.6 wide angle lens, set as 10 mm, and I was able to catch a wonderful image in the museum on a bright sunny day. In the background, a large Brachiosaurus appeared to be watching over Frank’s research work. I had set myself into a position that was low to the ground. Because the sun was changing position in the sky, I worked fast to catch the moment. I was afraid to lose the sunlight in the upper right of the photo. Without that lighting, the photos would have lost the motion.
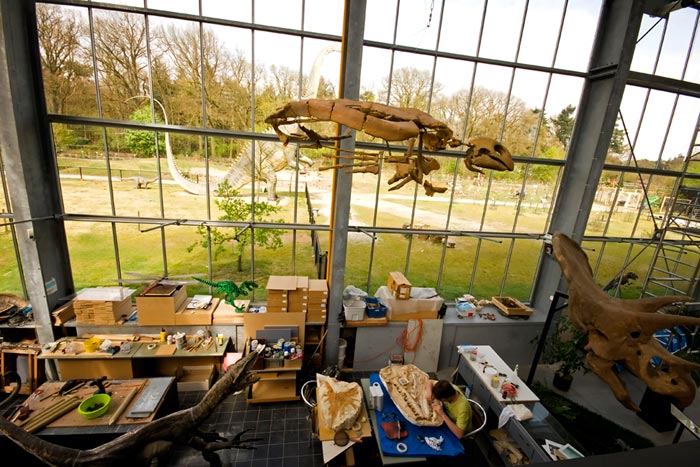
© 2010 Edwin Brosens All rights reserved.
Prehistoric Times Museum in Boxtel, Netherlands
Sony Apha 700 + 20/1.8 + Tripod & Flash, F/14 @ 1/60 sec.
It takes a lot of preparation before you can shoot photos of a scientist, but your time is well spent on such a venture. You are welcome to send your results to me and also feel free to share your questions about this topic.
by Edwin Brosens

Leave a Reply