
Exploring the fine art of black and white portraiture. Are portrait photographers born? Do they come upon this skill naturally and simply need some technical training in order to learn how to use their equipment?
Or, can anyone with a keen interest be taught how to see and react at precisely the right moment? Can they be taught to see the light? I believe “yes” is the answer to all of these questions.
I looked through the viewfinder and saw something I had to capture.Both for the person I was photographing and myself. Click. I smiled and let him know we got the shot. I was certain there was no need to continue the session. After seeing the image he agreed. Together we had created the first photograph of him he had ever liked.
This same scenario has happened throughout my photographic career more times than I can remember. I love what I do for a living–a dream of mine since the age of seven. To have my work be embraced so readily by viewers doubles the blessing.
Thanks to a number of talented and highly acclaimed photographers, who so graciously shared a wealth of knowledge with me throughout my school years, I have learned what it takes to create a cherished black and white fine art portrait.
It didn’t happen overnight! I had to practice the techniques, and over time, I became confident in relaying my vision to the sitter (the person or people being photographed). I’ve spent years learning my craft in order to develop my own personal style.

What Makes Black and White Portraiture So Captivating?
The goal is to create a portrait that will sing. I find this easier to do in black and white rather than colour. Black and white not only captures the essence of the subject by nature, as it isn’t as distracting as colour can be, it allows the viewer to focus on the expression, gaining a sense of the sitter’s personality.
They say it is more difficult to create a great black and white portrait than it is colour. I’m not sure about that, but what I do know is I have always been drawn to the dynamic nature of this medium. To me, it allows for more creative freedom.
I have always felt more relaxed knowing the final result of the portrait will be black and white. Personally, I think everyone looks good in black and white.
PREPARING FOR A SESSION
The Importance of Pre-visualization
Every person is unique. Find out what makes them tick and create a scenario where they can be themselves. After a consultation I will literally dream up a scenario for the sitter.
It’s really important to find out what they see as a final result so you are not on opposite ends of the scale. Sometimes, it’s necessary to do what the client wants, then if possible, to shoot how you see them.
I find a series of sketches can help remind me of the design elements I need to capture. Often a simple street scene or playground scenario can be perfect inspiration for a session. I love old movies; the lighting can be easily recreated, giving your portraits the simple elegance of a Hollywood noir technique.
Once you have a clear vision in mind for your black and white portraiture, you are ready to focus on photographing your subject.
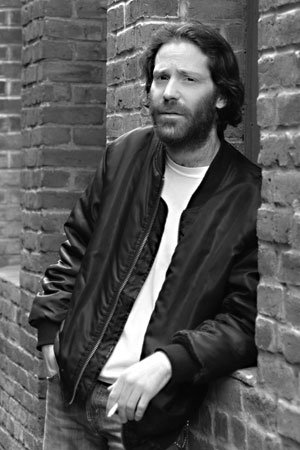
Lighting Your Subject
If in the studio, set your lights up before seating your subject. Make sure the main light can be moved around your sitter to create different modelling effects. The fill light is often behind the camera. At times I have gone without a fill light altogether.
If using a reflector instead, place it so the main light is bouncing off, filling in the shadows. Add a hair light and if possible, a backlight to separate the subject from the background. If you don’t have one, paint the background or use one with a lighter centre, giving the illusion of using a background light.
Take advantage of the fact that black and white can handle greater latitude than colour. Two stops between the highlights and shadow is common. For more drama, try more.

When working outside, the sun is typically your main light. Think about using the light reflected off light coloured buildings as your fill.
Fill flash or a reflector is so important if the sun is behind your subject. Heavy overcast days can benefit greatly from a silver reflector bouncing light up from underneath just out of the view from the camera. It the light is too bright, think about moving your subject into open shade.
If this isn’t possible for some reason, try blocking the light with a scrim. This will allow a soft filtered light to shine through.
Controlling the light can take a bit of practice, but after testing a few different methods, you will quickly learn the techniques that best suit your style.
Copyright © Monica von Stackelberg All rights reserved.
Copyright © Monica von Stackelberg All rights reserved.
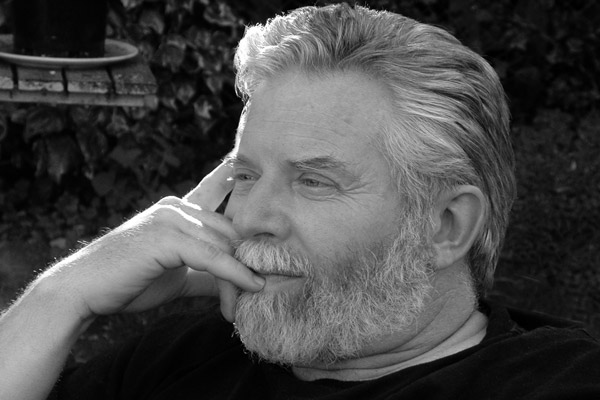
THE SESSION
We’ve all been told the eyes are the mirrors to the soul.
Don’t shy away from having your subject look directly into the lens. See if you can get them to smile with their eyes.
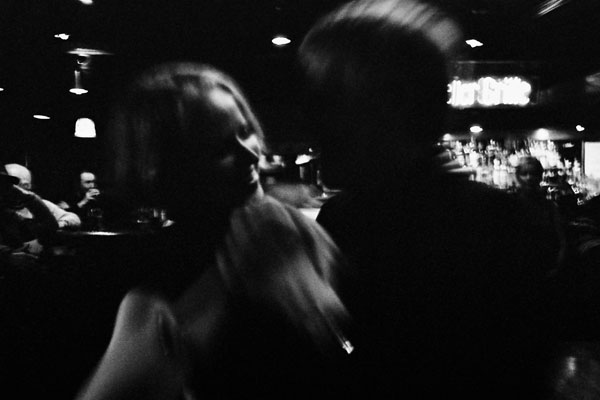
Looking for spontaneity?
Be conscious of the shots in-between your subject moving from one pose to another.
Try not to over pose or over direct.
Communicate with your subject, and allow his/her personality to shine through. I often carry on a conversation and add some direction during the sitting. This is often done not looking through the viewfinder, but with my finger always on the shutter or cable release.
Feeling stuck?
Take a break and rethink the session. Keeping an eye on your subject, watch how he/she relaxes, and recreate what is quite possibly the most natural position you’ve seen throughout the session.
Is he/she looking stiff or stilted?
Try asking your subject to turn away and then look at you. This should help loosen them up. Ask him/her to make small changes in head angle or expression. Guide by showing rather than touching if possible. Use your hands to show how you want them to change their head angle.
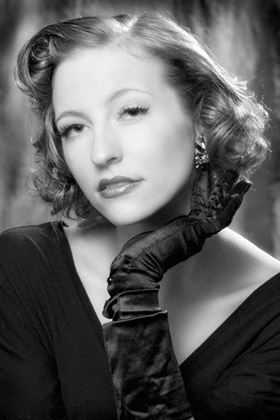
What do I do with my hands?
Always a favourite question that comes from the sitter? If the hands work for the shot, consider having them in thinking or pondering position. Stay away from the fist directly under the chin. Or, consider using just the hands to tell the story. Whatever you do, keep it real.

Copyright © Monica von Stackelberg All rights reserved.
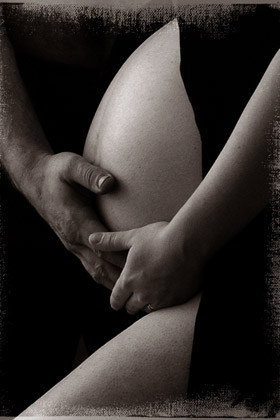
Consider a prop.
What does your subject do for a living or hobby? Play an instrument? Paint, sculpt or drive fast cars? Try adding something to which they are accustomed to help relax your subject. Being in front of the camera is a very uncomfortable place to be for many. It’s your job to change that.
Plan ahead and be particular.
The right music, clothing or lack of, or environment can make or break your shot.
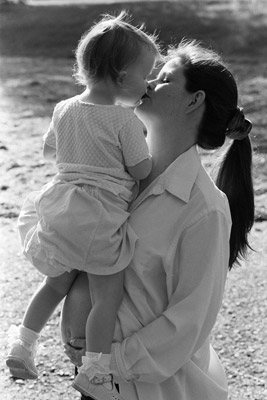
Expression sells.
Smiles are not always necessary. Oddly enough, a mother will choose an image of her crying baby over a sedate one simply because it captures a place in time.

Copyright © Monica von Stackelberg All rights reserved.
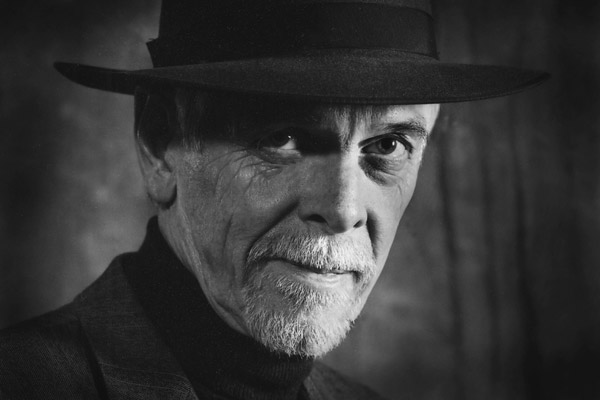
Seeing the light…
Pay attention to how the light falls on your sitter. If it’s not flattering, make a change. Whether you’re in the studio or on location, familiarize yourself with reflectors and flash, both off camera and on. The eye falls on the lightest part of the image first. Low-key portraits tend to be highly successful in black and white, keeping the face as the lightest part of the image.
Copyright © Monica von Stackelberg All rights reserved.
Let your camera become an extension of who you are.
Just as a painter uses brush, get to know your camera the same way.
Make every shot count.
Don’t just indiscriminately shoot away. Slow down as if you’re on your last frame.
Pay attention to the details.
Look through the viewfinder starting from the outside, all the way around, bringing your eye to the centre, making the necessary changes before pressing the shutter. Look for stray hairs, smudged makeup and anything that will be distracting in the final image.
Look for graphic design elements within the frame.
Use the background, foreground, clothing or body positions as design elements, bringing attention to the face, particularly the eyes.
More often than not, shoot from the shadow side.
Subtle back or rim lighting with a reflector or fill flash, slightly filling in the shadows is the main technique to get down. When shooting a model, slightly over-expose the face to give that smooth, flawless complexion.
Don’t worry if you are shy and not an overly charismatic person. It is possible to photograph a session without much verbal communication, however, you are the mirror and it really is important to let him/her know that they are accomplishing what the two of you have set out to do together.
The success of this is a wonderful bonding experience.
THE FINAL PRINT – Making Sure it “Says” what You had Intended


1.) If you still have a film camera, consider trying black and white negative. Although I have learned to embrace the digital age, I still like the latitude a properly exposed and developed negative has to offer. They can still be printed digitally–the best of both worlds.
Personally, I am at about half and half. If using my digital camera, I put the file through Photoshop and do my own corrections before sending it to the printer.
2.) If you don’t have the equipment or desire, consider having your images custom printed.
Most professional labs will include some dodging, burning and/or cropping according to your specifications. You’ll be glad you paid the few dollars extra for this service.
3.) Today, there are a number of different paper finishes and substrates available for your images.
The lab can guide you on which one will best suit a particular image and file size. Canvas prints are extremely popular and have become more cost effective than they once were.
4.) Find out where the final print will hang. The viewing distance is important when determining the final size. Also, make sure the print is large enough to show the fine details you saw through the lens, keeping in mind the limitations of the file size.
5.) Finish it off with the proper frame for the image. I am still fond of black metal frames with white or off white double mattes for most black and white portraits.
Copyright © Monica von Stackelberg All rights reserved.
The fine art of black and white portraiture is one which captures the essence of the subject. You’re going for emotional appeal here. Open yourself up to feeling what your subject is experiencing and when you get that “aha” feeling during the session, call it a day.
Have confidence in the fact that you can see the beauty in every subject and they are making themselves vulnerable to you. Give your sitter the best you have to offer, and above all, encourage them not only to be themselves, but help you in creating a piece of artwork they will cherish for generations to come.
Copyright © Monica von Stackelberg All rights reserved.

Copyright © Monica von Stackelberg All rights reserved.
by Monica von Stackelberg
Leave a Reply