
Looking at the glorious colors of Fall through your lens is a joy. Leaves are a fine subject for creative post-processing. Let’s check out seven quick Photoshop tips that work with your leaf pictures.
1. Sepia Tone
To add a color tone to a leaf image, open an RGB image. Click Image > Adjust > Hue Saturation (PC: Ctrl + U / Mac: Cmd + U).
In Photoshop’s Hue/Sat, just check the “Colorize” Box. Slide the Hue slider right or left to choose any color you want. Choose a saturation level. Click OK.
Brown tones work well, although you can try gold, red and any color you like. If you are working with RAW, use Adobe Camera Raw and open its HSL/Greyscale dialogue to check the “Convert to Greyscale” Box, or just de-saturate a color image.
2. Scanning
A. START–First, set your scanner for web or print. Use a low resolution setting on your scanner if you are in a hurry. Place a black sheet of paper over your leaf. Scan and Save. In Photoshop, select the black background (the paper area) with the magic wand. This is easy if the leaf has been scanned against a solid color sheet of paper.
B. With the selection active, feather the selection: Select > Modify > Feather (Shift +F6).
C. FINISH–Click the gradient tool, pick a yellow-red gradient, select the circular gradient type. Drag this gradient across your selected background area. Apply a Gaussian Blur. (Filter > Blur > Gaussian Blur).

Copyright © Jim Austin
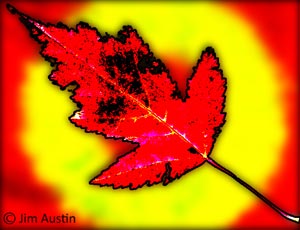
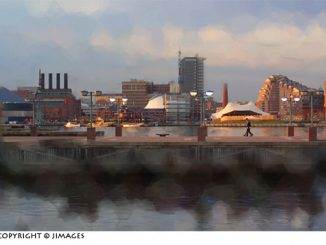
3. Contrast: Getting Reds to Pop Out
A. To put more contrast into a leaf, select it by clicking on a selection tool in the toolbox. The lasso tool was used to draw an outline around this red leaf, but the polygonal and magnetic lasso tools are also effective. Next, feather the selection with a radius of 2 or more ( Select > Modify > Feather Radius)
B. To boost contrast, use Levels or Curves on the selection. You can do this on an added layer. Because a selection was made, the area of the selection can be reversed to select everything else (Select > Inverse). I first selected the leaf and then inversed the selection to select the mossy rock and blue water, and applied a Lens Blur to them, to make the leaf stand out even more. I used a plug-in Filter called Mr. Contrast to increase contrast in the leaf above. This filter is from Flaming Pear software.
Copyright © Jim Austin
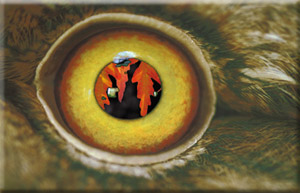
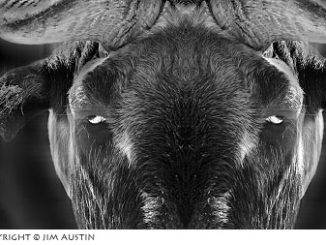
4. Layer Masking
This image has two layers. Just open your layers palette and drag in a second picture. A picture of red leaves was placed on the top layer, and then a mask was added to the layer to hide most of the red leaves. Reflections on the pupil were preserved. The eye itself is a macro shot of a captive owl in a zoo. The key to blending layers is keep the contrast consistent between layers, and to take time with your masking.

5. Add Text with the Type Tool
It is a simple step to add text or a poem to an image. I used a three-line haiku poem written by Issa, a Japanese poet. For a challenge, use Photoshop’s Type Mask tool to create a text outline. Clone part of the photograph into your type mask outline with the clone tool. Add noise, a drop shadow, and Gaussian Blur the text.
Copyright © Jim Austin
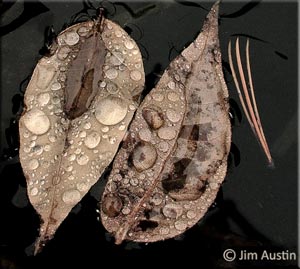
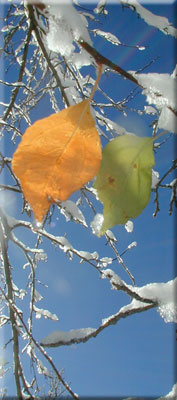
6. Spot Healing Tool to Get Rid of Blemishes
Click on the spot healing tool. It is right below the crop tool, and looks like a band-aid with a small white area near it. Choose a brush size between 15 -30 pixels and click and drag the healing tool around in a circular motion until the spots disappear, as I did to remove some white dry areas from this leaf.
Copyright © Jim Austin
7. Bookmark Your Leaves
Choose your favorite leaf image and print a bookmark from it. Click Page Setup > Paper Size. Try the template marked Borderless Panorama 10 x 30 cm. Print five copies, and give some to friends so they can enjoy your picture with their reading.
by Jim Austin, M.A., A.C.E.
Leave a Reply