
Learn some tips on getting great flower photos. One of the joys for me each year is anticipating gardens and landscapes full of beautiful flowers.
I’m lucky enough to live in a region where flowers bloom all year long. In the low desert areas of our Southwestern United States, colors won’t start to pop out until late February or early March.
In the high mountains, color finally comes out in late July or August. But wherever you live and whatever the timing, it is always a beautiful and welcome sight to see.
Frequently photographers can be overwhelmed by all of the dazzle and beauty. So let me share some tips on how I keep myself and my camera under control when I get really excited by all that I see. Rather than hop from one thing to another, I have developed a plan … an outline for shooting that seems to help me get the good shots.
I don’t always shoot them in this order but preplanning my shots by using this general outline makes it easier to explore all of the options.
First, I give into the impulse to take a number of grab shots. Yes I know that those are probably the shots that will hit the trash first, but I get greedy and rushed and want to just push ahead without giving careful thought to what I am doing. By giving myself permission to do this, it gets it out of the system and then I can settle down to the pleasure of capturing the “good” ones.
Find more great tips on improving your flower photography
Copyright © Noella Ballenger
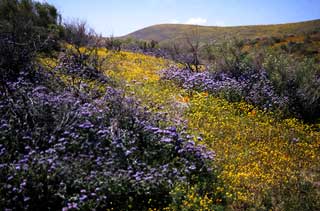
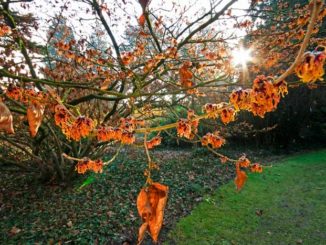
Hillside with an overall shot.
The Overall Shot:
This is the shot that most people never get beyond. It is an important shot because something in that shot catches your attention and makes you lift up your camera. You need to identify that “attention-grabber”. Is it the color? Is it the mountain behind the blooms? Is it the stream with the flowers tucked daintily along the edge? Identify what grabbed your attention in the overall shot.
There is another reason for taking an overall shot and that is to set up the scene if you are doing a presentation, book, article or a shot to bring back memories of what the area was like.

Copyright © Noella Ballenger
Sunflowers in a group shot.
Working the Group:
After doing the overall shot, I start to zero in on small groups or “mini-scenes” as well as clusters and families of flowers.
You might want to work groups of similar flowers such as a rose garden or perhaps you will find a solid bed of tulips growing in a field. A good way of getting a better perspective is to get down to the height of the flower. This makes a far more interesting shot than an overhead shot.
Also, dirt in an image isn’t exactly photogenic. By getting down to the height of the flower, you can eliminate the distraction of a patch of dirt in your image. Consider cutting out the sky on these shots to give them a more “concentrated” feeling.
I also include in this section a botanical shot (where you want to be able to identify the plant). In a botanical shot, you might include flower, bud, leaves, branches and size comparisons. That kind of information can be essential to plant identification.
Copyright © Noella Ballenger
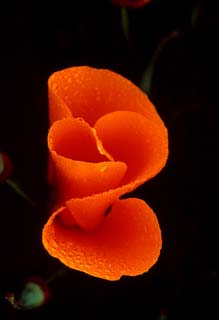
Close-up of California poppy.
The Individual Shot:
A single flower needs to be almost caressed by the camera. There should be an intimate connection between a single flower and the viewer when you isolate it from its companions. It needs to be given special attention. Does it have a fragrance? Does it have a special shape with contours (perhaps like an orchid or iris)? Is it straight forward and open like a sunflower or daisy?
There are some decisions that must be made as you begin working to make a special image. Are you going to blur the background so that the flower is isolated in its glory? How close are you going to get? Do you want the entire flower or just a part of it? What kind of lighting will show it off best? Are their water drops on the flower? Would it look better if there were?
When working an individual flower, I like to keep the design of the image as simple as possible. I consider taking the bird’s eye view of the flower or the worm’s eye view. I move around to get the best light. With some flowers, like our California Poppy, you can get an almost translucent color effect with the light shining through the petals.
Copyright © Noella Ballenger
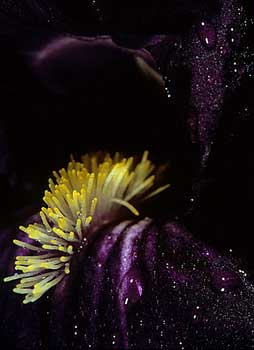
Pieces and parts of a black iris.
The Pieces and Parts:
Sometimes we want to get even more intimate in our presentation of the flower. Should we show our viewer the pistol and stamen? Are the “veins” in the flower petals or leaves interesting?
Doing pieces and parts may call for some special equipment like a macro lens, a tube, a tele-converter or a close-up diopter. These are all special pieces of equipment that will allow you to get closer and photograph a more magnified view.
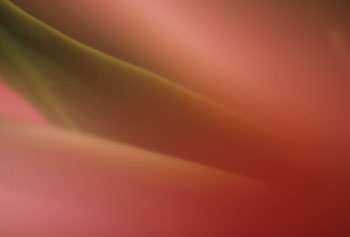
Break the “Rules” – go for the wild and crazy shots:
There are some flower images that you can’t explain the reason for taking them except that perhaps you were out in the sunshine just a tad too long. They are wild and crazy and great fun to do. These are the ones that use special techniques and/or some special equipment. You are only limited by your imagination and daring in trying things.
Here are a few of ideas for you to try if you get into that “wild and crazy mood.”
1. Stacking equipment: Although it is advised against in most “proper” photographic circles and by equipment manufacturers, I love to stack some of my equipment together. I take my basic 300 mm lens; add a 1.4 or 2x tele-converter, then perhaps a tube, and maybe a diopter on the end of the lens.
That gives me a really long, long lens stack that has little or no depth of field, that needs very bright sunlight to even record an image and that will give you no end of trouble holding. I jack up the ISO and go for it. Blurs, wiggles and vignettes around the corners don’t seem to matter to me. Somehow it is just fun to try. I never know exactly what I am going to get. Happy accidents!!!
Copyright © Noella Ballenger
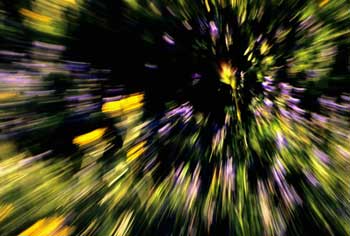
Stacking Equipment
2. Zooming: Use a very slow shutter speed and zoom the lens while you are shooting. The flower can explode with streaks and color.
3. Let the wind blow: Again, slow the shutter speed way down and take advantage of the wind. Let the flowers or the tall grasses dance in the wind.
No matter how you photograph the flowers, enjoy your garden photography and go out and enjoy spring and summer as the garden awakens from winter and decorates the land with its beauty.
For more information on the techniques and equipment I used, check out some of these articles I wrote for Apogeephoto.com:
Also gad
by Noella Ballenger
Leave a Reply