
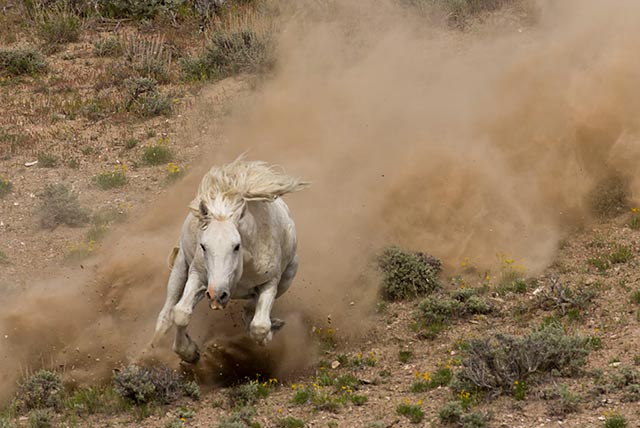
Wild Horse, Sand Wash Basin, Colorado
There is a saying, “When I was a child, I thought and acted as a child.” The same can be translated of photographers. “When I was a young photographer I made simple images, but once older and wiser, I act and create as a more mature photographer.”
Not only does our ability to ‘see’ develop, but our skill levels rise, our ideas grow and our techniques improve. And who would have thought 10 years ago photography would have progressed to the point where there is such a variety of camera bodies and software programs that enable us to create such incredible images.
Don’t misunderstand. It’s still about what’s behind the camera that makes the biggest impact on whether or not one produces great photographs, but with all the technological advances available, it’s to our advantage to stay on top of everything in order to continue to grow photographically.
You can’t depend on your eyes when you imagination is out of focus. – Mark Twain
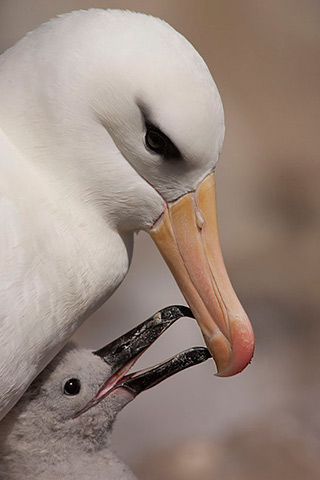
Black-browed Albatross

Depth of field focus stacking utilized.
So what pushes us to advance forward? Better and better camera equipment and software capabilities, seeing work from other photographers, and trying new techniques beyond what was possible previously all drive us towards creating better images.
Think. What are some things that have pushed your skills up several notches?
Broken down into three categories, this is an easy one for me.
EQUIPMENT
I happen to work with Canon gear, so the Canon 5D Mark III body has pushed my techniques to a whole new level. In the early days of digital cameras it was all about the megapixels. Now, much of the battle has turned to high ISO.
For instance: Just a couple of years ago photographing the northern lights meant setting the ISO at 640 or 800 with shutter speeds of 12 to 20 seconds. Now, photo are made at 2500 ISO with shutter speeds as low as 2 or 3 seconds. Who would have thought! With faster shutter speeds there is now more distinction in the shapes, making it easy to see the definition of the rays and curtains. With the higher ISO, it also picks up more colors not previously picked up by the camera.
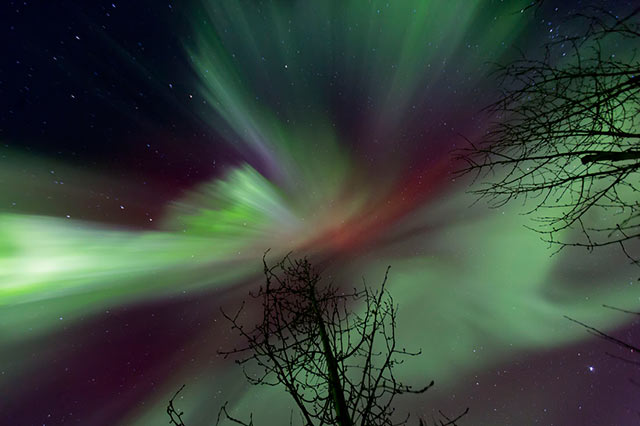
Aurora Borealis
The higher, less noisy ISOs also can be used with wildlife photography, allowing much faster shutter speeds to freeze action and capture more detail. My previous preference for wildlife shutter speed was around 1/1000th of a second, but now it’s around 1/2000th.
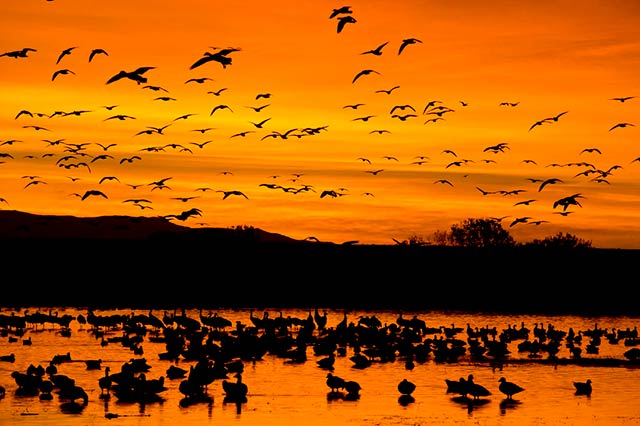
Geese at Sunrise, Bosque del Apache National Wildlife Refuge, New Mexico
One addition to this camera and other bodies today is the return of multiple exposures. Yes, it could be done with merging images in post-processing, but now the camera can do everything from calculating the proper exposure to creating a separate image with the exposures merged together. The same is true with in-camera HDR.
Add to these features larger sensors, higher frame rates (frames per second), faster autofocus, increased memory card capacity, and more and you can see how the advanced cameras have helped to expand your photographic visions.
SOFTWARE
Advancements to Adobe Camera Raw and Lightroom to allow for non-destructive work on Raw files have taken post-processing to another level. But, the advent of specialty programs has taken off the last few years. Programs like Photomatix for High Dynamic Range, stacked star trails with StarStaX, focus stacking with Zerene Stacker and Helicon Focus, and stitching panoramas with Panorama Factory have made for some interesting times in the field.
Eliminating Haze in Post-processing
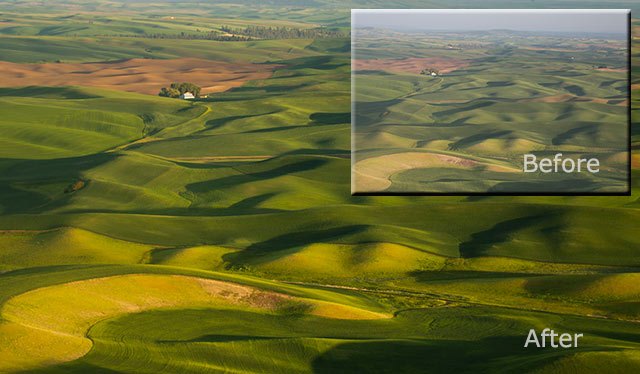
Rolling Hills of Palouse, Washington
While it’s best to get the photo right in the field, sometimes conditions don’t allow for this, such as when there’s a hazy sky. A polarizing filter takes care of this to a degree but doesn’t always eliminate it entirely, especially when not photographing at a 90-degree angle from the sun where this filter is most effective. A few tweaks in Camera Raw (also Lightroom) with the Contrast and Blacks sliders can eliminate the haze.
Stacking for Star Trails
StarStax is a program that has taken star trails photography to a new level. During film days a single, long exposure would produce lots of star colors and a crisp sky. In the early days of digital, a long exposure would take away all of these colors. With StarStaX the colors reappear.
If a plane went through the image back in the days of film, it was there for all to see. Now with stacking multiple images for a single image the individual files can be cleaned and the streak taken out before combining the images for the final shot.
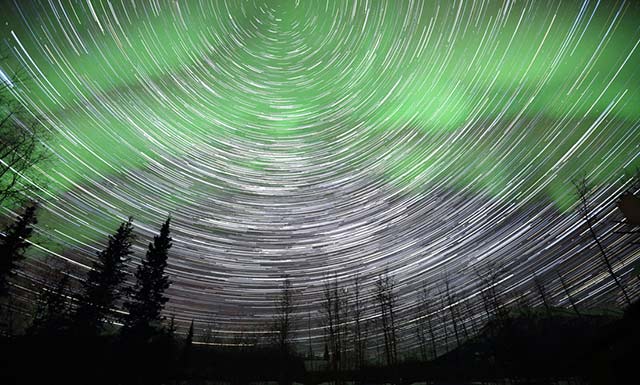
Stacking the Stars with the Aurora Borealis
Another asset is just a portion of a full duration can be taken out and an image can be created. After a night of photographing northern lights in a remote location, cameras have been set up outside for a star trails stack. When images are looked at later it can be a pleasant surprise if the lights have returned. What could have been a lost photograph with a single image can be broken into shorter images with trails and the aurora or even a single shot with the aurora and Milky Way if a high enough ISO (3000 to 4500) was used.
To learn more visit:
Star Light, Star Bright… Photo Techniques and
Photographing the Aurora Borealis: Tips on Capturing Nature’s Light Show
Panoramas
Panorama stitching is something many landscape photographers are doing these days. Before a specialty program like Panorama Factory came out, a lot of manual work in Photoshop had to be done to put an image together. The automation in Panorama Factory takes all of that work away as long as the proper settings were used.

A FEW TIPS:
1. The basics for a good landscape panorama do NOT include utilizing a polarizing filter to pop the color of the sky. The reason is the total field of view will include areas outside of its optimum scope and make for uneven sky tones in the final image.
2. Take manual readings of each section of the scene to be photographed and pick a single exposure.
3. When making the images, make sure to have at least a 25% overlap so the program can easily line up the images.
4. It is best to make the photos using a well-leveled tripod so there is no variance to the top and bottom of the images.
5. Make the photos in vertical format so more data can be included in the final product.
INSPIRATION
The proliferation of the many websites available for viewing great images can inspire everyone to want to make better images, and being able to read about the camera settings and techniques used to create those images makes it easier for you to improve your skills.
Free online magazines such as Apogee Photo get the readers engaged in the world of photography by providing lots and lots of articles and photos that demonstrate, educate and inform you on many of the techniques used in just about every aspect of photography. They will get you excited about creating your own images.

Reddish Egret
There are plenty of image showcase websites where people post images and comments for all to see. Wherever photos are posted, look at the comments from a constructive point of view and think about what was said to help improve the photo. It always feels nice when there are a lot of likes and good things said, but take advantage of critical comments to look for ways to improve your own images.
Also look at the websites for major photo competitions. Typically they will post the winners and these are winning images for a reason. Looking at the composition and technical aspects can drive you to go to a new location, motivate you to try new techniques or push you beyond the limits of where you are.
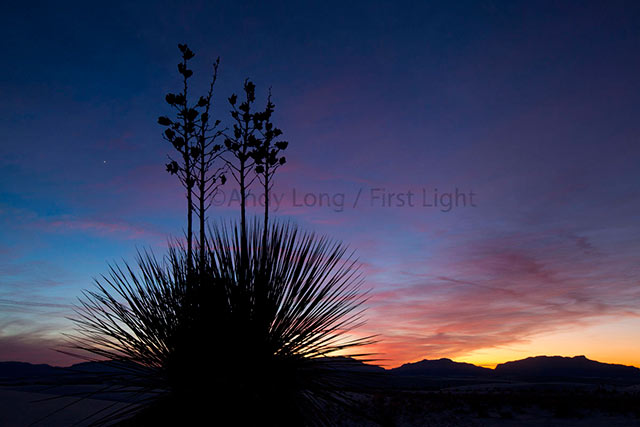
White Sands National Monument, New Mexico
No matter what the impetus, take the next step and grow from where you were. Even if it’s a small step ahead of last year you’ll be a step ahead instead of two steps behind.
by Andy Long
First Light Photo Workshops
All text & photos: © 2014 Andy Long. All rights reserved.
Leave a Reply