
Through my experience teaching beginning photography classes, I have found that taking blurry photos is the most common obstacle that students need to overcome.
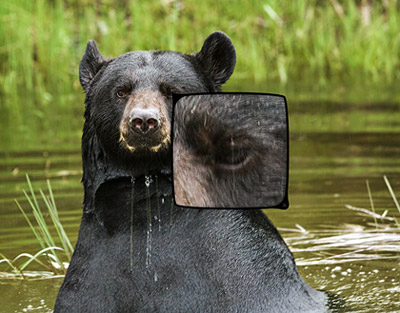
The term tack sharp is used in photography to represent the absolute best clarity of detail in an image…in other words, sharp photos. Sharpness is affected by two elements: focus and contrast.
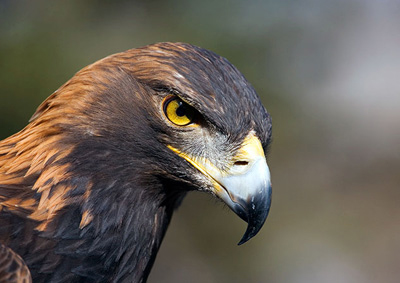
When you have an image with crisp focus and well attained contrast, and no visible blur when looking at it at pixel level, it is considered to be “tack sharp”.
If you are thinking you can correct the clarity of your images by using the Photoshop ‘sharpening and contrast’ tools to enhance your images, you may want to rethink that approach.
If you don’t have a “tack sharp” image while photographing in the field, no amount of post production work is going to produce quality contrast, make a blurry image sharp or create fine detail where there is none.
Therefore, it is important to know how to capture “tack sharp” images straight from the source—your camera.
SHUTTER SPEED
Typically blurry photos are due to one of the following….
camera shake while hand holding the camera – shooting with a slow shutter speed – and/or not using a fast enough shutter speed when the subject is moving.
Understanding how to correct these issues is vital to creating “tack sharp” images.
So let’s start with shutter speed. What shutter speed should you use? That will depend on what you are shooting–if your subject is moving or still and what type of affect you are trying to achieve (show the motion or stop the motion).
Examples of shutter speeds:
Stop race cars or pro-athletes 1/2000 – 1/4000 sec.
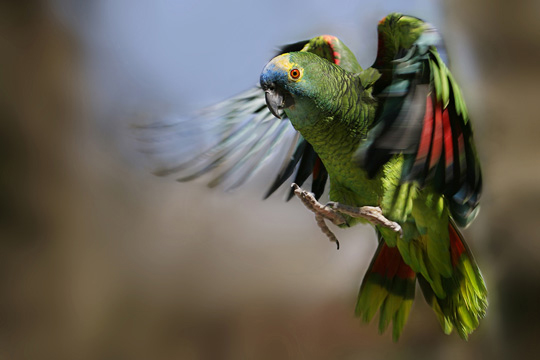
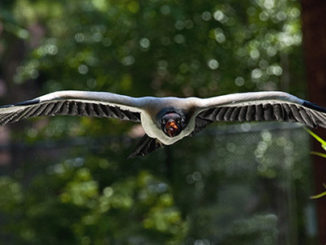
Stop a bird in flight 1/1000 – 1/2000 sec.
Stop action at gymnastic meet 1/800 – 1/1500 sec.
Still life or portraits 1/125 – 1/250 sec.
Landscapes 1/20 – 1/100 sec.
Waterfall on a cloudy day – velvet smooth water 1/2 – 1/30 sec.
City lights at night 8 – 30 sec.
Low light indoors with no flash & no movement 5 – 30 sec.
Remember, the closer you are to a moving object, the faster that object will be relative to you and the camera, which means you will have to use a faster shutter speed in order to stop the action.
So if you are sitting in the first row at a race and are right next to the track, your shutter speed will have to be faster in order to stop a race car, runner, or horse, than if you are sitting in the top row, far away from the track.
HAND HELD EFFECT ON OBTAINING TACK SHARP
The Reciprocal Rule–perhaps the most used “rule of thumb” in photography. It is used to determine the slowest shutter speed you can safely use while hand holding your camera and still prevent camera shake. It states that when hand holding your camera, the shutter speed should not be slower than the reciprocal of the effective focal length of the lens you are using.
So, if you have a 55 mm lens, then the reciprocal of that would be 1/55, which means that the slowest shutter speed you should use would be 1/55 seconds.
Examples:
200mm lens: Shutter Speed (SS) > = 1/200 sec.
100mm lens: SS > = 1/100 sec.
70mm lens: SS > = 1/70 sec.
Much has been written regarding the reciprocal rule, some positive, and some negative, but if you use it as a guideline only, a starting point from which to base your shutter speed decisions, then this rule should serve you well.
Be sure to factor in the following questions when making your choices:
1. How steady are your hands?
2. What method do you use to hold the camera steady?
3. Do you have vibration reduction or image stabilization on your camera or lens?
4. Are you using a full frame sensor or a cropped sensor?
5. Is your subject moving or holding still?

I personally like to change the rule a bit to ensure really sharp images. I like to add 1/2 to 1 stop faster to the reciprocal rule for my hand held shots, since my hands are not as steady as some.
If there is not enough light and the aperture is close to being wide open, then I have to choose between opening the aperture wider or slowing the shutter speed. I will usually open the aperture all the way before slowing the shutter speed.
Effective Focal Length
The focal length of a lens is based on the size of 35mm film. If the digital sensor in your camera is full frame (the same size as 35mm frame) then the “effective focal length” is the same as the markings on the lens.
However, if you have an entry-level DLSR you will have a smaller sensor. If this is the case, you will have to do some math in order to calculate the “effective focal length”. Consumer grade Nikon cameras usually have a 1.5 crop factor, while Canon’s have a 1.6 crop factor.
Check your camera’s manual to see if your camera has a crop factor. If you have a crop factor, you need to multiply the reciprocal of your focal length by the crop factor in order to get your minimum shutter speed.
Examples:
Nikon 200mm lens: (200 x 1.5) SS > = 1/300 sec.
Canon 200mm lens: (200 x 1.6) SS > = 1/320 sec.
Nikon 100mm lens: (100 x 1.5) SS > = 1/150 sec.
Canon 100mm lens: (100 x 1.6) SS > = 1/160 sec.
Multiple Bursts
Another way to increase your chances of getting “tack sharp” images while hand-holding your camera is to use the continuous shooting mode on your camera to take several shots in rapid succession. This will increase your chances of having a least one sharp photos shot – one that you could call “tack sharp”.
IMAGE STABILIZER (IS):
Using Image Stabilization allows you to use a slower shutter speed. Some lens manufactures, and or lens review sites, say you can shoot at speeds 2-4 stops down from the hand held rule of thumb, depending on the lens.
That means that if you shoot down 4 stops (16 times longer), you would get similar levels of sharpness with IS on at 1/8 sec. as you would at 1/125 sec. with IS off. Personally I don’t like to stop down more than 3 stops or to go below 1/60 sec.
Examples: With IS/VR
Full frame & 200mm lens: SS >= 1/200 sec. 1/100 – 1/60 sec.
Nikon 200mm lens: SS >= 1/300 sec. 1/150 – 1/75 sec.
Canon 200mm lens: SS >= 1/320 sec. 1/160 – 1/80 sec.
TRIPODS FOR SHARP PHOTOS
Be careful when purchasing a tripod. Not all tripods are created equal. You want to make sure that the tripod you use can support your camera with your largest lens attached.
A gust of wind will easily knock over a camera on a tripod if it’s not sturdy enough to hold the weight and even a mild breeze can cause camera shake if your camera is mounted on a flimsy tripod. The better your tripod is, the less movement you camera will encounter, and the sharper your images will be.
Note: A sturdy tripod can be made sturdier by attaching your camera bag or other heavy articles at the base of the tripod.

Most tripods will give you a weight limit which you can compare to the weight of your camera with the largest lens you have or expect to have.
You should also take into consideration that the closer your camera, with its heaviest lens, comes to the maximum weight limit, the more likely it is to shake, wind or no wind. A good rule of thumb is to use a tripod which has a maximum weight rated 25% above the weight of your camera and largest lens.
When using a tripod with an image stabilized lens or camera, be sure that you read the manual for your lens. Some IS (image stabilizer)/VR (vibration reduction) lenses recommend that you turn off the IS when mounted on a tripod.
When an IS/VR lens is mounted on a tripod, and there is no movement, the system tries to find some movement, which causes the IS/VR system to produce erratic effects and movement. However, few tripods are able to keep a camera and lens absolutely motionless, especially with larger lenses.
And newer IS/VR lenses can detect if they are on a tripod, so you can leave the IS/VR on, even while on a tripod. If you are not sure about the IS/VR on your lens, check the lens manual.


Remote Shutter Release or Self-Timer:
While a tripod will drastically reduce camera shake and allow you to take long exposures, the movement from pressing the shutter release will make the camera shake enough to prevent you from getting “tack sharp” images when using slow shutter speeds.
In order to minimize camera shake and get the most out of using a tripod, use a remote shutter release or self-timer so that you don’t have to touch the camera to get sharp photos.
There are two types of remote shutter releases–a cable release and a wireless release. If you don’t have a remote shutter release, you can use the self-timer function to release the shutter without touching it.
Now it’s time to go out and practice what you’ve learned. Try taking shots with the various shutter speeds and focal lengths—try the multiple bursts.
Then take some shots using your tripod—if you don’t have one, find something sturdy that can support your camera and try shots with and without the remote shutter release or self-timer. The more you practice, the better you’ll understand and the better “tack sharp” images you’ll get.
Most of all have fun.
my further articles on tack sharp
How to get tack sharp images Part III
How to Get Tack Sharp Images – The Use of Photo Stacking
Photos by Brad Sharp
Copyrights on Text and Photos:: © 2015 Marla Meier, Apogee Photo Magazine, LLC. All rights reserved.


Leave a Reply