
I doubt there is anyone who has not encountered an ant.
It seems they could move the world! And they can in their own miniature world.
They can move objects 50 times larger than their body weight.
I have been fascinated with ants for many years and with it now being a digital world, I can just keep taking image after image, after image, without any concerns of what it might cost to process the images.
An insect the size of 5 mm and moving very fast is a challenge for every photographer who likes to explore their limits of photography, but I am determined to catch them during their busy daily activities.
I’ve chosen the Wood Ant for my photographic research.
There are a few things you have to know before you start to take photos of Wood Ants, or any other ant for that matter. You’ll want to know where to find them, their social habits (colony behavior), when they are most active, and what they like to eat. If you come across a foraging trail (trail of ants going to and from a food source), then you can follow it to the nest. I would suggest not exploring the Fire Ant or ants that are known to bite! So research your chosen species before you head out the door.
Equipment: Macro Lens, Bellow, Flash Guns and Exposure Meter
Macro Lens & Bellow
To get up close and personal with these ants, a macro lens will not be enough. You also need a bellow, and Novoflex has a great universal bellow for every type of camera.
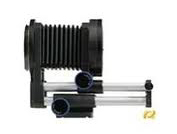
Novoflex AF Bellow
There are no optical glasses within the bellow – it’s empty. They have an adjustable accordion-like body which allows you a great amount of control for precise focusing. The only thing this tool is doing is increasing the distance between the camera’s sensor and the macro lens, allowing you to get closer to your subject. The result is an increase in the ratio, so the subject getting projected on the CCD sensor of your camera is larger.
In order to accomplish this, you will need a macro lens with the shortest focusing distance of 30 cm (approximately 12 inches from the camera’s sensor plane to the subject plane). This means a macro lens of 90 mm will be your best option. You can also use a 50 mm macro lens, but you may find that this actually gets you physically too close to the subject. The bellow can increase the distance between camera and lens for maximum of 10 cm (approximately 4 inches). So with the 90 mm lens your shortest focusing distance will be 20 cm, or nearly 8 inches.
In other words, with the combination of a macro lens and a bellow, the distance from subject to lens is now approximately 4 inches. This amount of space is just enough to still have natural light on the ants, while leaving enough space to fill in the light with two flash guns – one on each side of the macro lens.
Flash Guns
In order to get enough light on your subject and be able to adjust the amount, direction and angle of the light, duo flashguns are necessary tools.
Exposure Meter
Since this process of getting your flash guns set to the correct levels can be a slow process, you’ll save yourself some time if you include an exposure meter, such as a Sekonic L-608, along with the flash light meter. This is an expensive tool, but it is worth every penny. It is much better than the build in meter within your camera.
The exposure meter measures the light which falls on the subject and your camera measure the reflected light from the subject to your camera. That means the exposure meter doesn’t measure all the light, so the exposure time is not 100 % correct. I would strongly suggest making several test photos prior to photographing your subject.
Note on Tripod Use: Because the ants are moving quickly, you are going to have to follow them and react quickly in order to capture the moment, so a tripod will not be useful.
Photographing Wood Ants
Finding the Nest
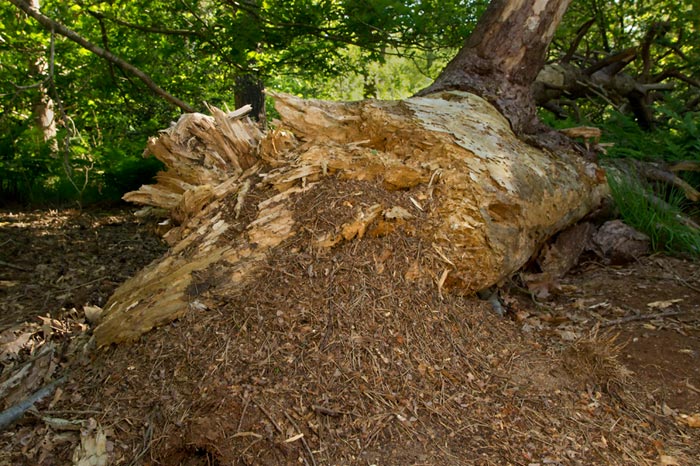
I found a large and very active nest at the base of a dead tree in the De Moeren Nature Reserve near my home. These ants, also known as Carpenter Ants, favor areas with downed, rotting trees – trunks and roots. You will typically find Wood Ants at the edge of a forest near an open field of vegetation.
Ecologically, the Wood Ant plays a very important role in keeping our forests neat and clean. For example, they work tirelessly at cleaning up other dead insects. When you get close and examine their nests, you’ll see a flurry of activity and the amazing results of all of their efforts.
Check out the nest closely for its various openings. There will be multiple entrances with Wood Ants, which helps assure a successful and safe environment.
You’ll be surprised and fascinated when you check them out via you macro lens, because you’re going to see all of the details – the colors and various body parts.
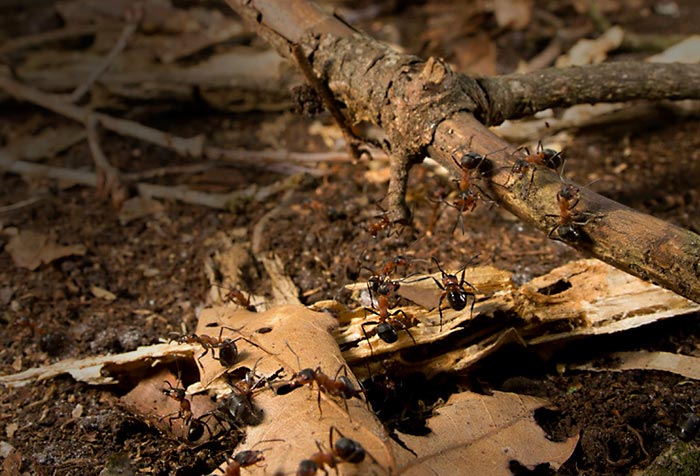
A wide angle lens and a wireless flashgun were used to create the above photo. With the camera on the ground, I used Live View and flipped the LCD screen of the camera 90 degrees so I was able to view the composition before pressing the shutter release.
Since there is no magic formula, you’ll need to experiment with your flashgun when you are mixing it with the natural light of the day. Use your own creativity and make your vision your own. This is the process that makes photography such a fun!
Set the sharpness of the image with manual focusing, because the autofocus of your camera will not be able to keep up with these small, fast moving ants.
And don’t forget to pay attention to the background while you are searching to get the ants in a good composition. It’s easy to get caught up in their action and forgot about the importance of the backdrop, thus rendering your image less interesting.
Behavior
Spend some time going back to the same nest so you watch their social interactions. They are an extremely organized society that’s called a colony. Within the colony is the queen, who lays eggs and commands the colony, the males, whose job is to mate with the queen, and the workers. Each worker ant has a specific job to do within the colony, from foraging for food, to protecting the nest and caring for the queen and larvae.
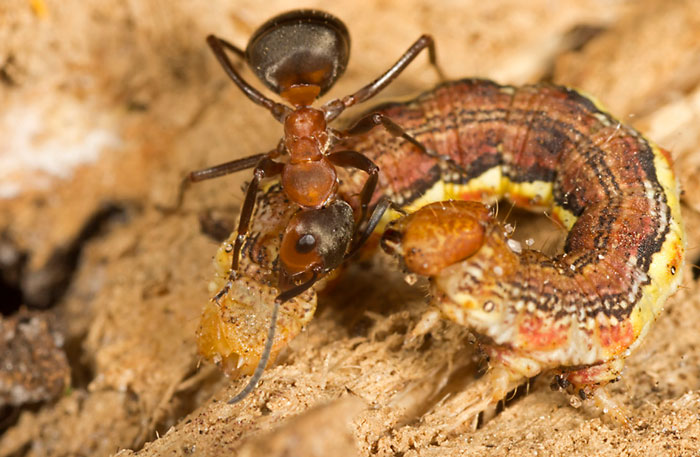
After visiting the nest for a few days I was lucky to observe and make images of a fight between an ant and a caterpillar (lead photo above). The caterpillar is trying to fight back, but this time around, the ant was stronger and won the battle.
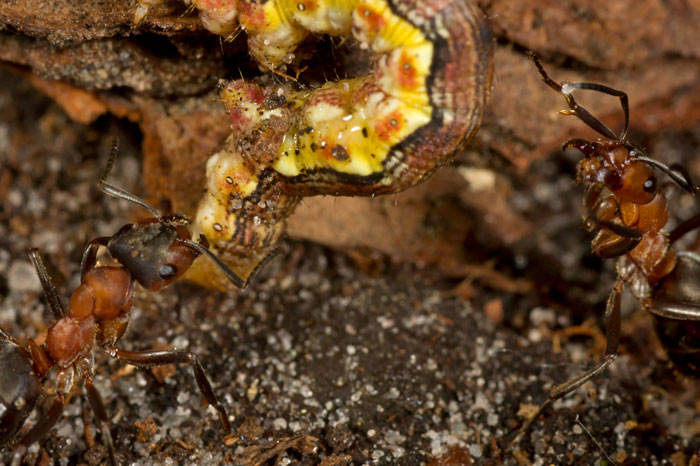
Patience is a key element when creating your compositions. Because the camera is so close to the ground, watch through Live View, wait, and then determine the best times to press the shutter release button. Many people prefer the Burst Mode at moving subjects, but when photographing ants, it better to watch them closely and press the exposure button at the right moment. It’s all about observation and knowledge of your subject that will give you a successful image.
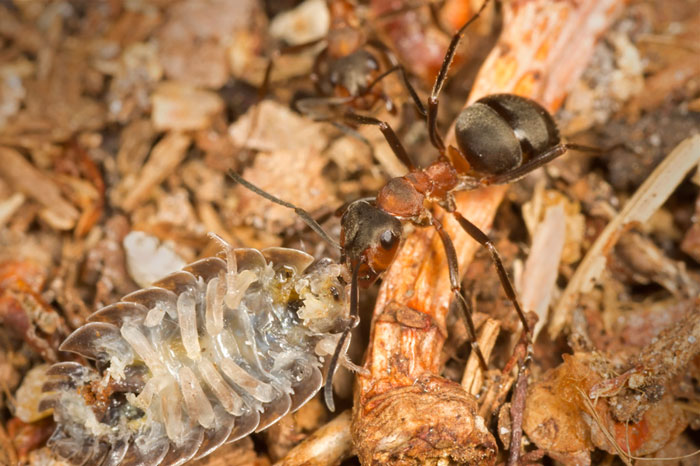
While photographing the battle above, I spotted an ant in the process of moving a dead woodlouse. You’ll learn to work quickly to move your camera equipment and get set for making the next image. I wanted to get as close as possible, but time here was of the essence, because this worker ant was in a hurry to bring its victim to the nest.
Flash Techniques
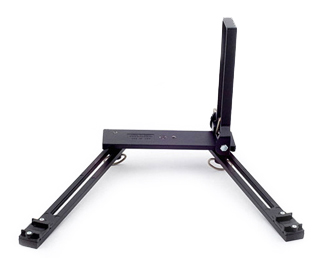
Novoflex Flash-bracket
You will need two external flash guns or a ring-flash. Personally, I prefer two external flash guns with the addition of the Novoflex Flash-bracket.
With my hands are on the camera, I only have to follow the movement and behavior of the ants.
Before creating photos of the ants you’ll need to set the external flash guns to the correct levels. This is the time to utilize your exposure meter if you have on. First, make some test photos of some leaves or other objects on the ground and adjust the levels of the flash guns at difference settings. When you have achieved a good combination of light, you’re ready to make images of the ants.
On another return visit, I saw two ants with what looked like dry fungi. I was fascinated by how they worked together so efficiently to bring it to the nest. In order to get the correct exposure for the chosen shutter speed, I prepared for capturing the images by using the exposure testing procedure above and then proceeded to work on my composition. I purposely chose to only show a portion of one ant, so the other ant would portray more power and movement.

Pay close attention to the composition during the image making process. Because ants are so small and you’re focused on stopping their actions, you may have a tendency to forget to look at the composition.
On the photo below I selected the ants on the twig and focused on the one with its mouth open. I found humor in how they were lined up to pose for the image and yet, it was as if the one was warning me, “Look out you! Don’t get closer!”
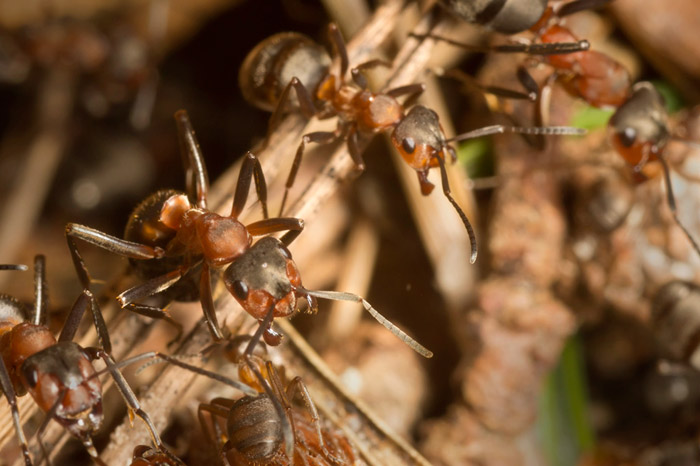
Wood Ants
Sony Alpha 33 +bellow + 90 /2.8 Macro + Flash, F/18 @ 1/160
Summary – Some Practical Tips
1. Study your ant subjects.
2. Visit an ant nest site on several occasions.
3. Suggested equipment – use a macro lens, bellow, 2 or more flash guns, and an exposure meter.
4. Run a series of test images to check for proper exposure prior to photographing the subject.
5. Use Live View to get close to the ground.
6. Look for the action.
7. Check your background before making the image.
8. Work to make interesting compositions
Now it’s your turn to go out and make your own images of these busy little insects. Have a fun adventure.
by Edwin Brosens
All text and photos: © 2012 Edwin Brosens. All rights reserved.
Thank you so much! Now I know what to buy!