
In a previous article you learned that mastering the basics of your digital camera isn’t really as difficult as it seems – even for those of you who’re confronting the complexities of a camera for the first time.
NOTE: If you haven’t read the first article and tried the exercises detailed, please go back and begin at the beginning. Why? You’ll find that by going step by step, in order, you’ll learn more rapidly.
Now that you’ve conquered the basics of ISO, shutter speed, aperture (f-stops), and focus control, we’re ready to expand your understanding of those basic controls. We’ll focus on aperture and add a few variations on what you already know and suggest some exercises for you to try.
Let’s explore the aperture control a little further (applies to both digital or film cameras).
To recap, exposure is made when a certain amount of light hits the camera’s sensor. To manage the amount of light entering the camera through the lens, there are two controls: the shutter speed and the aperture. The shutter controls the amount of light by regulating the amount of time the shutter stays open, while the aperture controls the size of the hole in the lens.
To understand how shutter speed and aperture correlate to make an image with proper exposure, you need to understand how to counterbalance the shutter speed and the aperture. Think of the two of them as ends of a teeter-totter.
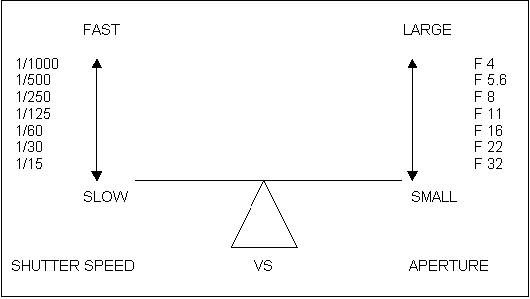
This is how the shutter and the aperture work together to achieve correct exposure. However, the aperture does much more. It’s one of your most important creative controls and the reason that many photographers create images on the Aperture Priority setting.
Aperture (f-stop) and Focal Length
So we know the aperture controls the size of the hole in the lens. If the hole is big, lots of light comes through. If the hole is small, then very little light is allowed to enter. To relate this more specifically, think about how your eye works. When there is bright, bright light, the pupil contracts to allow only a set amount of light into the eye. When it is very, very dark, the pupil expands to allow more light in. The aperture works in a similar fashion.
But what is f-stop and from where are the numbers derived?
In the very simplest of terms, the aperture setting is typically adjusted in steps that are called f-stops and each of these stops is labeled with a corresponding f-number. The f-stop is actually a ratio between the diameter of the aperture inside the lens and the focal length of the lens. It is the area and diameter of a lens that determines its ability to gather light and you’ll see the progression of f-stops (depending on the lens) as 1 – 1.4 – 2 – 2.8 – 4 – 5.6 – 8 – 11 – 16 – 22, etc.
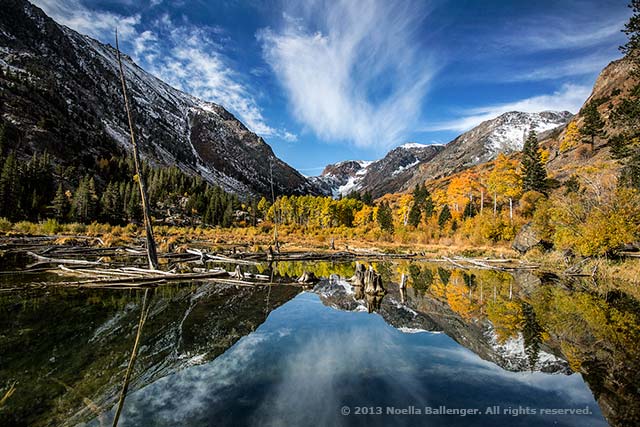
Beaver Pond, Lundy Canyon, California
f/4.0, 1/250 sec, ISO 500, 17-40mm @ 17mm
Lenses
To understand how the aperture works as a creative control, you need to understand more about focus and how your lens affects your final image. Let’s talk about lenses first. Lenses come in a variety of focal lengths. We talk about and can purchase fixed-focal length lenses such as wide-angle lenses, normal lenses, telephoto lenses or zoom lenses that can encompass a range of these options.
So what does focal length mean?
Again, in the simplest of terms, it is the distance from the lens to the sensor inside the camera, when the lens is focused on infinity (a calculation of an optical distance) and is typically represented in millimeters (mm). It determines the angle of view and how big objects will be within a scene (magnification).
A 50mm lens has always been considered to be a “normal lens,” because most people believe that’s about the same range your eye sees. (Actually, a 35mm lens is probably closer to real eye-view than a 50mm is). A wide-angle lens would be considered to be one in the 20-35mm range and typically used for architecture and landscapes, and a “short telephoto,” one in the 80-200mm range is great for creating street and portrait photography. Long telephotos are ones whose range is 200mm and longer (300-600mm range) and are ideal for making sports, birds and wildlife images.
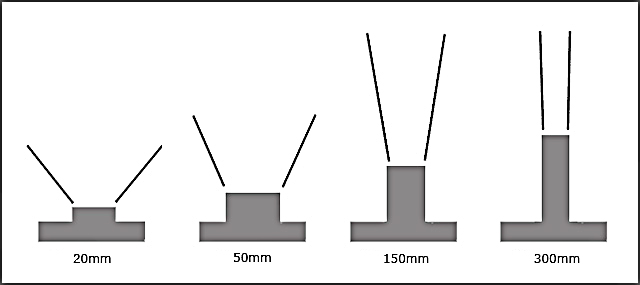
A 20mm lens has a short focal length, wide angle of view and lower magnification, while a 300mm has a long focal length, narrow angle of view and higher magnification
Each of these lenses has different characteristics and its focal length will determine its angle of view. A wide angle lens has just what it says – a wide angle of view and they have a short focal length and low magnification. This means that you can make an image of an entire mountain vista.
At the opposite end of the spectrum, a long telephoto has a very narrow range of view with longer corresponding focal lengths. It will bring distant objects closer – higher magnification. In other words, you won’t see the vista, but you may see one pine tree on the mountain. The tree will appear greatly enlarged and fill the entire frame.
Another point to consider about various lenses is the compression factor from front to back. This means that with a wide-angle lens, the distance between the fence, barn, and mountain will be elongated (i.e., look further apart). With the telephoto, they’ll be compressed (i.e., the fence, barn and mountain will look very close together).
When you make a creative decision about how you want to focus your camera, keep in mind that you can choose to focus the camera in the foreground, the middle ground, or the background. If you’re using a wide-angle lens, you probably won’t notice too much difference, but if you’re using a telephoto lens, you’ll see lots of differences. You’ll immediately see why it’s important for you to understand the mechanics of how tools like lenses work. They can make a major difference in your creative control of your image.
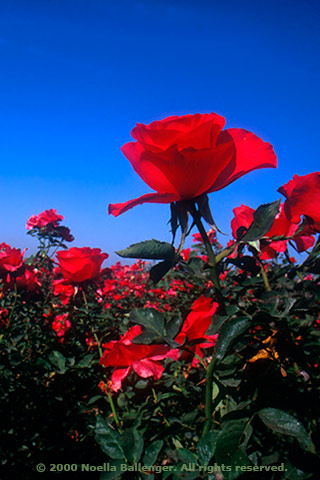
Commercial Rose Field, Central California f/16, 1/100 sec, ISO 100, 20mm
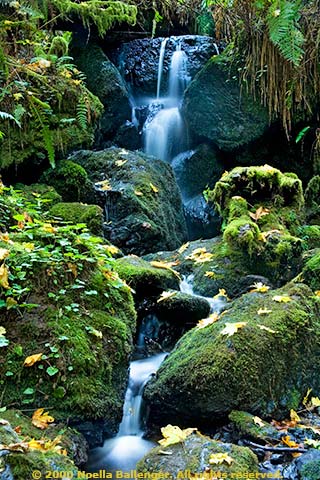
Fern Creek, Northern California Coast
f/20.0, 1/25 sec, ISO 200,
28-200mm @50mm
Depth of Field
Another creative tool at your disposal is depth of field. Depth of field is the distance that will be sharp from foreground to background in your photograph. Your aperture setting controls depth of field. Remember, the larger the opening or aperture, the less depth of field your picture will have; and the smaller the opening or aperture, the greater the depth of field.
In the first article of this series, you made a number of photographs using the variety of aperture settings on your camera, keeping the focus in the same spot each time. You should have discovered that the aperture setting made a difference in the amount of foreground, background, and middle ground that was in focus. If you think of that in-focus area as a band of focus that has various widths or depths (front to back), then you understand depth of field.
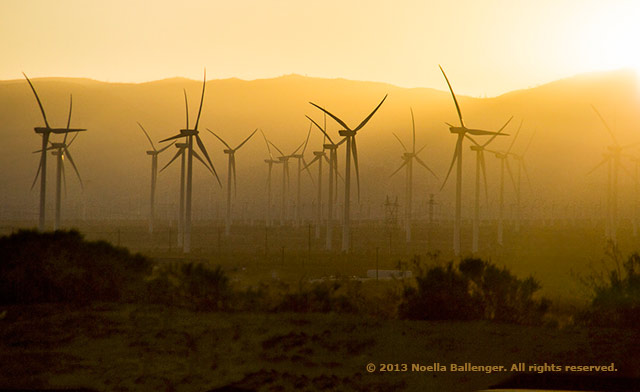
Wind Farm, Mojave, California
f/8, 1/8000 sec, ISO 1000, 28-300mm @ 300mm (taken from a moving car)
Aperture, or the size of the hole in the lens, controls what is in focus (foreground to background). You’ll notice a lack of depth of field when you use long lenses–because of the compression factor that we just discussed. When you use wide-angle lenses, the depth isn’t readily apparent, because the band of focus tends to be wide–even at f/4 or f/5.6 (large holes). If you don’t focus on the subject precisely, you may have some leeway, because the depth of field is more forgiving. With a long telephoto, the band of focus tends to be compressed and narrow (foreground to background). At f/11 or even f/16, the band of focus isn’t that wide, and you need to be sure your focus is precisely where you want it to be. You won’t have much room for error.
I like to use a couple of simple phrases that sometimes you to remember their depth of field options:
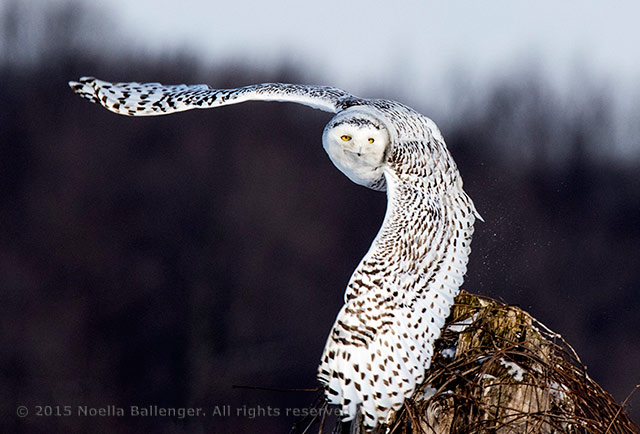
FAT – FAST – FUZZY
“Fat” (large aperture) and “fast” (large opening needs a fast shutter speed to balance the exposure) makes the background go “fuzzy”.
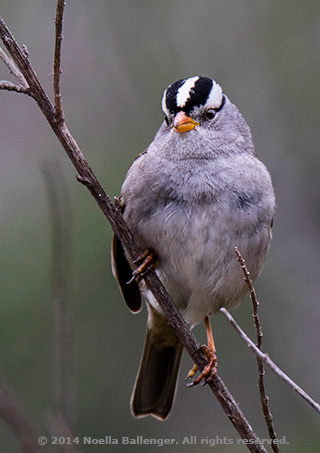
Crowned Sparrow
f/7.1, 1/320 sec, ISO 640,
150-600mm @ 532mm
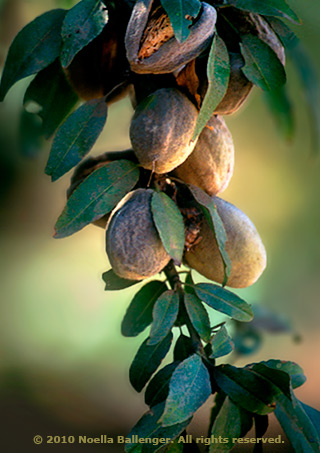
Walnut Tree
f/4.0, 1/250 sec., ISO 200,
28-300mm @ 280mm
SKINNY – SLOW – SHARP
“Skinny” (small aperture) and “slow” (small opening needs a slower shutter speed to balance the exposure) makes the background “sharp”.
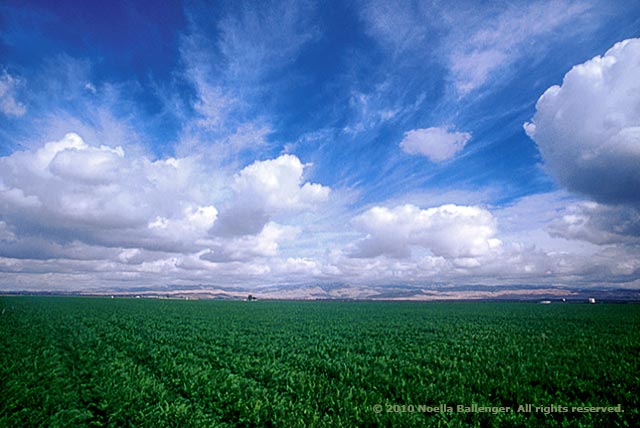
Alfalfa Field, Central Valley, California
f/16, 1/250 sec, ISO 200, 28-200mm @ 35mm
As a simple exercise, look online, or go to the library or a bookstore and look at some photographs. Can you guess what the photographer’s choice was for the depth of field in each photograph?
Now, take the next step and see how what you’ve learned about apertures and lenses can help you creatively. As an exercise, try using each of your lenses and all of your aperture settings. Find a scenic and photography the overall scene and then try photographing a single subject from within the scene. Now review your images.
What difference does depth of field make in your image?
What do you prefer?
What lens did you like working with?
Did you try a variety of aperture settings?
Did you remember to balance the aperture and shutter speed to get the proper exposure?
Are you making your depth of field or aperture decisions in a variety of ways to reflect what you want to show the viewer?
If you photographed a single subject, did you try using your long telephoto lens at f/4 – 5.6?
What happened to the background or the foreground with your chosen settings?
Continue photographing various subjects in a variety of ways to show how much control you have over your depth of field and focus. Be sure to take notes as we suggested in the first lesson, because it’s important to write down your ideas and what you were trying to do and then how you did it.
by Noella Ballenger
© 2015 Noella Ballenger. All rights reserved.
Leave a Reply