
Does getting up before the sun rises so you can photograph bugs sound strange? Totally! But after the first click of the camera there is the basic understanding that, for me at least, there is no substitute for the satisfaction and thrill of documenting the lives of these small and delicate insects – photographing what the naked eye cannot see.
During my ventures with macro photography I always try to look for those special moments and give them my artistic touch, style and vision. I’ll patiently wait for the right moment, find the right angle, and seek the best background colors and image composition. All of these elements will reveal frames of tiny creatures within a fascinating and beautiful world.
I would like to share with you a part of myself, my vision and my way of making macro images with my Canon 7D and 100mm, 2.8 lens.
So … Here we go with some guidelines to photographing bugs.
First, you may want to do is a bit of research on the various bugs within your area. Learn what species you can find and learn some about their behaviors and favorite hangouts.
When and what time of day is best for creating macro photos of insects?
The answer is always and at anytime! But…
If you live in colder climates, one of the best seasons to create some very interesting macro images is in early spring, when it’s still cold and moist, especially in the very early morning hours when they are still sleeping, frozen and full of dewdrops. And, it’s a perfect opportunity to practice your skills, as they will not run or fly away when you approach them. But the dew dries and the bugs get active rather quickly, so make the most of your time.
NOTE: Some macro photographers use an agent that freezes the insect. I choose to not change the natural order of things, so I am against the use of these materials. We want to document reality – nature as it is.
If you live in a warm, humid climate, your array of species will be greater and you can find them anytime of the year, but spring and summer will still have the most bug activity.
Do you photograph during the morning, noon or evening?
Photographing these little creatures is optimal when the sun starts to come out, or even a little before. Although the lighting conditions are not the best, this is the time when the bugs are still sleepy or slow to move. This is surely the time to observe and create some stunning images with more ease.
Other times you may want to try your skills at stopping the action while they are busy and most active.
Try all of the options – just keep photographing.
Where can we find bugs?
Everywhere… flowers, shrubs, ground, air, public or private gardens, and even at home.
My favorite places are those which are close to water sources – lakes, rivers and fish ponds. The variety of the insects there is spectacular!
How do we find the bugs?
If you’re looking to photograph a specific bug, again, do a bit of research and find out where they like to hang out. Typically, you’ll need to get down to their height in the flowers and bushes – get into the bugs life! There you will find the treasures!
Many insects, and usually the more interesting ones, are hidden between the leaves and branches. A little effort and you’ll discover a magical world!

You found some interesting bugs. What do you do now?
While in the field, spend some time watching the insects, even if they are not moving. By studying them, you will be more prepared to set up your photograph or anticipate and photograph their behaviors.
For action images, watch as they scout for prey or look for food, eat, mate, or maybe fly together. Such scenes will provide more eye-catching photos.
Your behavior near insects:
At all times, avoid quick movements and approach them slowly.
When the insects are starting to be active, more patience will be required, as they can move quickly and only land on objects for a short length of time. It just takes more effort and attention on your part. If they notice you, stand still and wait awhile until the insect calms and then approach it again slowly.
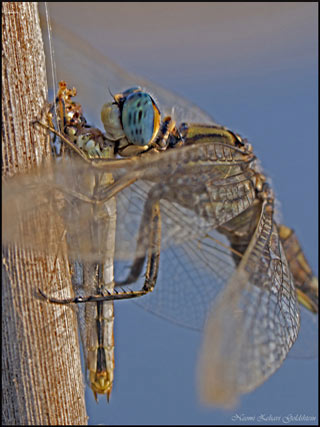
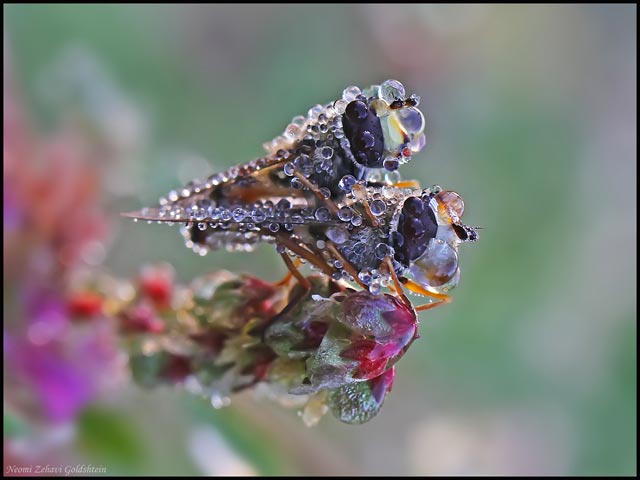
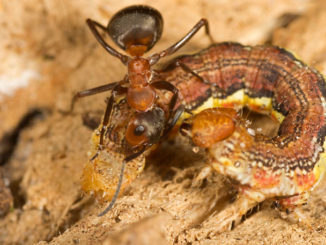
Cannibals? Yes!
EOS 7D, 100 mm, f/5.6,
1/500 sec., ISO 400
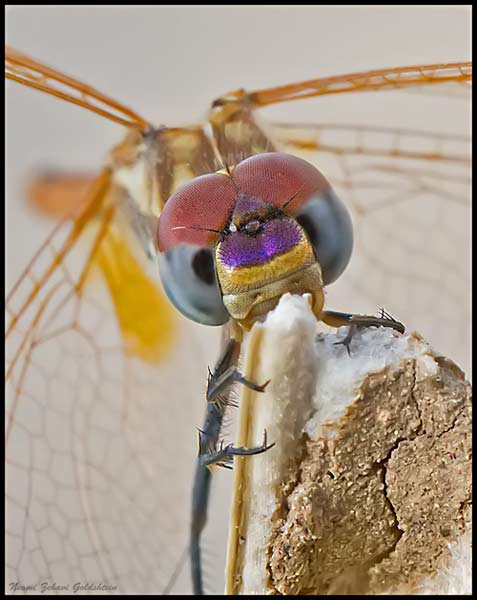
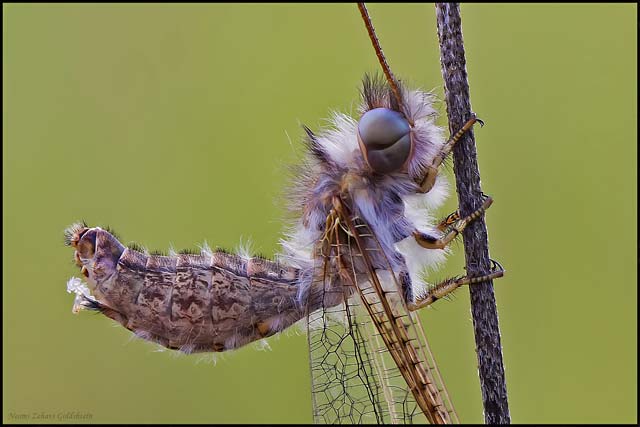
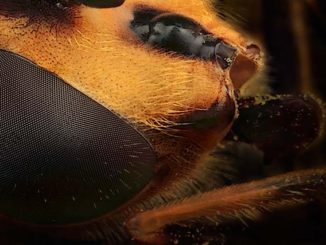
What big eyes you have!
Canon EOS 60D, 100 mm, f/6.4,
1/80 sec., ISO 400
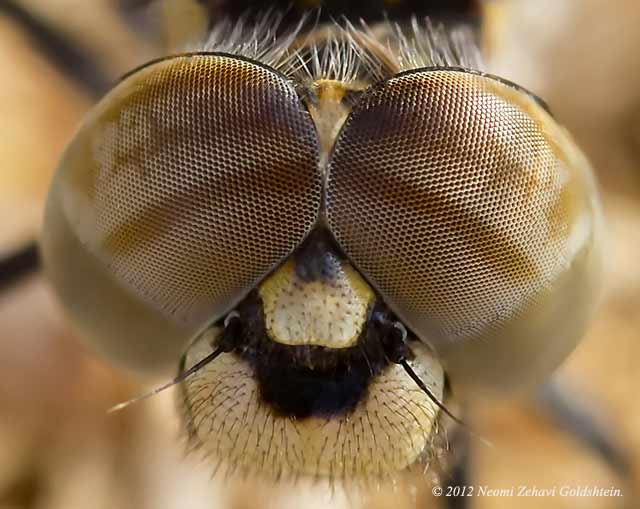
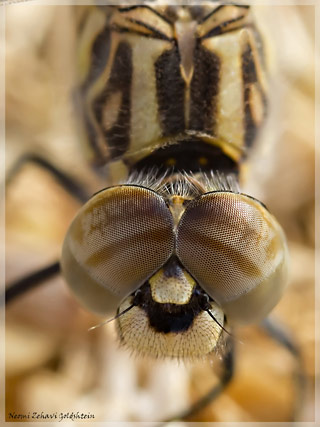
Let’s take a closer look at the details of those eyes (cropped from the large file).
CREATING THE PHOTOS
Static Subjects
Camera settings:
I don’t always use a tripod, but it is certainly a valuable tool. I prefer the flexibility of having the ability to create images quickly if I see some action.
If you are photographing in early morning light while the insect is sleepy or frozen, you will need to compromise a bit with the camera settings. An ISO of 400-800 is reasonable and will not create too much noise in the image (depending on the camera model – may also be able to adjust the noise reduction if your camera has this function). You can drop the shutter speed to 1/60 and give more priority to a high aperture.
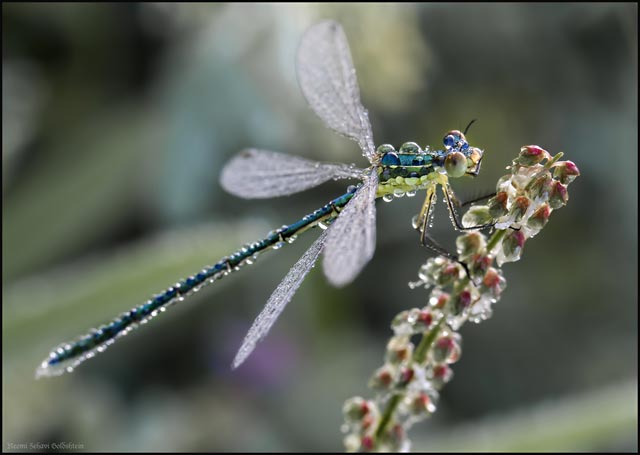
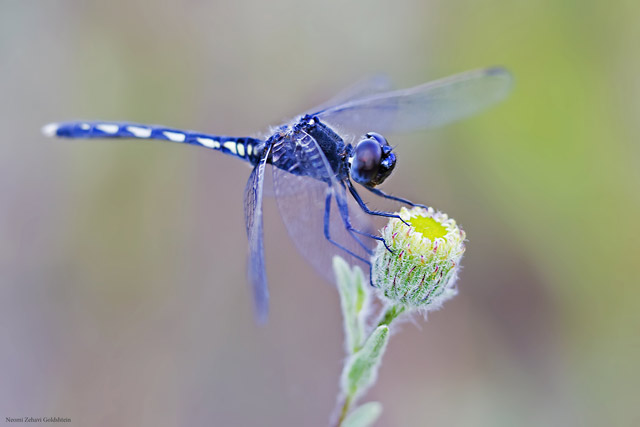
Damselfly Waiting to Thaw
Canon EOS 60D, 100 mm, f/10, 1/80 sec., ISO 800
Be sure to have the sharpest focus on the head and eyes. That will be the first place the viewer will look within the image.
Tip 1: An aperture setting of f/8-f/10 gives the maximum sharpness for my lens and usually provides sharp focus on all parts of the insect. Know what f-stop will provide the best focus for your lens.
Tip 2: You may also want to consider a twin-flash system to get more light on your subjects.
Composition:
When choosing the composition, you are deciding on how the final image will look – the location of the insect in the photo and what should be included or excluded within the image frame. Always think about what the most important supporting elements should be in order to create a great image.
The Rule of Thirds can play an important role here and I highly recommend placing the head of the insect in or near one of the intersecting points. Of course, since rules are made to be broken, feel free to play and use your creativity.
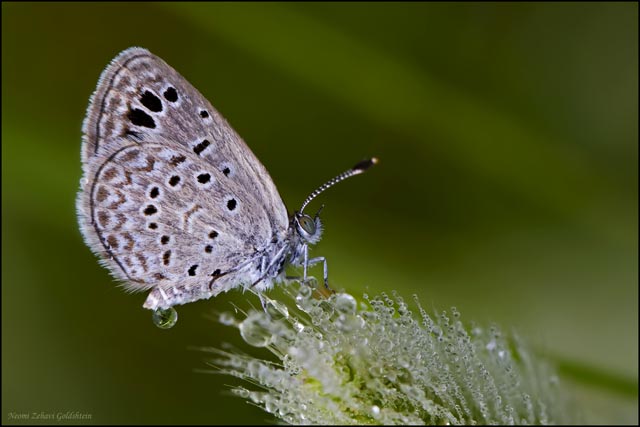
Lycaenid Butterfly in Early Morning Dew
Canon EOS 7D, 100 mm, f/7.1, 1/60 sec., ISO 250
Because your subject is static, you’ll have some time to plan your angles and backgrounds. Get down, look at the eyes of the insect and then search for the best angle. Try to find an unconventional angle, so you can give the picture a touch of your vision. And look around – what is behind the insect? Is there is a flower nearby or a stunning blue sky? Try to change the angle so you can to utilize one of them. If there is not a background object that adds appeal, see if you can use something to create a more interesting background, such as a branch with green leaves. You might even carry some swatches of colorful fabric with you in your camera bag. Use anything you can to draw more attention to the insect.
Owlfly – Bubopsis Andromache
Canon EOS 7D, 100 mm, f/8, 1/100 sec., ISO
Insects in Motion
Flying insect photography is more complicated and challenging, especially since they tend to fly in erratic patterns. It requires a lot of practice and patience. Again, watch and study their behavior to get a feel for their flight patterns and habits.
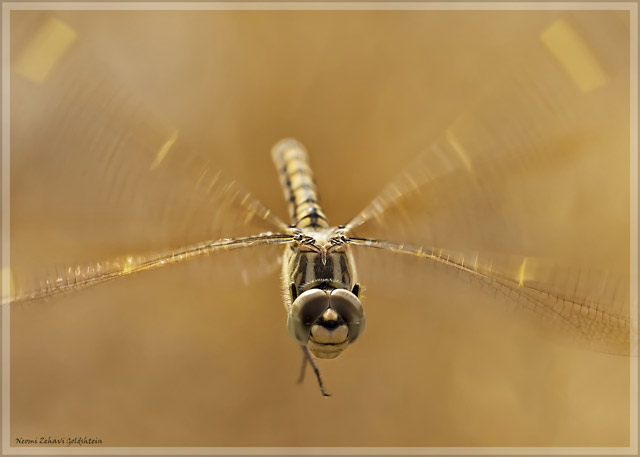
Incoming!
Canon EOS 60D, 100 mm, f/7.1, 1/500 sec., ISO 200
Camera settings:
Some suggest a macro lens with a teleconverter or a 400mm lens with a teleconverter, the use of autofocus with continuous shooting and focus point expansion.
The following is my preferred method, but find what works best for you.
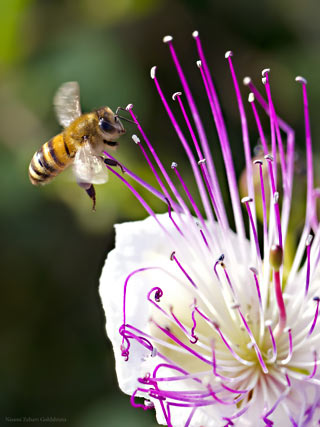
Hovering Bee
Canon EOS 7D, 100 mm,
f/5.6, 1/1250 sec., ISO 400
I use just my 100mm, 2.8 lens with no added gear. The shutter speed must be high to freeze the movement of these quick moving insects – the higher the better. Start at 1/1000 sec., but it could exceed 1/2000 sec. The correct exposure is determined by the shutter speed. Because we are not as close to the insect as we were with are static subjects, we can set the aperture in the f/2.8 to f/4 range. With an open aperture, keep the ISO as low as possible. Use manual focus. While following the insect movements you need to set the focus on the insect and click the shutter release at almost the same time.
Tip: There’s no need to change the aperture to prevent over exposure. It is better to increase the shutter speed.
Shoot a series of rapid images – maximum Continuous Shooting allowed by the camera. After each series, check the pictures to make sure the camera settings are correct – not too bright or too dark.
Composition:
With the insect moving it is more difficult to control the composition or the background, but do your best to position yourself in a location that can provide the best possible background.
When you have a beautiful background, sharpness, great composition and color, you will indeed have made a beautiful and attractive insect portrait. But just as with any other wildlife images, showing the viewer insect behavior will add more interest and have an even greater impact.
Now go in search of these tiny creatures and have some fun.
by Neomi Zehavi Goldshtein
All text & photos: © 2013 Neomi Zehavi Goldshtein. All rights reserved.
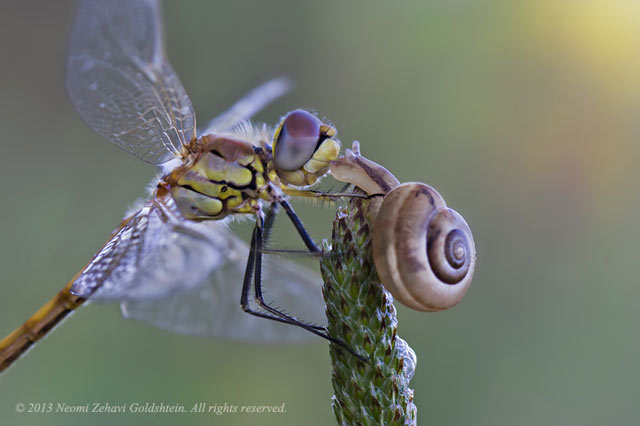
Your work is beautiful! I saw a picture of a dragonfly looking straight into the eyes of a snail, and fell in love. How can I see more. Would it be okay to show these pictures on my smartboard in my classroom for my school children? I am teaching a unit on Ecology and then I’ll be doing the Classification of Animals, and I try to teach children that we really are all the same and we need to respect wildlife.