
The goal here is to blur the background in Lightroom and to go beyond the brush blur itself, because this tip shows how to give your photograph a stronger center of interest
Time Start to Finish: 5-10 minutes.
An easy method to blur a distracting background in Lightroom is this technique that I teach in my classes called The Brush Blur.
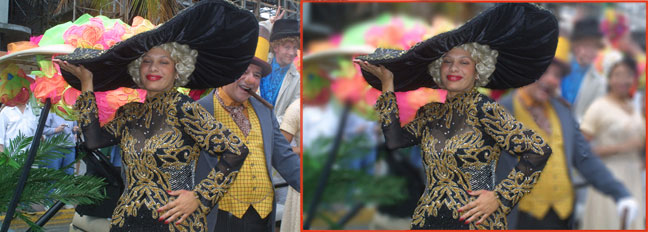
Photo A : Before and After Brush Blur
The Brush Blur Tutorial
1. START:
Grab a photograph from your files. I chose Mae West in Miami. She looking quite lovely, but the rest of her gang, WC Fields and Harpo, are crowding her. So I want her to stand out from the crowd because she is the center of interest. On to how blur the background in Lightroom…
2. Develop.
Open Lightroom.
Find the Develop Module.
3. Brush.
Click on the adjustment brush–Lightroom’s Custom Effect settings will appear.
The one you want to find is Sharpness.
Photo B: In Lightroom
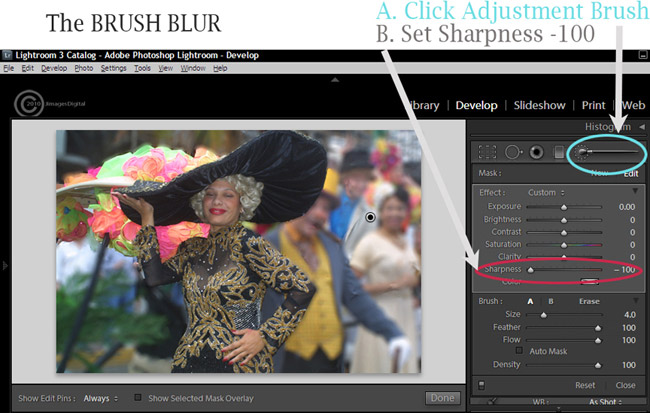
4. Choose Blur Strength:
Click the adjustment brush–the mask effects from Exposure to Color will appear.
Find Sharpness, and set it to -100 (minus one hundred).
That’s it, now you are ready to brush in some blur. Think about where you want to blur the background. Have fun experimenting as you try sharpness settings of -50 and -75, or whatever you like. Remember, if you do not see the mask effects, just click the adjustment brush, circled in blue in the photo above.
[ Brush Tips: To reset or return to the basic settings, just click the adjustment brush. This toggles back and forth from basic settings to custom effects. When you apply the blur with the brush, you are adding a mask edit pin.
You must click the check boxes labeled “Show Edit Pins” and “Show Selected Mask Overlay” to see them. To take away the mask, hold down the Alt Key as you are using the adjustment brush.]
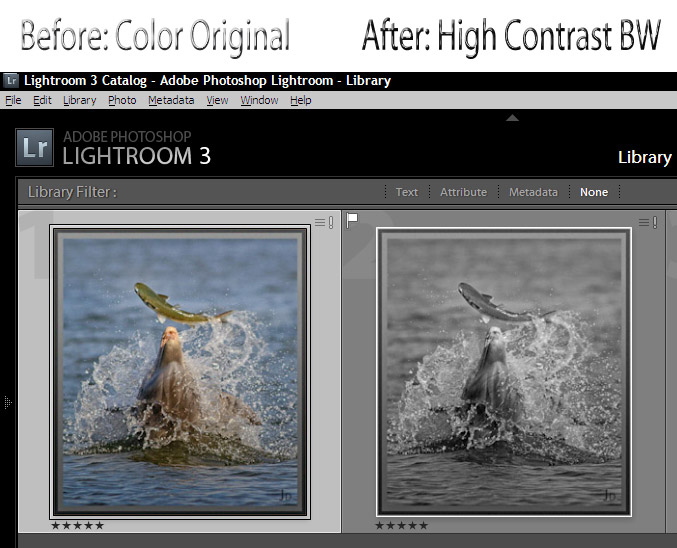
Method: High Contrast B/W from Color in 3 Simple Steps
Goal: Create stunning black and white from your color photograph.
Time Start to Finish: 5-10 minutes.
My tip here lets you get compelling and dramatic BW images in no time.
Blur The Background In Lightroom – Fill In Light
1. START: FILL IN THE LIGHT
Start with an RGB image.
In LR3, click the Develop Module.
Find your Fill Light slider.
Slide it to about +60. The results will not look good , yet.
2. BOOST THE BLACKS
Locate the Black slider.
Slide it to increase its strength, in the positive direction, until your photograph starts to have good looking tones and contrast.
Play with the Blacks slider and judge how to set it for your photograph.
Note: For this dolphin picture example, I set the Blacks slider to 30. This black slider adjustment may clip the black tones. You can click on the LR3 ‘Show Clipping’ feature ( type J on your keyboard) to see the clipping.
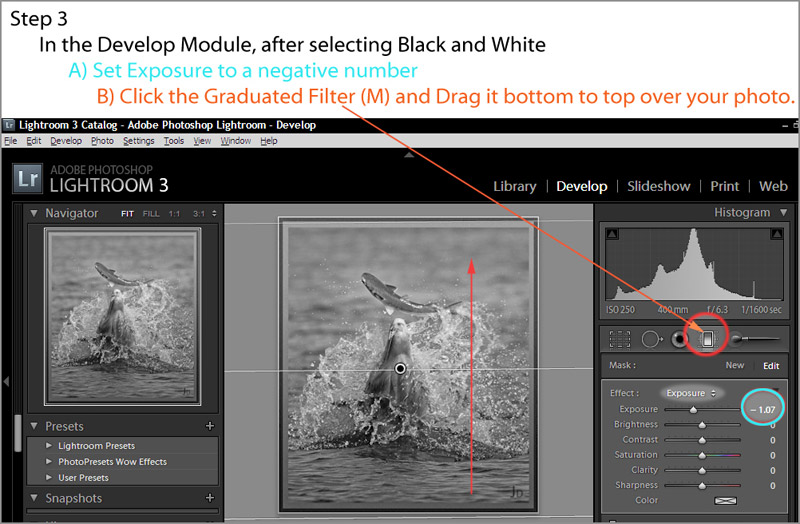
3. CONVERT TO B/W
In LR3, next to Treatment , you’ll see Color and Black & White.
Click Black and White–it’s under the word Basic.
Find the graduated filter–it’s the 4th tool over, right under the Histogram.
Set it to a negative number. In this case, I used -100.
From bottom to top, drag the graduated filter over your picture, to enhance contrast and bring back the detail. Note: Other pictures may benefit from a top to bottom graduated filter.
FINISH: Export and enjoy your high contrast black and white image. Hop you enjoyed my guide on how to blur the background in Lightroom.
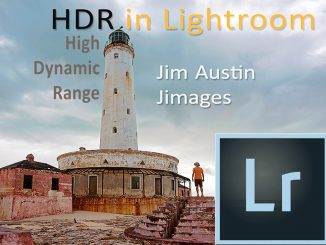
by Jim Austin M.A.

Leave a Reply