
What’s the best way to approach photographing snow? It can be a tricky subject, so let’s look at techniques to get it right.
The temperatures have dipped below freezing, there’s a foot of snow on the ground, and most of the wild animals have either headed south or gone into hiding–which is exactly what a lot of photographers do. They crawl under the covers, turn up the heat, set a cup of hot chocolate by their side, and go through their images.
Precisely because so many photographers like to stay inside during the winter months (unless they head to Florida to photograph the migrating birds), you should head out shortly after the first snowfall and continue going out until the final snows melt.
The opportunities you can come across are boundless, no matter where you’re located in the northern climes. If you like to be by yourself when you photograph, you’ll be delighted. The tranquility will make each trip even better. Besides being one with nature, you’ll have plenty of time to reflect on everything around you. However, the real reason you’ll venture into the snow will be to create images of it.
This is where the fun begins. When you think of the seasons as photo opportunities, lots of ideas for images come to mind. Fall presents the changing colors of the trees as well as the mating season for a number of animals. Summer offers lots of wildflowers in the high country, and spring is a time of new birth and growth. But winter? That’s when you’ll find snow and ice and plenty of it.
What Subjects When Photographing Snow
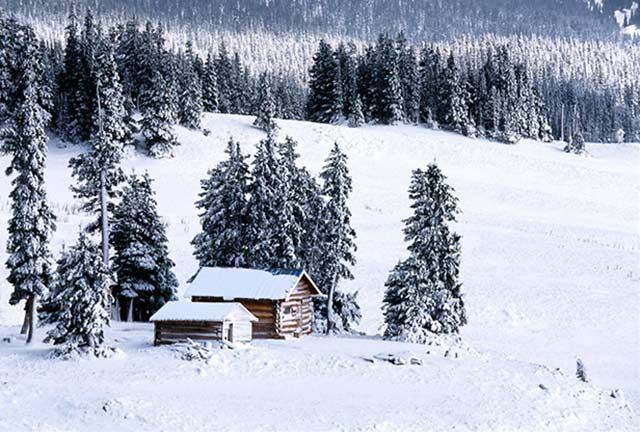
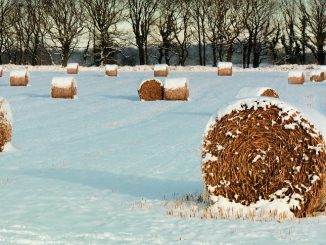
Although the main subjects you’ll be photographing are snow and ice, the way you approach them provides countless options. In making images of snow scenes, what you want to look for is a scene in which the snow enhances the overall image. This concept is best illustrated when you see an image of an isolated barn covered with snow.
You can approach a location like this in one of two ways: get close to the barn and focus on the barn itself, or photograph from a distance to show the entire snow covered area. Each perspective provides its own feeling about the moment. One lesson you’ll learn as you play with winter photography is that you have to use your eye and feel for composition even more than during other seasons. There isn’t any color to help you see a picture, so you have to look for shapes and mood to enhance the scene.
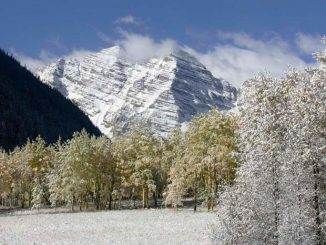
Another subject you can search for is one that you’re used to seeking out in the fall—the view through the trunks of a group of trees. This time, however, instead of highlighting the barrenness of the trunks after the leaves have fallen or the shapes of the trunks with color in the background, you’re looking for trunks with fresh blown snow piled on and around them.
Fresh snow or frost on the branches can be contrasted nicely with a crisp blue sky as a background.
Snow-lined streams also offer interesting subjects. Some of the best images you can make using water in the winter is when that water freezes into ice. Here, a whole other world is opened up to you. Icicles hanging off of trees and the reflections inside of them invite you to bring out your macro equipment for close-ups. If you can find a small waterfall in the woods, you can incorporate the running water with ice-covered objects around it.
When you go to an area where the large mammals don’t migrate or go into hibernation, you’ll find another category of great subjects. Large animals in the snow offer a new dimension to your work that doesn’t occur other times of the year. However, make sure when you’re working with animals that you don’t create stress on them. They are much more vulnerable during the winter than at any other time because of the cold and lack of food.
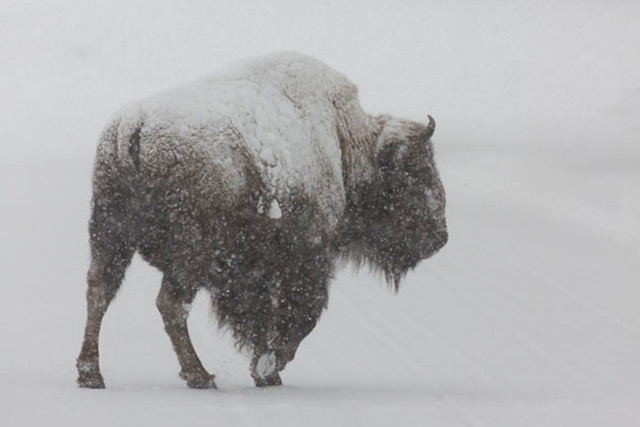
Where the buffalo roam – snow storm in Yellowstone National Park.
As you can see, there are plenty of subjects from which to choose when you’re heading out to do winter photography. In fact, there are far more than we’ve suggested here, but these should keep you going for a while.
GETTING AROUND
Moving around when you’re photographing snow-filled scenes can pose problems. Although the road crews do a good job of keeping most roads to chosen locations clear for your vehicle, you might want to think of other modes of transportation that work well in the snow.
For example, you can pilot a 4-wheel drive to reach some spots. Sport utility vehicles that have a lot of ground clearance will take you down some (but not all) forest roads, depending on how much snow there is on the ground. However, when you climb out of your vehicle, you need other ways to explore the places where you eventually want to make those images.
The easiest way to trudge through the cold and snow is with a pair of pack-type boots such as those made by Sorel. They can keep your feet warm and they’re tall enough to allow you to walk through up to six inches or more of snow without a problem.
Next up the ladder is a pair of snowshoes. These are good for short walks in the woods. From first-hand experience, I would advise you to watch your balance while trudging around in snowshoes if you’re carrying a back or fanny pack filled with camera gear. The same holds true when you step up to using cross-country skis to venture even farther into the wilderness.
Your center of balance changes from the situation you face when you cross-country ski without a backpack to when you ski with a backpack strapped on. You have to compensate. Before getting too far into your journey with a backpack, spend time finding your center point and getting used to it.
CONDENSATION
As anyone who wears glasses knows, bringing a cold object into a warm area causes immediate condensation. The same principle holds true for cameras, but the consequences can be deadly–especially for electronic cameras. So, when you bring your camera back into your home, be sure to warm it slowly by keeping it in a case.
Also, keeping your equipment in airtight bags will greatly reduce condensation. (Note: Always carry extra batteries with you in your pocket to keep them warm, as you will need to switch back and forth on really cold days.)
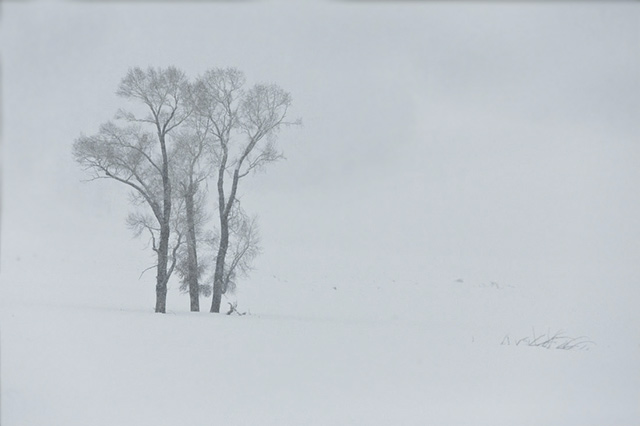
Fog adds mood to most any scene, but when mixed with snow, it causes the histogram to skew to the right.
The condensation caused by taking a warm camera into cold air is not as significant. However, the same rules apply. Cool the equipment as slowly as is feasible. If possible, leave the equipment in a cold place long before you need to use it, but remove any batteries to preserve their power.
On a similar note, if you’re like me, you have a problem with fogging your viewfinder with your breath.
The only way I have found to prevent this from happening is to hold my breath. When I have to breathe, I exhale away from the camera. Anti-fogging solutions help but don’t seem to work totally. If you try one of these, be sure not to use it on your camera lenses. Likewise, never blow snow off of a cold camera or lens. The ice that forms instantly will prove to you it was a bad idea.
EXPOSURE
To get the best exposure of snow, do a test photo and check the histogram to see where the whites fall. So the textures and details are maintained without getting washed out, have the highlight side of the histogram (right side) reach into the last section but not too far to the right.
A good general rule of thumb for handling exposures today is to start at around +2/3 exposure compensation and see what the histogram looks like.
One of the weather conditions that can arise in winter that can cause a change in mood is when there’s some fog. Trees isolated in the snow and fog have a totally different feel to them than other settings. The histogram for this will pretty much be fully in the right section because of the lack of contrast, but this is all right.
There is no perfect histogram when it comes to photographing snow. The more snow, the further right the histogram and the more contrast there is between snow and dark subjects – the histogram will be split with spikes to the right (highlights) and to the left (shadows).
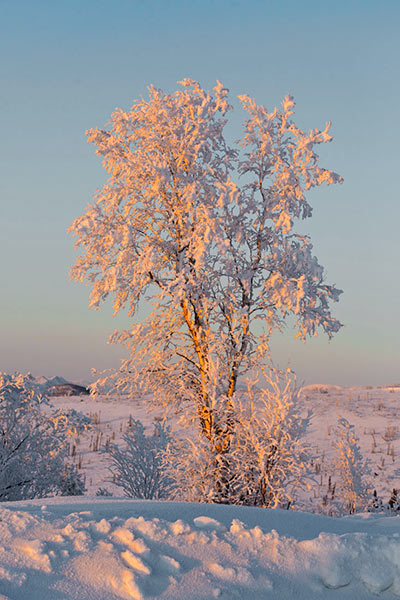
Hoarfrost on a tree is highlighted just before sunset.
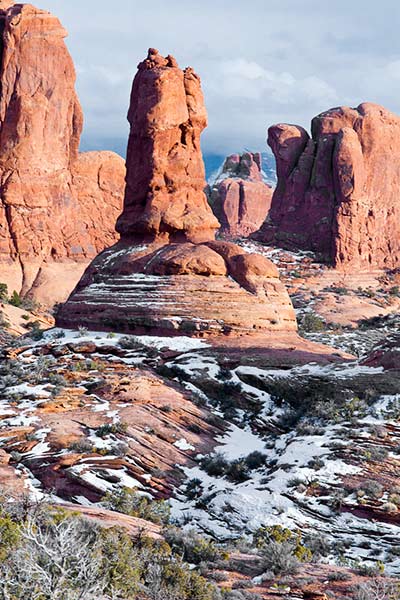
Snow is compliment to the scene in the Garden of Eden at Arches National Park and adds a light contrast to the otherwise neutral tones.
SNOW Q & A
What color is snow?
The answer is not as obvious as it seems. Snow reflects ALL wavelengths of visible light, so it appears white to our eyes. On the other hand, it also absorbs the longer wavelengths of infrared light. If you use infrared film to photograph a snowy landscape, your image will look peculiar, because the snow will be black.
This blackness (to infrared light) has a significant effect on the snow’s temperature, since infrared is another name for heat. As you know, a black object both absorbs and radiates quickly (Anyone who has had a black interior in his or her vehicle knows this).
This quick radiation means snow gains more heat during the day than you might think and loses more heat during the night. On a clear night, infrared radiation from snow can cool it several degrees below the air temperature, which might explain why your toes get so cold when you go out and stand in/on it early in the morning when photographing those stunning snow scenics.
Why is snow a good insulator?
Place your hand on the snow, and your hand will get cold. But, if you dig down into the snow, you can build a cave that will enable you to stay comfortable for an extended period. This is because snow is mostly air. (Fresh powder is 93% air.) Air spaces between the crystals work the same way as air spaces between fibers of wool or goose down, preventing air movement and slowing heat loss.
Thus, the lighter and fluffier the snow, the better insulator it will be. Old, hard snow has less air (60-70%) and feels colder if you build a burrow or even stand on it.
When is it too cold to snow?
When temperatures reach -40°, two things happen to stop snow from forming. First, all the available moisture has already precipitated out. Secondly, even if there were moisture available, the process of forming a snow crystal in the cloud would be very slow because of the diminished molecular activity at low temperatures. This is why regions around the poles have very little snow, and “cold deserts” are formed.
Now, instead of hibernating like the bears this winter, bundle up and get ready to create some beautiful photos of snow.
by Andy Long
First Light Photo Workshops
All text & photos: © 2014 Andy Long. All rights reserved.
Leave a Reply