
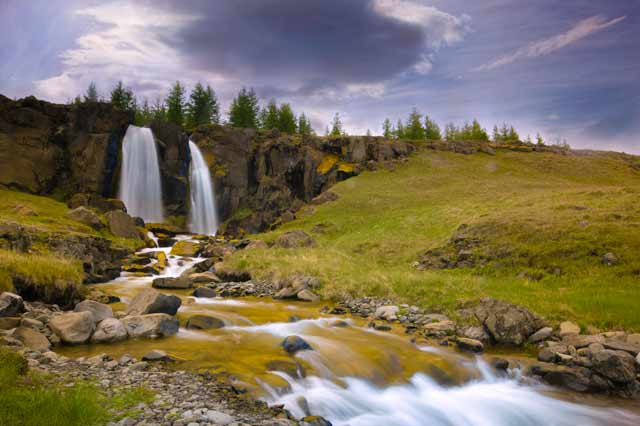
Roadside waterfalls, Iceland: © 2013 Michael Leggero. All rights reserved.
Waterfalls are a staple subject in the portfolio of landscape photographers and finding the options to one of my main “rules”, there are at least five different ways to interpret a scene, makes this subject an ideal choice. Just changing the shutter speeds alone will provide several different interpretations. Throw in a few compositional changes–such as different visual weighting, changing the focal length, or moving to a different position, and it’s easy to get many interpretations of the same waterfall.
Even though waterfall photography is very popular, it’s more difficult to photograph than the average landscape scene. Most of the problems can be overcome with experience. However, some techniques will supplement photographic experience and help overcome the issues.
The three main problems associated with photographing waterfalls can be summarized in the following questions:
How much of the waterfall should I include in the image?
What shutter speed should I use?
How do I expose the scene?
How much of the waterfall should I include in the image?
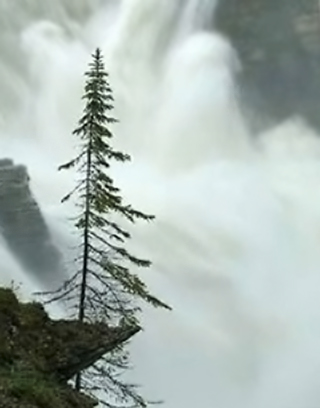
Many waterfall images, as seen above, include virtually the entire length of the waterfall by using a wide angle lens, so the falls can be shown within their environment. This style of composing can be especially good when other compositional elements of interest are incorporated into an image.
However, if using the whole length is the only way in which you compose waterfall photographs, then you’re not using your creative and technical talents to their fullest. By not revealing a waterfall completely, the photographer can also involve the viewer, because a partial image sparks the viewer’s imagination. For example, if the falls cover most of the frame, but the bottom of the falls is not visible, it’s up to the viewer to imagine where the bottom of the falls might lie outside the frame. The same is true if the image shows only the bottom of the falls. Any time you invoke the viewer’s imagination, you create viewer interest. You can isolate some portion of the falls, most commonly with a longer lens.
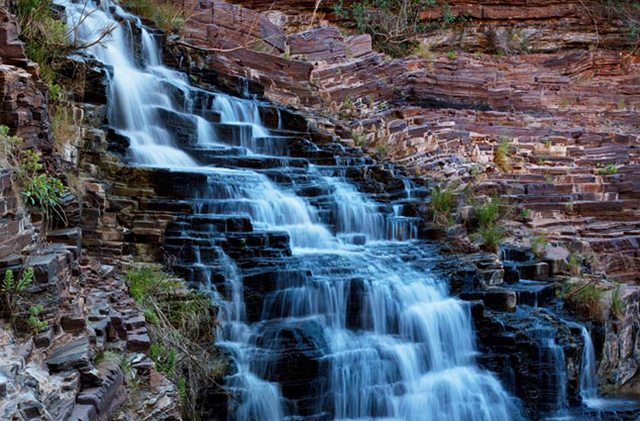
Fortescue Falls in the Dales Gorge, Australia: © 2012 Barry Epstein. All rights reserved.
By interpreting a waterfall in several ways (at least five), you have a selection of images from which to choose your favorite(s). And when I say there are at least five different interpretations, don’t limit yourself to that number – keep going until there’s no answer to the question, “What if I change X?” The worse thing that can happen when you get home is for you to say, “I should have made it in a different way.” Photograph your subject every way you can while you’re still in the field, so you won’t experience that lament.
© 2004 Jim Altengarten. All rights reserved.
© 2004 Jim Altengarten. All rights reserved.
What shutter speed should I use?
A change in shutter speed creates different textures in the water. There is no one correct shutter speed to photograph waterfalls. The shutter speed to use depends upon how you want to interpret the scene. However, there is a good guideline to which you can refer.
Most landscape photographers seem to prefer interpreting waterfalls with a slow shutter speed. The soft “cotton candy” effect of the water. As a general guideline, a shutter speed between 1/4th and 1/15th of a second will create this soft effect. A slower shutter speed will increase the softness of the water; a faster shutter speed will create a “harder” look. Photographing water at around 1/60th of a second will reproduce the water as your eye normally sees it. Shutter speeds faster than that will start to “freeze” the water droplets. There are situations when fast shutter speeds are more appropriate than slow shutter speeds. Your choice depends on how you want to interpret the scene.
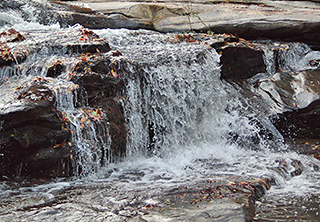
1/500th sec.: © 2014 Marla Meier. All rights reserved.
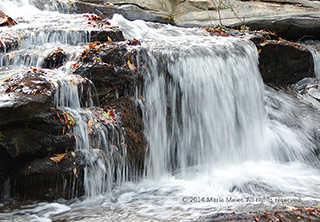
1/20th sec.: © 2014 Marla Meier. All rights reserved.
The guideline provided above is not a hard and fast rule. It’s merely a good range for most waterfalls. You should adjust the range based on two factors: volume of water and speed of flow. You can use the upper range of the guideline, or a slightly faster shutter speed, if the volume of water is great and/or the water is traveling at a very high velocity. If the volume of moving water is low, or it’s not moving at a high velocity, you’ll need to make the images at the low end of the guideline, or slower, to create the soft effect.
The adage, practice makes perfect, applies. Experience will help you determine how to interpret the guidelines and get the desired shutter speed. Until you obtain that experience, try bracketing your shutter speeds to obtain the soft effect. Use a fairly wide interval in your bracketing—perhaps a two or three stop difference. If you bracket in two-stop intervals and start at 1/4th of a second, your shutter speeds will be 1, 1/4th, and 1/15th sec. Those should provide a wide range of interpretations for the waterfall.
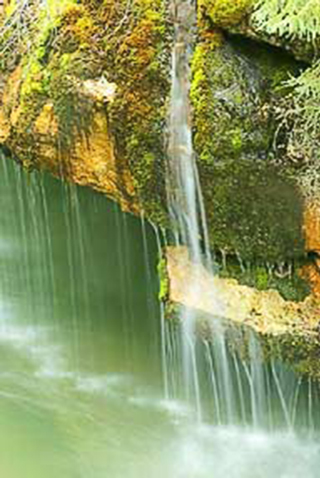
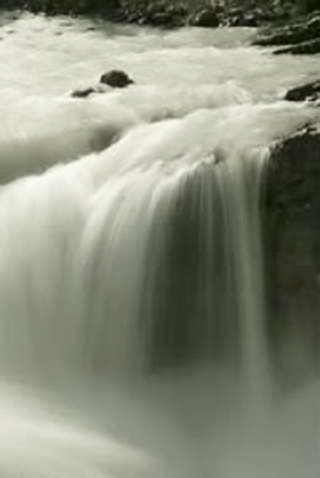
© 2004 Jim Altengarten. All rights reserved.
Low volume flow means a slower shutter speed of 1 1/2 sec. to produce the silky feel.
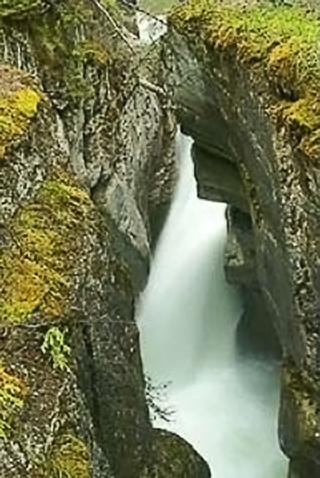
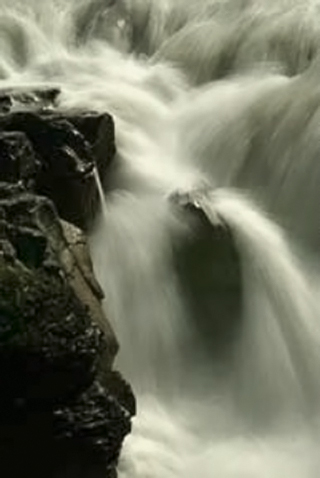
© 2004 Jim Altengarten. All rights reserved.
A rapid, high volume flow of water means you can use a faster shutter speed to get that silky look – here 1/20th sec.
The same guideline and principles apply to any moving water, whether it’s in a waterfall, stream, or ocean wave. Remember the general range of 1/4th to 1/15th of a second, and determine if the volume of water or the speed of flow requires any deviation from that range.
The best ways to achieve slow shutter speeds are to photograph on overcast days using a very small aperture (large f-stop number) with the lowest ISO possible (50-100). Allowing light to come in a small opening requires that the light comes in for a long length of time. Also, photographing on an overcast day means the light level is lower, and you’ll be able to use a slow shutter speed.
1/400 sec.: © 2012 Brad Sharp. All rights reserved.
Of course planning for an overcast day isn’t always an option. There will be occasions when no matter what f-stop you’re using, the light level is high enough to prevent you from getting into the “magic” range of 1/4th to 1/15th of a second. Your best recourse in this situation is to have one or more neutral density (ND) filters handy. These filters should have neutral density over the entire filter–not the graduated neutral density filters used to balance out wide ranges of contrast. A neutral density filter reduces the light entering the lens by a certain number of stops. The most common one used by landscape photographers is a two-stop ND filter. Your polarizer normally reduces the light by about two stops, so it can be used as a ND filter. A two-stop ND filter used with a polarizer will reduce your shutter speed by about four stops, which should cover most of the situations you face. For example, if your shutter speed is 1/200th without any filters, four stops less exposure will put you within the guideline range. If you don’t have a polarizer, I suggest carrying a three-stop ND filter in addition to the two-stop filter.
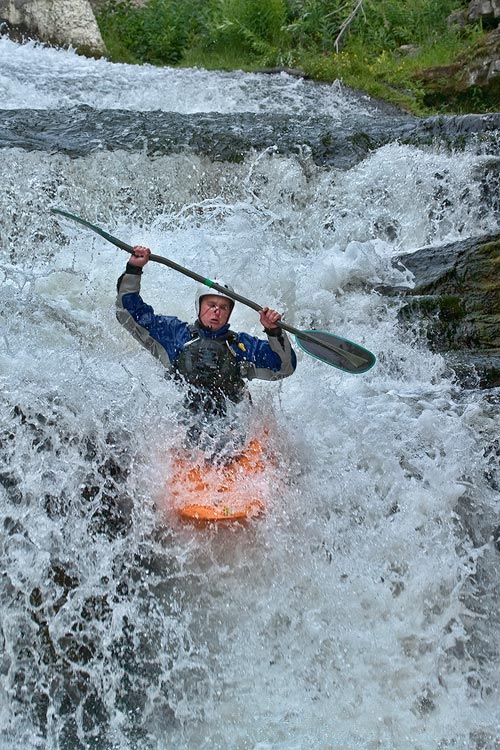
Any time you want to create a feeling of power, use a fast shutter speed to freeze the water, such as suspending water drops in mid-air or stopping a kayaker as he makes his way through the falls. Depending on the ambient light, you may need to bump up the ISO to get enough light on the scene when using shutter speeds anywhere in the range of 250th of a sec. and up. Play with those speeds until you get the desired look.
Remember, it is YOUR interpretation of the scene that dictates the shutter speed, not some arbitrary rule.
How do I expose the scene?
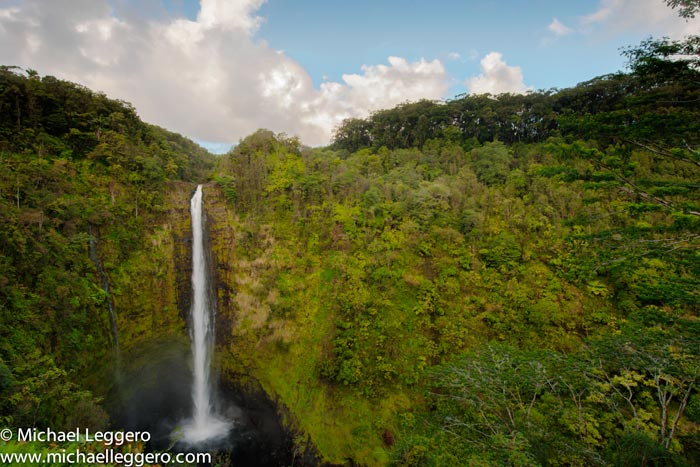
Akaka Falls, Hawaii: © 2012 Michael Leggero. All rights reserved.
In many situations, the waterfall in your image will not dominate the scene. When composing by showing the waterfall in its environment, you probably need to meter normally if you have multi-segmented (matrix, evaluative, honeycomb, etc) metering.
However, more careful metering is necessary when the waterfall dominates, or takes up a large portion of the frame. Of primary concern is the total contrast in the scene. This is especially important on sunny days. When the sun strikes the water, it dramatically increases the contrast in the scene. Try using your spot or partial metering mode to check the contrast range between the bright water and the dark surrounding rocks or vegetation. If you have more than a four-stop range, you’re probably not going to be able to take the picture successfully.
© 2004 Jim Altengarten. All rights reserved.
Here are two strategies that you can use to photograph waterfalls that dominate the frame:
1.) Use your spot or partial metering mode to isolate the exposure reading on just the water. Since the camera will try to make the water medium tone in this scenario, add a stop or a stop-and-a-half of exposure to make the water come out white. If the scene is within the four-stop range described above, the other elements in the scene will be properly exposed.
2.) Believing that the scene is within the four-stop range, you can take your exposure reading from some medium tone subject (even if it’s outside the portion you’re framing), lock in those values, and re-compose the shot. Green vegetation near the falls is often a good medium tone subject, as long as it’s in the same light as the water. Any element in the shade is usually about one stop darker than the same element in the sunlight. Since you’re basing your exposure reading on a medium tone, no exposure adjustment is required.
Ideally, photograph your waterfalls on overcast days if the waterfall dominates the frame. This is the best situation for getting the correct exposure, because the tonal range if the scene is at its lowest. On sunny days, especially when the sun is striking the falls, be sure to check for the total tonal range in the detail elements that you want to maintain.
And don’t forget to use waterfalls, streams and rivers as a backdrop for another primary subject, such as walkways, flowers and trees. A slower shutter speed can add a nice soft textured background.
On your next trip photographing waterfalls, remember to determine how much of the falls you want to include, use the guidelines to select a shutter speed, and plan your exposure. Most important of all, take at least five photos of every scene!
by Jim Altengarten
Article: © Jim Altengarten. All rights reserved.
Images: a variety of photographers
Leave a Reply