
NOTE: This article is for older versions of Photoshop
(prior to CS6/CC), but the fundamentals still apply.
Copyright © John Watts
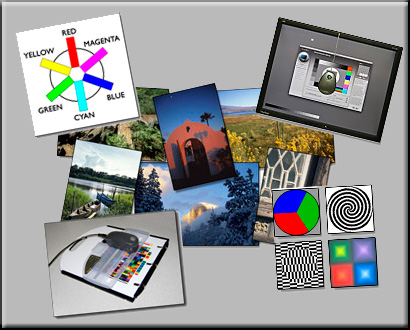
Frustrated by the fact that your photographic prints don’t look like your monitor, and vice versa?
You’ve got a “Color Management” issue!
Do the words “Color Management” instantly give you a headache? They shouldn’t.
Read on…it’s easier than you think.
Purpose
Proper Color Management will allow you to print with a great degree of consistency and repeatability, whether it is on your home inkjet printer or through a custom print lab. It allows you to print what you see on your monitor with a large degree of accuracy. The old adage, “WYSIWYG” (What You See Is What You Get) readily applies when you are properly color-managed.
To accomplish a properly color-managed workflow, you will be creating and/or using at least two Profiles, one for your monitor and at least one for your printer. A “Profile”, by the way, is nothing more than a file which tells your computer how to act and what to do.
The Four Steps to Successful Color Management
It really is this simple; there are four successful steps to proper and consistent color management. If you ever have a problem with color management, it can almost always be traced back to one of these steps!
Step 1 – Calibrate Your Monitor and Create a Monitor Profile
Step 2 – Use the Proper Printer Profile or Create a Custom Printer Profile
Step 3 – Assure That You Have Proper Lighting Conditions and Perception
Step 4 – Soft-Proof Your Image in Photoshop (this step, unlike the other 3 steps, is optional)
Let’s look at steps 1 and 2 in detail in this column, and I’ll cover steps 3 and 4 in my next column.
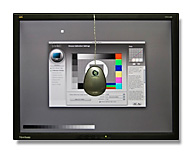
Step 1 – Calibrate Your Monitor and Create a Monitor Profile
Copyright © John Watts
The best way to calibrate and profile your monitor is to invest in a Monitor Profiler Package such as the X-Rite Eye-One Display 2 or the ColorVision Spyder 3 Elite (both around $200). It is a piece of hardware called a colorimeter (looks like a pregnant computer mouse) and the software to go with it. I would strongly suggest purchasing one.
If purchasing a Monitor Profiler is not an option right now, you can use the “by-eye” calibrators built in to your computers’ operating system. This is not a perfect solution. It is very subjective, but better than nothing.
For Windows, use the Adobe Gamma Utility (usually in “Control Panel”).
For Mac, use the Mac Calibration (“Apple” menu ->“System Preferences” -> “Displays” -> “Color” -> “Calibrate”).
By the way, I keep saying “Calibrate” and “Profile” your Monitor. It really is two steps.
First, you Calibrate your monitor to a given standard.
Second, youcreate a Profile so that your monitor will keep showing that Calibration.
How it Works
This procedure will vary between the various Monitor Profiler manufacturers, but basically this is how it works:
1. Install the software and plug the colorimeter into your computer, usually into a USB port.
2. Attach the colorimeter to your monitor.
3. Start the software, and run through the step-by-step procedures.
4. Save the generated profile.
Most of the better software packages (including the two profiling packages mentioned previously) allow you to choose an “easy” mode and an “advanced” mode. You will want to choose the “advanced” mode. This will allow you to choose a specific Color Temperature, Gamma, and Lumens.
Color Temperature is measured in degrees Kelvin (°K). A smaller Kelvin value is warmer (more yellow) than a larger Kelvin value, which is cooler (more blue). Gamma is a function of contrast and midtones. Lumens (CD/m2) are a measurement of brightness: A lower Lumens value is darker than a higher Lumens value.
In the “Advanced Mode” of your software I would suggest setting a calibration “starting point” of: 5500°K (Kelvin), 2.2 Gamma, and 110 Lumens (CD/M2).
I say “starting point” because each system is a bit different, and you will see trends in your printing. If, after calibrating and profiling your monitor, you see your prints coming out consistently dark, then you need to recalibrate and re-profile and lower your lumens value to, say, 100 lumens. Or, if the color is consistently warmer in your prints, change your color temperature to 5000°K, and conversely if they are consistently cooler, change your color temperature to 6500°K.
A note of caution: Before you make these adjustments all other aspects of your Color Management must be in order.
A further note of caution: You will never get your monitor to be a 100% accurate representation of your print, due to the different physical light properties between your monitor (emitted light) and your print (reflective light). It will never be perfect, but it will be extremely close!
How Often to Profile
Monitors have a tendency to “drift”. You will need to re-calibrate and re-profile on a regular basis – – approximately every 30 to 60 days.
Copyright © John Watts
Step 2 – Use the proper Printer Profile or create a Custom Printer Profile
A Printer Profile makes the most out of your printer’s capabilities by characterizing the behavior of your printer/ink/paper combination. With a Printer Profile, in combination with the other elements of Color Management, you will significantly improve the accuracy and quality of your print output.
There are 3 choices for Printer Profiles:
1. Use Printer Profiles provided by your Custom Print Lab.
Most good print labs implement Custom Printer Profiles into their workflow, and will be glad to supply them to you. By following the 4 steps to Color Management listed above, and setting up your file the way the lab likes it (DPI, Color Space, etc.), you can achieve excellent results without ever physically visiting the lab. You might also realize some cost savings, as most of these labs will give you a discount for setting up your files ahead of time.
2. Use “Canned” Printer Profiles for your Inkjet Printer
If you cannot afford a Custom Printer Profile, these generic Printer Profiles are available from the manufacturer of your printer or paper. Although using one is better than no profile at all, they are not as accurate as a well-built custom profile, which will bring out the best in your printer. The reason for this is that a generic profile is based on an “average” – not your specific printer.
3. Use Custom Printer Profiles for your Inkjet Printer
If you’ve never bothered with custom printer profiles because you thought it was too complicated or expensive, it is easier and more affordable than you think, and the results in your print output will be dramatic!
Why? Because all printers, even amongst the same make and model #’s, are different, and these profiles are designed specifically for your printer.
* You will need one Printer Profile for each paper/ink/printer/resolution combination that you print on.
* Unlike a Monitor Profile, a Printer Profile will not “drift” appreciably unless you change printers, ink type / brands, paper type / brands, or introduce any other variable. For all practical purposes, they are good for a few years.
* You are not limited to just the full version of Photoshop to create and use custom printer profiles: Photoshop Elements and Lightroom users can also take advantage of custom printer profiles.
Note: Watts Digital Imaging can create your Custom Printer Profile(s) for you for $40 each.
See my website for more information.
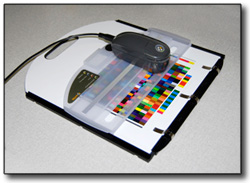
To Create a Custom Printer Profile for your Inkjet Printer: (This varies between Profiling Services)
1. Download Profile Target(s) and instructions from the profiling services’ website.
2. Print the Profile target onto the paper to be profiled with all Color Management “Off”.
3. “Snail-Mail” the Profile Target to the profiling service.
4. The target is measured using a Spectrophotometer, and a profile is created.
5. The profiling service will email your profile to you (a file about 1 MB in size).
To Load any Printer Profile to your computer:
Note: After loading the profile, restart Photoshop (if it was open) so it will recognize the profile.
For Mac: Go to “Primary Hard Drive” -> “Library” -> “ColorSync” -> “Profiles” and put your profile in this folder.
For Windows: Download the profile to your desktop, right-click on the profile icon and click “Install Profile”. You can now delete the profile on the desktop. For your information, the path for the profile location is C:\WINDOWS\SYSTEM32\SPOOL\DRIVERS\COLOR.
In my next column, I’ll cover Steps 3 and 4 of the steps to successful Color Management.
Until the next column, have fun and stay well!
by John Watts, Watts Digital Imaging
Leave a Reply