
Photo Coach Jim Austin (Jimages) offers four practical ideas for shooting and processing quieter, sharper, high-ISO images.
RAISE YOUR ISO
Today we often shoot at high ISO settings in low light. ISO settings on your camera let you to raise and lower the sensitivity of the sensor. By pressing the dedicated ISO button, or by changing your ISO menu setting, you can adjust a digital camera’s ISO from default to 1600, 3200, 6400, 12,800, 25,600, 51,200 and up in some models.
PROS: One main advantage of using a higher ISO is being able to shoot at night in light too dark to see, using faster shutter speeds, and get sharp captures.
CONS: Perhaps the main disadvantage of high ISO capture is sensor noise. We’ll get into noise reduction solutions shortly.

LENS CHOICE FOR BETTER AUTOFOCUSING
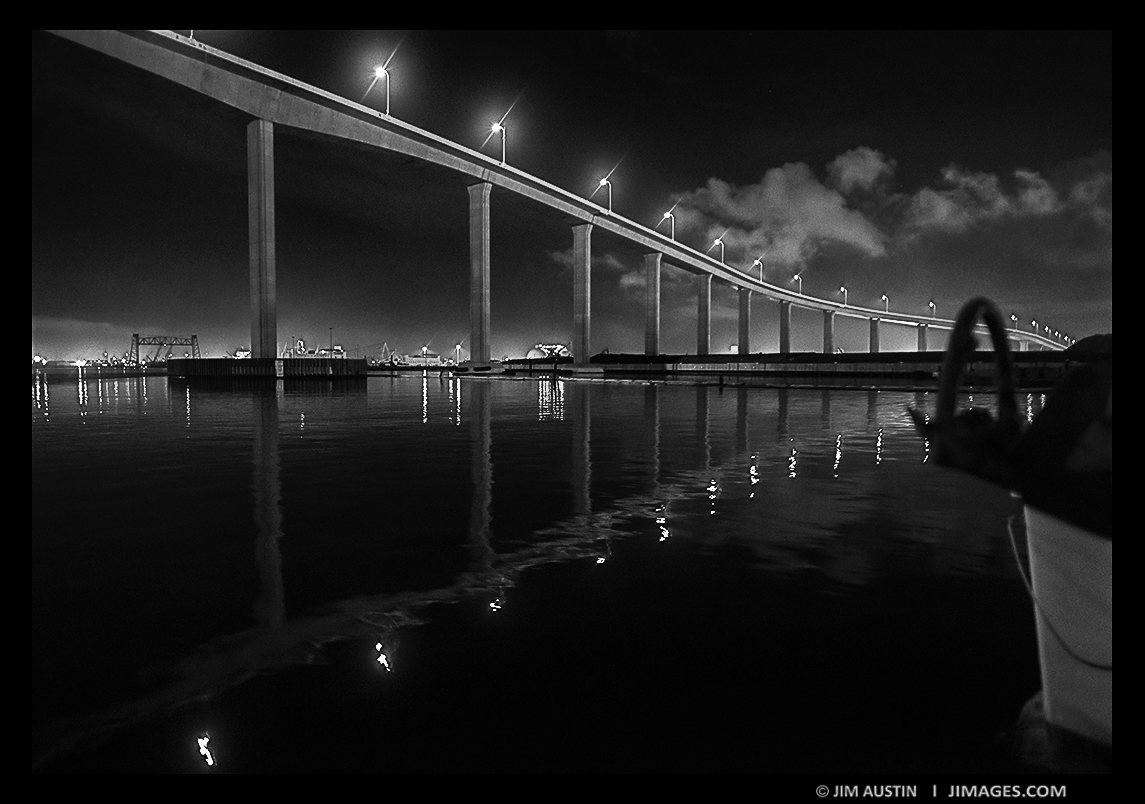
Can a faster lens give better results ? Yes. For this series of night shots in Virginia, USA, a 20 mm wide angle lens with a maximum aperture of F/1.8 allowed more accurate autofocus (AF) than a zoom might have.
In these low light conditions, with a wide angle of view, due to the maximum aperture being large and bright, there was less focus-hunting by the AutoFocus system.
Also, sharp optics can offset the slight softening effects on a images that may occur when using noise reduction software in post.

NOISE REDUCTION
As our ISO goes higher, visible noise gets more prominent in RAW and JPEG captures. The faster we set the ISO, the more noise is recorded by the camera sensor. Pre and Post processing are each convenient ways to reduce noise.
TO REDUCE NOISE:
First, enable your in-camera Noise Reduction setting. For instance, Nikon offers noise reduction options of High, Normal, Low and Off. The last option, “Off” , means that noise reduction is not enabled. While Nikon does not publish the exact level when High ISO noise reduction begins to work, I find at ISO 1600, the “Normal” in camera setting does an excellent job of decreasing noise.
At ISO 12,800 and higher, noise reduction is often needed in post processing as well, depending on your subject matter.
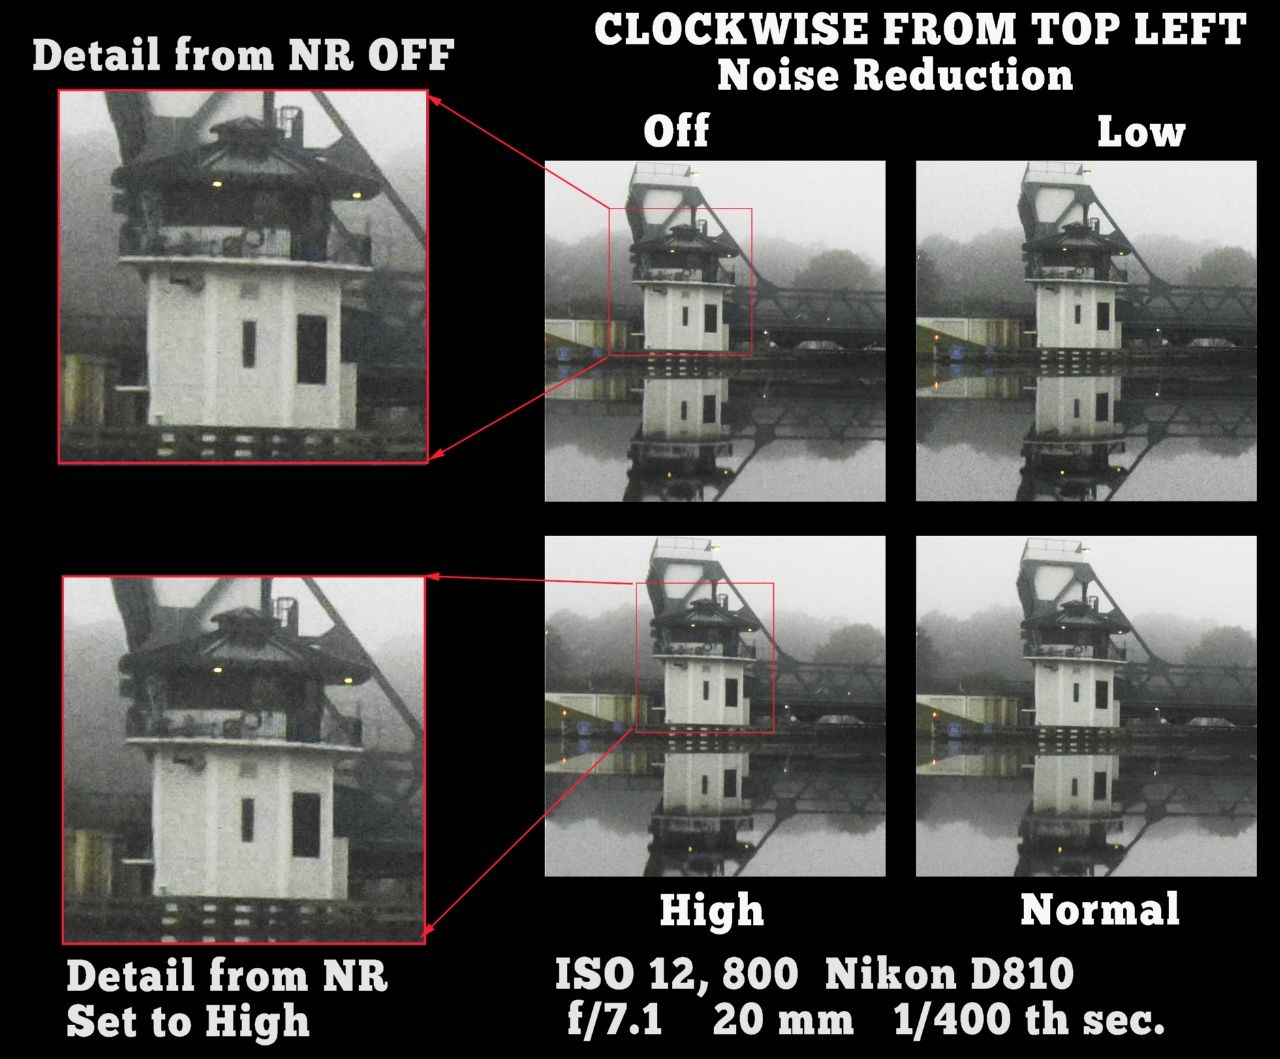
TRY ALL SETTINGS:
Most modern DSLR’s have built-in noise reduction. If yours does, find the noise reduction settings and try ’em all. A great practice is to test shoot a series of images using all the options: OFF, LOW, NORMAL and HIGH noise reduction settings. See which one you like and dial that one is. My choice is Normal ( see photo above).
If your camera model does not have a noise reduction setting, you can reduce noise in post-processing with Photoshop, Lightroom and other Plug-in Filters and programs such as NIK Dfine. Noise Ninja is also an excellent noise reduction program.
In Photoshop and Lightroom, avoid over-sharpening. Likewise, be gentle with the Clarity slider in Lightroom. Each of these actions increases the appearance of noise in the image.
STABILIZE
Using ISOs from 12,800 to 51,200, or higher, means the sensor will gather a lot of light, and because of signal-noise ratios, this creates noise. Since handholding a camera at night increases the likelihood of blurring our images, its a good idea to do 3 things: raise the ISO to the lowest level we can to still get a decent shutter speed, turn on noise reduction in your camera, and enable Vibration Reduction if possible (VR, IS, OS).
DIAL IT DOWN A BIT
Lower ISO’s are often preferred, especially when a print is the output. To reduce the appearance of digital noise in the final, print it is good practice to dial down the ISO a bit, especially for nature photography, and to use a tripod if possible .
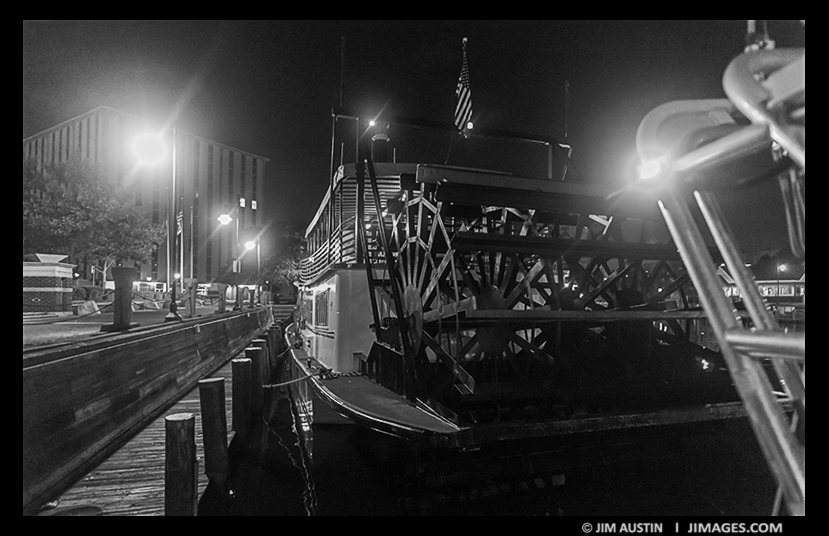
At night aboard ship, I had to hand hold the camera. While handholding my gear, 1/20th of a second was the slowest shutter speed that worked to ensure reasonably sharp photos. To keep a practical shutter speed, I used a more modest ISO, of 12,800, that was lower than the camera maximum.
The benefit of this compromise between shutter speed and ISO is to reduce time spent in post-processing doing noise reduction. As a result, more time was devoted to creative processing with the Silver Efx Pro filter from NIK Software.
IMAGE NOTES
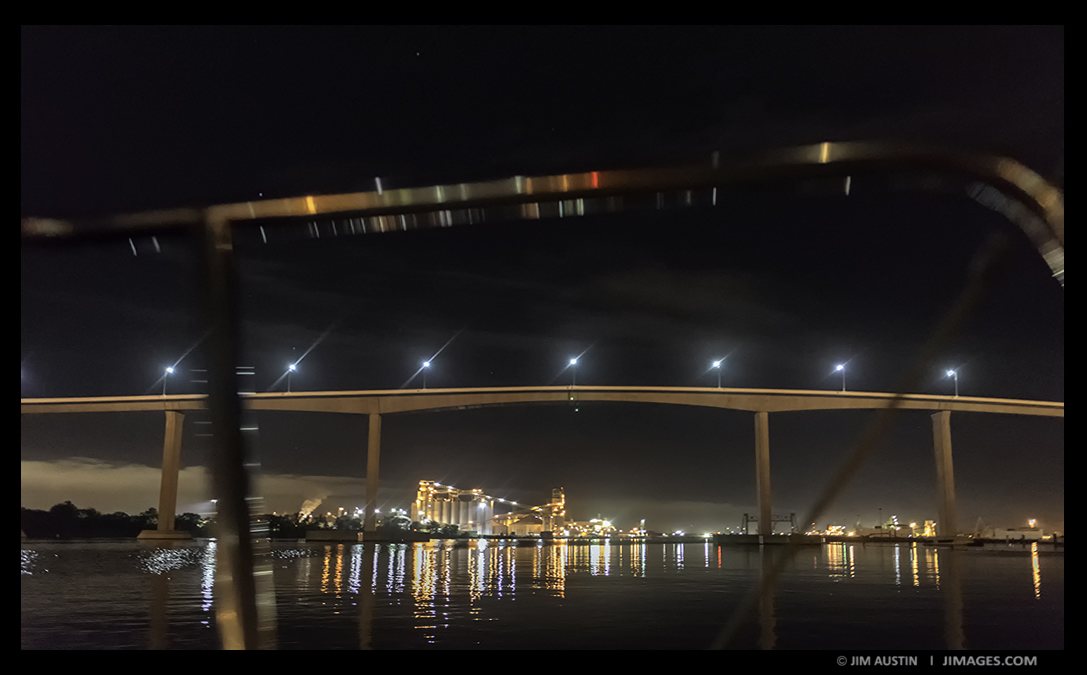
Taken aboard a sailing vessel underway, the capture details for these photos included: 20 mm Nikor lens on a Nikon D810, f/2.2, about 1/20th of a second, ISO 12,800 (the final image of container ship and solar panels was taken at ISO 2000). RAW captures were made in Aobe ProPhoto color space. Sharpening in Lightroom was Amount 45, Radius 1, Detail 3. Silver Efx Pro in post was used to create black and white versions, using the High Structure (smooth) setting.
As always, thanks for your comments. Jim

Leave a Reply