
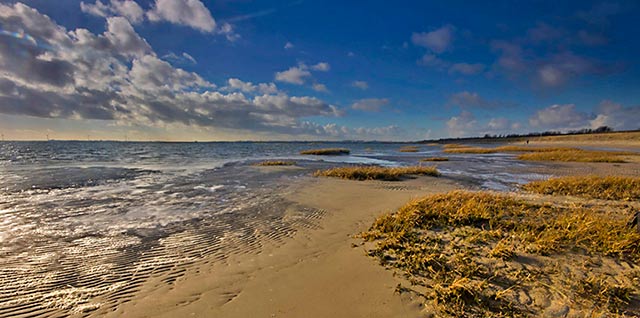
Look for the element of shapes within the image frame when creating
your seascapes. There are multiple triangles within this photo.
Sony Alpha 33 + Sigma, 10-20 f4-4.6, f/22, 1/20 sec.
Down by the sea… What a great location for all those photographers who enjoy all the attributes provided by the sand and surf. There are opportunities at every turn, so keep an eye out for ripples in the sand, shells and driftwood, rocks, moss, birds, people, clouds, wave action and so much more.
How can we make nice photos of these subjects? Here are some guidelines you can follow.
Equipment
To photograph seascapes it is important to first decide which camera lens you are going to use. The sea is expansive in size and width, so you’ll want to express that feeling to the viewer when you create your images. You can certainly choose to use a 70-200mm telephoto lens at times, but a wide angle lens is going to be your best choice to communicate the vastness of the sea and shore. Use any wide angle lens with less than a 20mm focal length, for instance, a 17-35mm f2.8 lens or similar to what I happen to use, a Sigma 10-20mm f4-5.6.
Keep that camera stable: To get very sharp images, use a tripod and a wireless remote control or cable release. This is especially important should you want to have your images available for printing.
First things first – be sure your camera sits level on the tripod – always. You will not want that horizon line sloping at an angle.
If your camera has the capability, take the time to set the horizontal level – called the EVL level on the Sony Alpha. Mostly used with live view, it is a very useful tool.
Use of Filters: Though it is controversial, a UV filter can help protect your lens from the sea spray, as you may need to clean you lens frequently. Try working with other filter options to eliminate the glare and enhance the colors – neutral density, graduated neutral density, circular polarizing and warming – until you get the look that you like.

When the sun is partially obscured by clouds, it provides a nice soft light on the beach.
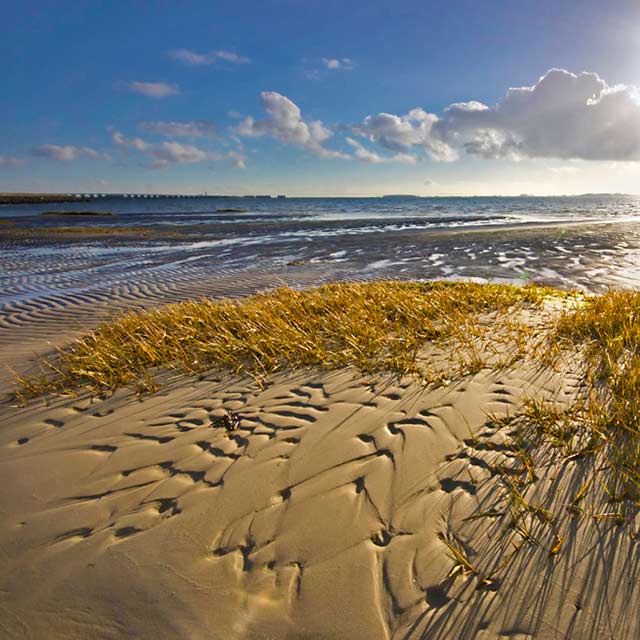
By including vegetation or other beach elements, a photo will have good depth
of field and give the viewer a sense of space.
Sony Alpha 33 + Sigma 10-20 f4-4.6, f/22, 1/25 sec.
Composition & Perspective
Vary both the direction and the height from which you photograph. Photographing from a low position, from the level of the beach for instance, can give you more depth of field. This is important because we can see 3D and our camera records in 2D.
Decide if you would like to show your images when the tide is in or out. When the tide is out, not only can you find some great objects, but you can find wonderful impressions left in the sand.
Look for the elements of lines, shapes, forms and color, and use foreground, mid and distant subjects to add interest to the image.

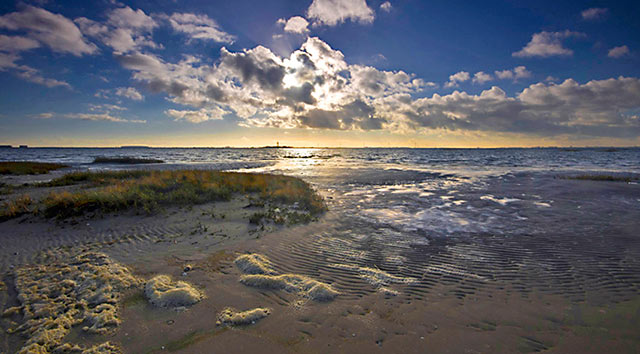
Find interesting objects to tell the story, and use diagonal lines,
both real and implied, to create a sense of motion and depth.
Sony Alpha 33 + Sigma 10-20 f4-4.6, f/22, 1/25 sec.
Be sure to try both vertical and horizontal formats in order to show the strongest point of view. During post-processing, you can also crop to a square format, which relays a sense of order and balance to an image.
The time of day you choose to photograph is also important. When the sun is lower or near the horizon, the light will be softer, have a golden glow and create beautiful long soft shadows. Harsh daylight renders too much contrast and hard shadows.
Long, soft shadows of the low grasses provide a sense of depth.
Practice photographing from different angles so you can select the best of what you see.
Sony Alpha 33 + Sigma 10-20 f4-4.6, f/22, 1/15 sec.
To get everything sharp in the image, set the focal point at 1/3 of the foreground and use an aperture setting that can reasonably achieve the depth you need, which is typically in the f/16 to f/22 range. But, do have fun and play with those aperture settings. An open aperture and shallow depth of field when focused on a foreground element can certainly make for some wonderful images.
The sea foam takes on the golden glow of the light.
Sony Alpha 33 + Sigma 10-20 f4-4.6, f/22, 1/20 sec.
Try to use manual focus or the camera will get confused as it searches for a place to focus. Depending on the desired look of the final image, the exposures will vary – faster shutter speeds to freeze the action of the water and slower shutter speeds to make it smooth and silky. Adjust your ISO and aperture accordingly – check the histogram for the correct exposure.
So when you are going to visit the sea, grab your photographic equipment and go for it.
Get inspired by the water and its surroundings and transform what you see into a photograph. Try it all and most of all have fun.
If you would like to share some of your seascape images with me, just visit my website and email them to me.
by Edwin Brosens
All text and photos: © 2014 Edwin Brosens. All rights reserved.
Leave a Reply