
 Years ago, when photographers used large format cameras for their commercial and portrait work, it was not uncommon to see images where the depth of field was very limited. On a portrait that meant only the eyes were really in focus, or in a product shot, all was blurry except the item that the photographer wanted the viewer to focus on.
Someone along the way found that an interesting effect could be created by tilting the front lens of the view camera so that the plane of focus was not parallel to the film plane, but instead angled front to back at an odd angle.
The effect was interesting because it created a field or plane of focus that was unexpected. Despite the fact that we expect objects the same distance from the camera to be in focus, for example the plane of a face, this effect had only some of that area in focus. In addition, one could discern a plane of focus going through that one spot, both front and back, that might also be sharp.
It was completely counter-intuitive and thus created an eye-catching effect. Large format cameras with tilt and shifts of the lens are the exception now, instead of the rule, but we can create a similar effect using Photoshop’s layers, masking and gradient tools. Let’s see how.
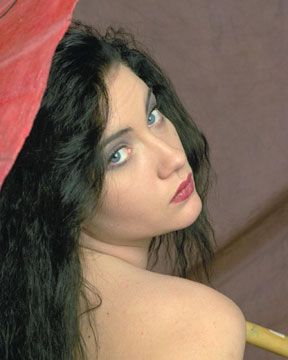
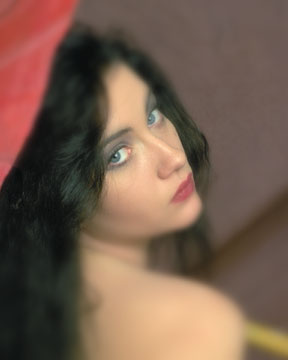
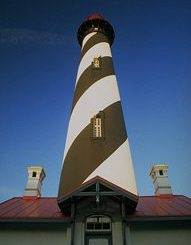
The image to the left is how we started. It is a pretty good image. The models eyes are quite attractive, but because the entire image is so sharp, they are not the center of attention. Let’s explore how using this selective focus method can change this.
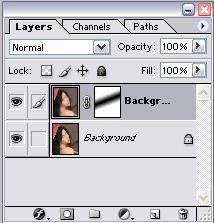
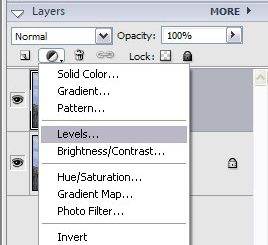
We will start out by making a duplicate layer of the background. You can do this by using Control-J (Command-J on the Mac) or by dragging the background layer to the duplicate layer icon at the bottom of the layer’s palette, as the next figure shows.
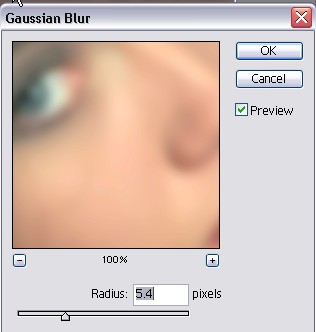
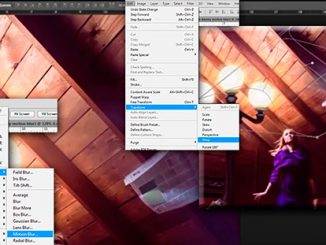
Next, we will perform a Gaussian blur on our new layer. In this case, I have chosen a blur value of around 5 pixels. The amount you choose will depend on the effect you want, as well as the size of your image. Larger image sizes will require higher values to produce the same look. After applying the blur, the new layer with the blur is all that we see.
With this new, blurred layer highlighted, click on the “Add Vector Mask” icon at the bottom of the layers palette, to create a mask on this new layer.
Now let’s choose the “Reflected Gradient” from the gradient menu, and apply this gradient to the mask.

This will create a gradient like you see below in the masked area of the second layer. You will notice that the gradient is at an angle. I chose this because of the angle of her face. I wanted the gradient to include the flat of her face. I accomplished this by pulling the cursor at an angle across the image. The result is that a black, linear gradient appears in the masked area. Remember that the black areas of the mask will allow the layer below to show through. Because the gradient includes grays as the gradient moves from black to white, the effect will not have a sharp edge, but will gradually transition from one state to the other.
At this point, we have created the image below. Remember, if the effect is a little too strong for you, simply adjust the opacity slider in the layers palette. You will find the image getting sharper or blurrier as you move the slider back and forth.
We are not quite done because this does not quite represent how a tilted lens would produce an image. As the image is now, the areas of the subject and the surroundings are uniformly out of focus. In real life those areas farther away and right up close to the the camera would be blurrier than the areas around our model’s face. Let’s fix this next.
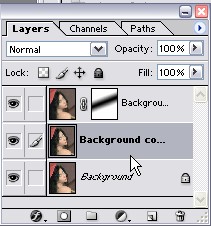

Duplicate the background layer again. At first, it will be above the original background, but below the masked layer. We want it above both layers, so we will drag that layer to the top of the stack. Now, we will perform a Gaussian blur on this new layer, but at a value that is quite higher than we did before.

When you click OK, the whole image will be as blurry as you chose in this operation. But we want some of the layers below to come through, so we will use the “Add Vector Mask” again, this time creating a circular gradient. Again, the black areas let the layers below peek through. What we have now is the lower layers appearing through the blur we just made, but in a gradual fashion: very blurry at the edges gradually becoming the sharp, lower layer in the center. This would be more what we might expect from a real lens.

Now we have the image below. Compare it to the original and intermediate steps.

Final image
Intermediate image
Original
by Michael Fulks
Leave a Reply