
In this age of high quality digital scanning and output, it seems that the days of the chemical darkroom are over. I’ll admit, it’s been five years since I shot a black-and-white roll of film for a client. There’s no demand anymore. However in this article I will explain how to build a darkroom.
Yet now, more than ever, the traditional darkroom has found its niche as a sanctuary for the true photographic artist.
Nothing can replace the excitement of watching your first print appear in the developer tray, or the control supplied by your choice of developer, dilution, and time spent processing film.
While digital methods (even cameras) can approximate a black-and-white photograph (and offer some definite advantages in terms of retouching and tonal control), there’s no substitute for the intangible, subtle quality provided by a conventional silver gelatin black-and-white print.
Processing and printing your own black-and-white photographs is not only easy, but it’s also very satisfying. While it’s possible to set up a temporary darkroom in a bathroom or even a kitchen, for reasons of health and safety, I don’t recommend either.
No matter how fastidious you are with chemical spills, you can never be certain you’ve cleaned the mess up completely enough, and you have to be especially careful when you’re working around food!
Black-and-white chemicals are not as dangerous as some color chemicals, but the difference shouldn’t be a justification for carelessness.
Years ago, Ilford published a warning to users of Ilfospeed developer that it could affect the sperm count of male users. Whether or not the warning decreased or, indeed, increased sales of the product isn’t known. But, as a general rule, treat all chemicals as if they’re poison.
Always clean up spills, wash your hands, and mix powdered chemistry outside or in a well-ventilated place. You can read my other article on darkroom safety advice here later.
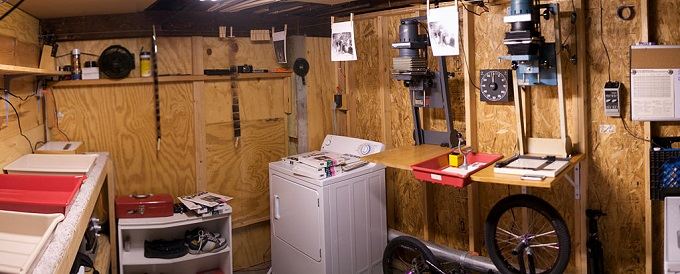
image – Wikimedia Commons
Here’s the step-by-step Rundown To Build A Darkroom:
(1) Find a suitable space. As previously mentioned, bathrooms are not recommended if you want to build a darkroom , but if you take extra care, they can be used temporarily as darkrooms. My current darkroom is housed in a small laundry situated outside my apartment.
I emptied, cleaned, and painted the room, which had been unused for years, and it serves the purpose quite nicely. Sheds are also a good option, although making them light-tight can be tricky–especially if the roof has no ceiling.
Look for a space that has running water, electricity, and a minimum of natural light. (These requirements may seem obvious, but I’ve seen friends try to set up darkrooms in spaces that offered none of the above, and the frustration of the experience made their life hell!)
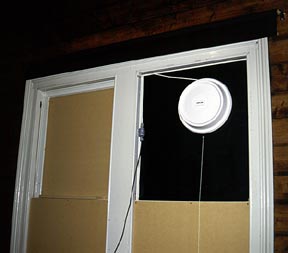
(2) Light-proof the room. Start by blocking out any window(s) with two layers of heavy black garden plastic. In situations where the room is multi-purpose, stretch the plastic over a wooden frame that hooks over the window while the darkroom is in use.
With the window darkened, close the door and look to see if any light is leaking around it. Felt weather strips are great for small cracks, but larger gaps need either a strip of wood nailed in place or a flap of black cardboard which overlaps the edge of the door.
A plastic or fabric curtain covering the door is another option, but it can be more of a nuisance than a help when you’re moving in and out of the room with trays or equipment. The inevitable light leak along the bottom of the door could be more difficult to solve.
Try using a pivoting draft-cutting strip or–as a temporary measure–a carpet snake! To test for effectiveness, go into the room on a brightly sunny day, close the door, and wait five minutes. This technique will give you an idea of the smaller cracks and crevices that need attention.
Take care of them before you begin using the room, and you won’t stress-out in tricky situations–for example, when you’re loading high-speed film into the processing tank, and you can’t see what you’re hands are doing! If light control seems impossible, maybe you’ve got a darkroom that can be used only at night.
In fact, if that’s when you’re most likely to have the time to process and print, this limitation might work out fine.
(3) Clean and paint the room. Using a brush or sandpaper, remove all loose material from the walls and seal them with an appropriate paint. Despite anything you’ve heard, white is the best color for a darkroom. If you’re worried about light bouncing around, eliminate the excess light source, because the benefits of having white walls outweighs any time you’ll have to spend blocking light spills.
An extra coat of sealant which can be wiped clean is worth consideration, too, because chemical spills will generally dry brown and be quite visible.
Also, clean everything thoroughly. It can’t hurt!
Plan distinct “wet” and “dry” areas. Chemical contamination of unexposed paper and splashes from the print washer reaching your main electricity can be not only frustrating but also dangerous.
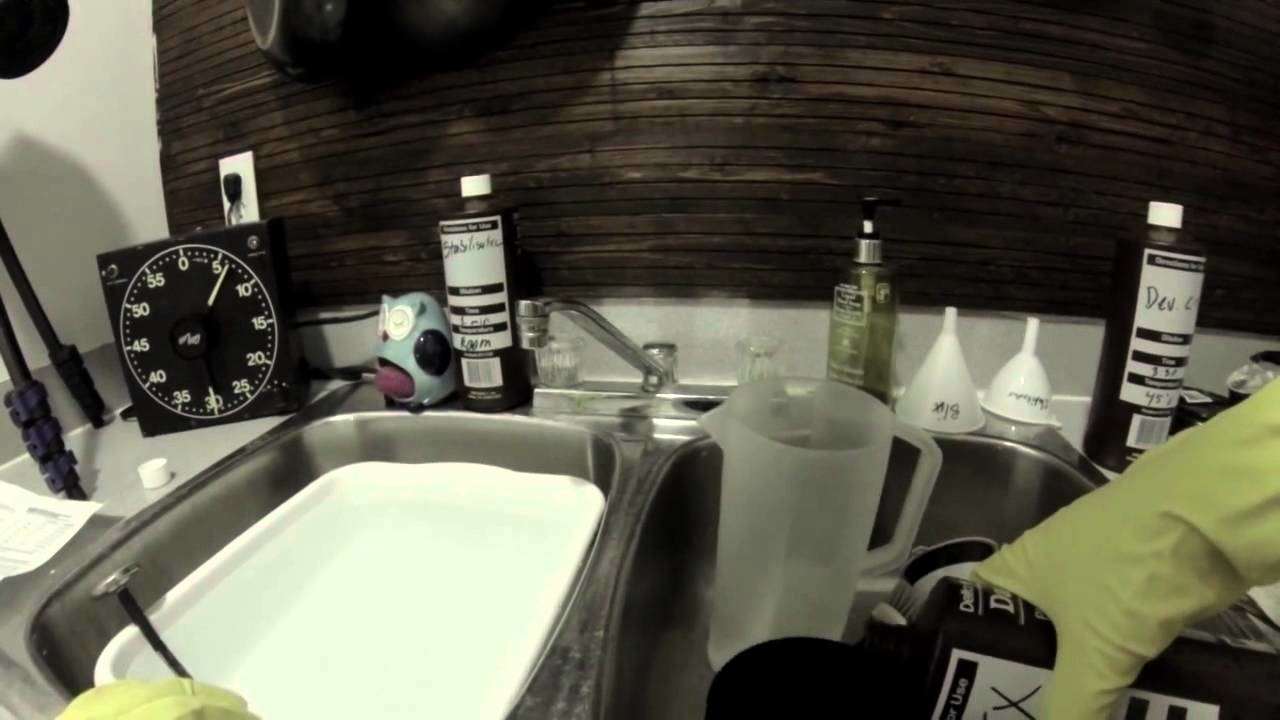
Wet Area
Dry Area
Adequate ventilation is essential
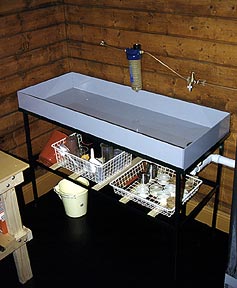
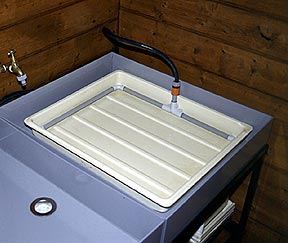
The Print Washer |
(4) Allocate ‘Wet’ and ‘Dry’ areas. Obvious as it seems, this advice is one of the earliest and most important decisions you can make. Chemical contamination of unexposed paper and splashes from the print washer reaching your main electricity can be not only frustrating but also dangerous.
If possible, locate your “wet” area near your supply of running water and the “dry” area near the electricity outlet (although where you place these areas is not as essential as the location of your plumbing is). Your “wet” area is for all storing and mixing of chemicals, tank and tray processing, and the washing of equipment.
The “dry” area is for your enlarger, storage of your photographic paper, and storage of equipment you want to keep ready for use–such as developing tanks. You may also hang a couple of old towels on the back of the door, so you can always have dry hands when you’re loading film into reels and printing.
(5) Provide some Ventilation. This is a difficult requirement when you build a darkroom, but one worthy of consideration. Ideally, you should install a light-proof extraction fan above the “wet” area, but such an installation is expensive and often impractical.
One alternative suggestion is for you to utilize a range-hood extraction fan to remove chemical fumes. These fans can be obtained quite cheaply from a building supply warehouse, and they’re simple to install as well as easy to light-proof.
Conventional extraction fans (such as those used in bathrooms) are even cheaper and can be installed into a ceiling above your “wet” area as long as there’s no stray light from skylights, etc. Be careful when you’re dealing with chemical fumes. Nasty symptoms can creep up on you, sometimes days after a printing session!
(6) Create bench space. First, you’ll need a bench, or ideally a sink, to accommodate three or more trays in which to process your exposed photographic paper. If you intend to produce only 8×10 inch prints, something as small as 30×12 inches could suffice, although in practice, a larger area is preferable.
As a general rule, it’s best to use trays one size larger than the maximum intended print size (e.g. 11×14 trays for 8×10 prints) for reasons of processing consistency and ease of use. If you’re careful with spills, a laminated bench is an adequate work area. Just don’t overfill your trays and be certain to clean up any spills as they happen.
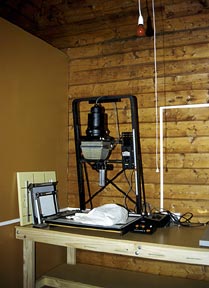
A “dry” bench needs to support the enlarger and provide space for the timer, paper, and negatives, as well. Keep this area as clean and dry as possible, and you’ll be rewarded with dust-free and predictable results. Often forgotten, but always essential is storage space for your paper, scissors, thermometer, etc. A couple shelves above the enlarger and a few drawers below should suffice.
(7) Organize your washing and drying facilities. Water quality can make or break the best of darkrooms, so it’s important to maximize whatever resources you have at hand. While a supply of hot water is not essential, clean, cold water is necessary for mixing chemicals as well as for washing film and prints. As a test, put a tray under the tap and run the water for fifteen minutes. If there are any particles at the bottom of the tray, you need a water filter.
Even if there isn’t any evidence of residue, a water filter is as useful to darkroom work as a surge protector is to a computer system. A cheap solution is a filter used for in-ground garden watering.
Wrap a few layers of stocking around the center element to catch the fine fragments before they get to your precious emulsion. A clip-on tap filter (costing about two dollars) is also quite effective, but be sure to change it regularly to maintain effectiveness.
Properly washing prints is an art in itself and can require a little forethought. On the simplest level, running water in a tray can work if it enters at one end and exits at the other. Otherwise, the water just circulates the chemicals and does little or no washing.
Sophisticated wash systems are an elaboration on this theme and can be homemade with a length of plastic tubing and a modified processing tray. Patterson water siphons are also quite effective as they clip onto the side of the tray and fill/empty it cyclically to reduce chemical residue.
The rule here is, don’t spend a lot of money. Experiment with what you have, and if it doesn’t work, use some homegrown ingenuity!
As with washing, drying depends on cleanliness of a different nature. Essentially, the longer it takes for the film to dry, the greater the chance of dust settling on the surface. So, a cabinet with a filtered supply of warm air is ideal. This also protects the film from chemical splashes and can be used to dry processing reels and warm the darkroom in cold weather.
For this purpose, I’ve utilized a vertical clothes drying cabinet (about $15) which has fan-forced air of varying temperatures. It doubles as a print-drying cabinet, and wet tanks and reels can rest on the top after use (they tend to melt inside). An option to this is a fan-heater located inside a homemade cupboard, but make sure there are vents to allow air in and out, or you might have a fire on your hands!
(8) Set up a safe light. This installation may seem easier than it really is, as its installation is always a compromise between the potential fogging of paper and the ease with which your darkroom can be used. With modern, multi-grade papers, the correct color of safe light is more important than ever, so be sure to check the bulb/filter with the paper you’re planning to use.
This can be done when your darkroom is up and running by placing a coin on a blank sheet of photographic paper and leaving it illuminated by safe light for ten minutes or so. If the coin’s outline appears once the paper is processed, you might have a problem.
Bouncing your light off the ceiling will reduce potential harm to your paper and spread the light evenly throughout the darkroom. This trick will also minimize shadows and reduce the need for you to have multiple safe lights. If you’re still having problems, reduce the globe’s wattage to 25W or as a last resort, use a red rather than a traditional amber filter in the safe light enclosure.
(9) Choose an enlarger.

While this choice may be made for you (by a hand-me-down from a family member or whatever), there are a few factors to keep in mind:
* Maximum print size. Don’t assume you’ll print only 8×10 inch prints, as the restriction will limit your possibilities if you ever need to enlarge a smaller portion of a negative or print an “all-important” family photo for Auntie Marge!
* Maximum negative size. 35mm might be okay for now, but if you borrow a medium format camera or offer to print some old family photos, 120 format capability is very useful. Also, 35mm-only enlargers tend to be shoddy in both design and construction, so a little extra money spent is often worth it.
* Condenser versus diffuser. For the uninitiated, most black-and-white enlargers are of the condenser variety, which means that the light is evenly spread across the negative by a large chunk of glass with a big curve in it. Diffuser enlargers tend to be designed for printing color negatives and transparencies, although they make excellent black-and-white enlargers, as well, depending on the type of images you’re printing.
Condenser is great for graphic, sharp, and contrast-filled images requiring maximum sharpness and definition. This is not to say that diffuser enlargers are “soft,” but they tend to be more appropriate for printing portraits and images with subtle shadow detail.
If you can afford a color enlarger, I’d recommend buying one, because the color filtration controls can also be used to adjust the contrast when you’re using multi-grade papers. And, who knows, maybe one day you’ll try a little color printing as well!
To match your negatives to the lower contrast of a diffuser enlarger, a small increase in your development time might also be necessary.
* Enlarger brand. There are a large number of well designed and manufactured enlargers on the market, so it’s no easy task to choose one, even given the options outlined above. As a rough guide, your choice has to be common enough to enable you to obtain parts and accessories easily and well made enough so it won’t disintegrate on the first print you attempt.
Reputable brands include LPL, Durst and Bessler, although there are heaps more. The enlarger you end up buying is as personal a choice as buying a car (although, hopefully, a little cheaper). Check that it has a standard lens mount, an option for a glass-less negative carrier, and that globes for it are affordable and easily obtained in your area.
Also like a new car purchase, you’ll get what you pay for.
* Enlarger lenses are probably more important than your choice of enlarger, because they directly affect the optical quality of the final print. The brand of optic you choose is as much taste as your ability to finance the purchase, but you generally can’t go wrong with Nikon, Rodenstock or Schneider lenses.
Buy a lens that matches the standard lens of the format you’ll be printing (e.g. 80mm lens for 6×6 or 50mm lens for 35mm). You can always use a longer lens for a smaller format, but your prints will be smaller.
* Enlarger timers are neither cheap nor easy to obtain second-hand. Given these problems, there is a bewildering assortment available for purchase new and any number of accessories to go with them. Don’t waste your money. A simple timer with 0-60 seconds and a provision for focusing the enlarger will be fine.
Digital accuracy to 0.1 second is rarely necessary (you can always stop-down to increase the exposure time), and gadgets such as meters are generally necessary only in commercial darkrooms.
* Easels and focus-scopes are often forgotten in the rush to buy the enlarger and lens, and they’re just as important in the production of the final print. In the same way as timers can drain your bank balance, both easels and focus-scopes can be either expensive or VERY EXPENSIVE! As always, it’s best to buy something well made and easy to use (I use LPL products for both). You can upgrade when and if you win the lottery!
(10) Start Processing and Printing!
Of course, don’t forget all the other bits and pieces you’re going to need when you build a darkroom.
* Processing tank(s)
* Scissors
* Wall timer
* Thermometer
* Trays
* Tongs
* Measuring jugs
* Proofing frames or just glass
* Burning in /dodging tools
* Towels
* Squeegee for fiber prints
* I’m sure you’ll think of more stuff as the need arises!
Good luck!
By: Chris Groenhout
Useful article thanks