
There’s one area in photography that causes more confusion than any other–exposure control. Camera companies capitalize on this confusion by creating ever more complex cameras which supposedly ensure perfect exposures. Whole books have been written on the subject, yet the confusion continues. Why? I’ll explain exposure in simple terms. For any photographer, good exposure control is essential in the quest for stronger photographs.
Film needs a certain amount of light to produce the chemical reaction leading to an image. The light meter was invented to measure the light on the subject. Knowing the level of light allowed the photographer to set the shutter and aperture to the proper combination.
The first light meters were simple instruments, using a selenium photocell to power a moving needle. They worked pretty well in bright light but were delicate, slow to react, and expensive. The next development replaced selenium with cadmium sulfide. These meters worked much better in low light but still had problems. Today’s technology uses such materials as silicon photo diodes to give us durable meters of wide-ranging sensitivity and precise accuracy. It would seem, then, that such meters have solved the problem of exposure. Solved? Not quite. The problem lies not in the meter but in the creature using it!

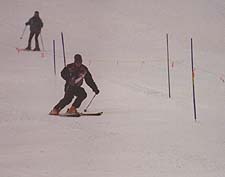
Snow pictures can come out white, like this…
Or gray like this. The difference is knowing something about how meters work.
Meter design
There are two main meter types: the hand-held meter and the built-in camera meter. Twenty years ago, the hand-held meter was king. The early built-in meters were not nearly as sensitive and accurate as the hand-held type. But as electronics improved, the built-in meters took a giant leap in quality. Today’s cameras have such good meters, there’s little cause to buy a separate, hand-held meter. The exception might be the professional who needs extremely accurate spot meter readings, flash exposure reading capability or incident light readings. The disadvantage of the hand-held meter becomes apparent as you use filters, extension tubes or anything that changes the light coming through the lens. The built-in meter always sees and reads exactly what the lens sees, so it’s to our advantage to use the camera meter whenever possible. A built-in meter is always a reflected light meter. A hand-held meter can be built for reflected light, incident light or both.
If this built-in meter is so good, then why the continued problems with exposure control? It all has to do with the way a meter is designed. Every meter built is calibrated to read a certain value. It’s much like a car speedometer which is calibrated to read the actual speed traveled. Or a thermometer which is calibrated to read the correct temperature. When the light meter was first invented, the scientists went outside and measured the amount of light reflecting off a typical landscape scene. It turned out, the amount of light reflecting was about 18 percent, so they used this value to calibrate the light meter–no different from sticking a thermometer in a glass of ice water to find the freezing point.
To human vision, a piece of cardboard reflecting 18 percent of the light hitting it appears a middle gray. In fact, any object which reflects about 18 percent of the light looks mid-toned to our eyes. Now, as I’ve said, a light meter is not really smart. Why? Because the light meter doesn’t know what it ‘s looking at! Since it doesn’t know, the meter has to make an assumption. And guess what assumption it’s going to make…Yep, that the subject is reflecting 18 percent of the light!
So far, so good. And, indeed, if everything in the world reflected 18 percent, exposure problems would never occur. Or, if we photographed only stuff which had 18 percent reflectance, all our exposures would be perfect. Of course, neither of these states exist in real life.
And then, a genie happens…
At this point, let me introduce you to my friend, the genie. This genie lives in your light meter and has one job in life–to turn everything it sees into a middle tone. If it does that, it’s happy because it did its job perfectly. Understanding the goals of the genie is your ticket to understanding exposure.
Consider an average outdoor landscape that reflects 18 percent. If we point our camera at this scene and let the genie do its thing, we get back a slide which is right “on the money.” The genie is happy; you’re happy; everyone’s happy! But for our next shot, we point the camera at a black cat. Our genie studies the cat, assumes the cat reflects 18 percent, and provides an exposure to give a mid-toned black cat. But a mid-toned black cat isn’t black; it’s gray! The genie is happy, but you probably aren’t. In order for the genie to produce a gray cat, it called for MORE exposure than normal. This extra exposure lightened up the black fur into gray fur. So, if you wanted the cat to stay black, you would’ve had to allow LESS exposure than the genie requested. The actual adjustment needed would have been about one f-stop LESS. This lesser exposure would have kept the black cat from washing out to a gray. Remember, when I say “one stop,” that can mean either one f-stop or one shutter speed since they are equivalent.
Next, you find a white ptarmigan (which looks a little like a wild pigeon-ed.) in a snow bank. Of course, our genie doesn’t know much about wildlife, certainly not ptarmigans. So, it does the only thing it can do–assume the ptarmigan is middle-toned or about 18 percent reflectance. You get the slide back, and, sure enough, the beautiful white bird is now a gray bird. Same, but opposite problem as the gray/black cat. To make a gray ptarmigan, the genie called for LESS exposure, thereby creating a muddy gray tone. To actually obtain a white bird, you need to give MORE exposure, about one f-stop more.
Please read the proceeding two paragraphs again, for they are the crux of the exposure dilemma.
backwards seems all It
Part of the problem, I think, is that it all seems backwards! I remember as a young child, I would go out photographing in the winter. My brain decided that with all that white snow, it was really too bright. So I always gave less exposure than my trusty handheld Sears meter called for. That was exactly the opposite correction from what I should have applied. By giving less light, I actually got black snow. Since this was when I used b/w film, I played hell in the darkroom trying to get a decent print. It was to be many years later, at a Nikon seminar, that I finally had the mysterious workings of a light meter explained.
Cardboard magic
There are four basic ways to shoot a black cat and keep it black or to keep a white bird, white. First, you can get a humble piece of cardboard, called a Gray Card. I buy these in 8×10 inch sizes and cut them into 4×5 sizes for field use. This 4×5 size costs about fifty cents! I then hold the gray card in front of the cat, so the light is hitting the card the same as it’s hitting the cat. I take a meter reading off the card, remove the card, compose and shoot. Like magic, my cat’s back to black. By using the gray card, I’ve calibrated the meter for the light hitting the cat. The genie doesn’t know the reflectance of the cat, but it DOES know the reflectance of the gray card, so the exposure is perfect! The sales people from the various camera companies shudder every time a photographer picks up this stupid chunk of cardboard, because they want to sell their special camera.
Secondly, if you don’t have a gray card, you can look for something middle-toned in the scene that’s in the same light as the cat. Take a reading off this substitute gray card, recompose on the cat and trip the shutter.
Thirdly, if you don’t have a gray card and you can’t find a substitute in the scene, you probably have your hand along! And, if you can find your hand, open it up, hold it in the same light as is hitting the cat, take a reading off your palm, and shoot the photograph–AFTER you open up one f-stop. (Because your palm is about twice as bright as a gray card, you must open up to compensate. Just remember: you open up your hand to take the reading, so you open up one stop.)
Finally, if none of the preceding adjustments appeal to you, you can usually just close down one stop from the reading for a black subject or open up one stop for a white subject.
Special considerations
Snow presents a special challenge, as it’s about 2 1/2 stops brighter than 18 percent gray. Using a gray card with snow indeed gives you white snow. But, since pure white snow doesn’t show any texture or detail, you actually want a slight underexposure, so that it looks good on film. To shoot snow, I gray card it, then give one f-stop LESS. This underexposure gives the snow some detail. OR, you can meter the snow directly and give 1 1/2 f-stops MORE light. This may sound confusing, but either method gives the same result–a one stop underexposure, thereby maintaining texture.
The best way to use gray card metering is with the camera in manual mode. I often have students who faithfully use the gray card while the camera is set to auto or program. As soon as the card is removed, the genie quickly recomputes a new and erroneous value. For most folks, the hardest part of learning the gray card system is actually learning how to use their camera on manual!
Is correcting exposure really this simple? Yes. I call the gray card, The Incredible Exposure Machine! What are some pitfalls to avoid? Some gray cards have a surface sheen to them that can throw the reading off a bit. The new Kodak gray cards now have a duller coating to help avoid this. The Delta brand of gray card is also good, and they have a plastic type which lasts longer. Always hold the card so the light is hitting it the same as is hitting the subject. Don’t tilt the card, or the shadow cast will cause an inaccurate reading. Hold the card close enough to your lens so the card is all the genie is seeing. Replace the gray card as it becomes dirty. That’s pretty much it. For you technical types, a gray card is Zone V. But don’t think that gray cards only apply to black-and-white photography. For this reason, I sometimes give students red, green or blue cards that I have measured to be sure they’re reflecting about 18 percent. I make these from scrap mat board left over after I’ve been framing photographs.
Many times you’ll be in different light than your subject is. For example, you’re shooting a sunlit mountain in the distance, but you’re in overcast light. The gray card won’t work here, so just find a substitute middle tone in the sunlit scene and meter off that. This is where a spot meter is more accurate than an averaging meter. Most camera meters are center-weighted, meaning the genie is looking mostly in the center part of your composition.
Some of you may be thinking an incident light meter is the solution. It’s true that an incident meter functions like a gray card. You just hold this meter close to the subject, letting the light hit it, and it automatically gives you a proper reading. But the problem begins as you start adding filters or extension tubes, etc., for now you’re required to perform all sorts of mental gymnastics with filter factors and such. Why not just use your built-in reflected light meter? It’s a lot easier.
Understanding how the genie works gives you control you never had before. The fancy meters on the new cameras promise that, somehow, they’ve mastered exposure. This is a total lie. Sure, a matrix type of meter takes several different readings, but it still does NOT know what it’s looking at! So how does that help us? Slide users, especially, will benefit from the gray card. Slide film has a very narrow latitude. In fact, slide film can record only about a four-to-five stop range of light. Such a range is less than the usual sunny scene. By careful metering, you can place these four or five stops where you want. The newest slide films–like Velvia, Provia and Lumiere–require even more accurate metering than did Kodachrome and Ektachrome.
Guess-timating
Most of the time, you aren’t shooting black cats or white birds but a middle-toned something. So, just figure out how close to a middle tone your subject really is. If the aspen leaves are a little brighter than a gray card, then give a little more exposure–perhaps a half stop more. With practice, you can judge subject tones amazingly well. You can actually develop a genie of your own in your brain. By the way, a north, clear-blue sky in the middle of the day is sometimes about 18 percent! But, be careful of those who tell you that green grass is always 18 percent. The reflectance of grass varies greatly with moisture content. Brown paper bags are usually 18 percent–as is concrete. Many gray camera bags are deliberately made 18 percent .
A useful exercise is to go to a picture frame shop, and get several pieces of scrap mat board in various colors. Take them home, meter a gray card and compare each mat to that reading. Write the value on the back of the mat. If the mat was a half stop darker than the gray card, write -1/2 on the back. Then, shuffle the deck and try to estimate each card’s brightness as compared to middle tone. Do this several times over a few weeks, and you’ll be surprised how good you get! Now, just transfer this knowledge to real-world subject matter.
Finally, realize that the exposure you want isn’t necessarily the correct exposure. You might actually want your subject to be darker or lighter than what’s correct. When you point the genie at something and let the genie figure the exposure, you’ll get a subject that is middle-toned. Knowing this, you can easily give a bit more or less light to get the exact exposure value that your emotional side wants.
As a recap:
-
If the subject is lighter than mid-tone–open up (give more light), or use the Gray Card!
-
If the subject is darker than mid-tone–close down (give less light), or use the Gray Card!
-
If the subject is very light, decrease the gray card reading by % to 1 stop. If the subject is very dark, increase the gray card reading by % to I stop.
These last two situations are moderate exposure adjustments compared to the large errors that would result if you made readings directly from very light or very dark subjects.
Now you know the truth about your camera meter. The sooner you learn how the genie works, the sooner you can get on with CREATING good photographs.
by Steve Traudt
Leave a Reply