
How to shoot a moving object
Panning
You can obtain sharp images of a moving object with a hand held camera using the technique known as panning. Let’s say we’re preparing to shoot a horse and rider in a trot from the side as was discussed in Part 1. I first decide where I’ll click the shutter. How far away do I need to be? Will the background add or detract from the shot? Will I be able to see the entirety of the horse uninhibited by brush or trees? Since the horses are following a defined trail, I know the spot on the ground where they will pass. I next prefocus on that spot.
Now I wait for the horses. As they approach, I frame each one within my camera, following it until it crosses my prefocused spot. At that moment, I click the shutter and continue to follow through. In other words, I’m always in motion–at the approach, at the target point, and as the horse and rider leave. I’m trying to hold the image of the horse and rider within my viewfinder. If I want the horse and rider centered, I try to hold the horse and rider centered throughout my entire sweep. Most of the time, however, I don’t want them centered. Good composition calls for having the horse slightly off to one side, so it’s traveling into the picture.
The shutter speed I choose will affect the results of my shot. A high shutter speed will result in both the background and rider being sharp. This is okay, and most people will like the product. However, if you want to communicate the motion of the horse to your viewer, you’ll want to do something a little different. You’ll need to use a slower shutter speed.
You were probably taught the rule about using a shutter speed equal to or faster than the focal length of your lens. In other words, if you’re using a 50mm lens, then you want to use a 1/60 of a second or faster shutter speed if you’re hand holding the camera. Try this in your first tests. Usually this speed will suffice in causing the background to be slightly blurred while maintaining the sharpness of the moving object. You can, however, use an even slower shutter speed and still have an acceptably sharp object against a blurred background. You can also use an even slower speed to create a very artistic impression. I’ve chosen a series of photos to illustrate the effects of the slower shutter speeds.
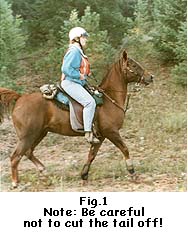
The first picture demonstrates the effect of a very fast shutter speed. In this case it was 1/500 second. As you can see, the horse and rider are sharp against a sharp background. If you could use this shutter speed effectively all of the time, it would be fine. However, it’s not always possible to shoot at that speed. Also, note that we know the horse is moving only because of the position of its legs. If the subject were a car, could we tell from the picture whether it was moving or not? No.
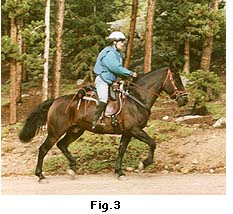
The next figure shows the effect of having your camera on a tripod as you select a somewhat slow shutter speed. As you can see, the background is nice and sharp, but the horse and rider are not. In this set up, the slower the speed, the blurrier the rider will become. If you were to use an extremely slow shutter speed, the rider would all but disappear. (Incidentally, you can use this technique to clear out a street scene where the pedestrians are not too packed together and are moving.)
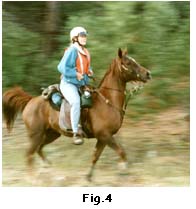
What happens when you pan? In the next photograph, the horse and rider are fairly sharp, but the background shows some motion blur. This blurring is acceptable in that it conveys the sense of motion, but still shows the horse as sharp. Note the blurring of the hooves.
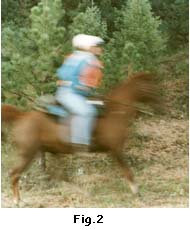
In the next picture, you can see even more blurring of the horse and rider. Most times the client will not feel fuzzy subjects are acceptable–again, because horse owners/riders want to see as much as of their horse as possible. As a photograph, however, the picture is fine. It conveys a sense of motion, but doesn’t distort too much.
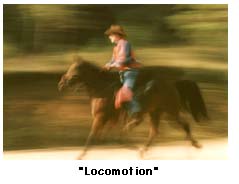
The last picture I took at ¼ second. Here the intent was purely artistic. It’s impressionistic. It’s a wonderful blur of subject and background, giving us the impression of motion and speed. The subject of the photograph is the motion and speed, not the human and horse–which, of course, is why you will not sell this photo to this rider. Unless they appreciate the product as artistic expression, most people will consider this photo a mistake.
In closing, the most important piece of advice I can offer is experiment. Find out what speeds work best for what you’re shooting, taking into account the focal length of the lens, the speed of the moving object, and other factors such as the client’s tastes. And then practice. You may find you lead too much and you consistently cut off part of the subject. Then you’ll need to figure out how to compensate to center the subject better. With a little effort, eventually you may discover you, too, really enjoy shooting horses.
by Michael Fulks
Leave a Reply