
Photographing children can be a challenging undertaking, yet the results are perhaps some of the most rewarding for the photographer.
Universally cute and without the self-consciousness of adults, children’s portraits pose a great opportunity for you to be creative in your photographic endeavors, resulting in memorable and cherished images.
Whether it’s for friends, family or a business client, you would be hard-pressed to produce an image that the doting parents would not like if you follow a few of tricks of the trade.

First, you need to think about how to make your photos outstanding. The challenges of photographing children are varied and the nuances of how best to capture the personality of each child will change depending on their interests and age, so if you know a bit about the child in advance, it gives you the opportunity to be more prepared for a successful photo photograph.
Babies are arguably the easiest to photograph, as they are not yet able to run away and can be placed strategically to take advantage of the best light or background. They may be wriggly, but they’re not mobile, so remember to take advantage of this by varying the direction and height from which you are photographing.
By getting down to their level or by photographing them from directly above, it will give your images a fresh and vibrant feel.
A popular photographic approach with very small babies is to focus on their tiny size. You can contrast a parent’s hand with the baby’s little hand, take a photo of both of their feet or……use your imagination for a composition you haven’t seen previously.
Babies don’t stay so small for very long, so try to capture a sense of their vulnerability and size and you can be sure that the parents will love the results.
In my experience, the most challenging young subjects are toddlers. Too young to follow directions yet, they tend to spend their time running backwards and forwards, tripping over objects, and placing things in your photo that you would really rather not be there.
The key to obtaining good portraits with this age group is to really find things that fascinate them for at least short periods of time, be fast on your feet and really know your camera setting well.
A good game to play with kids of most ages is ‘peek-a-boo’ or some variation of it.
Get them laughing and giggling naturally and you will end up with lovely, natural smiles. Laughs and smiles create engaging portraits that all parents will love. Also try to get some candid photos of them while they are absorbed in other activities that they enjoy.
Older children can respond well to a photo session, especially if you can develop a good rapport with them. Remember though, they tend to get bored quickly. Keep thinking up new games and distractions, and get them involved in the photograph.
Show them the photos on the back or your camera. Even let them take a picture or two of you. The more engaged and relaxed they feel with you, the better you will be able to capture their unique personalities.
Understanding Light When Photographing Children
Your photographic approach to children is only one piece of the puzzle. As in every type of photography, good lighting is a fundamental ingredient for great portraits. Yet, you don’t need an expensive studio kit. With a good understanding of the different qualities of light, amazing portraits can be created using only natural light.
If you want to take child portrait photography a bit further, add some simple tools to your repertoire and you can achieve different results. The key to unlocking good lighting techniques is to remember that there is no right or wrong way to approach lighting, and I would hesitate to listen to anyone who dogmatically advocates natural over flash lighting (or in fact the reverse).
Different situations require different light, so have an understanding of the principles of lighting and you’ll know how to best approach each situation.
All photographers have their preferred lighting approach, so it is worth taking the time to find out which one works best for you—maybe it will be both.
Natural Light
Nature’s lovely light can make your portraits look amazing, but to get the best out of it you need to understand that natural light has different qualities. We may enjoy being outside under the bright sunlight, but many beginning photographers quickly learn that bright light is not “good” light. It will create harsh shadows and will usually make your subject squint, creating unflattering results.
An overcast day, which looks and feels grey, is actually the perfect light. All those clouds in the sky, creating a big white blanket, end up working like an enormous soft box* that diffuses the light giving it a beautiful even quality. There will be minimal shadows on your subject and a soft glow to your images.
*Note: A soft box is an enclosed black box that fits over a flash head or tungsten lamp and is made with a reflective interior and a translucent front where light passes through.
Photographing Indoors
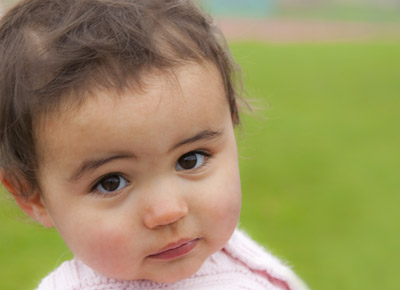
If photographing indoors, try moving next to a window. Open up the aperture as wide as your lens will allow, so you can catch the maximum amount of light falling onto your camera’s sensor. As a general rule, the corresponding shutter speed needs to be above 1/60 of a second.
Anything slower could introduce movement and/or camera shake, which will result in a blurry portrait. The soft light coming in from outside will not only produce striking portrait results, it should also give enough illumination to ensure you get a well exposed image.
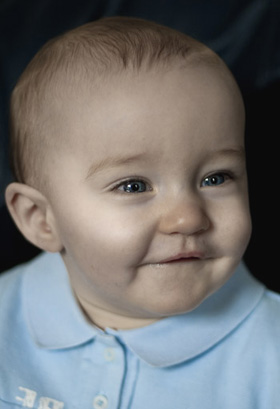

Note: Be careful when using a very wide aperture. The depth of field that it creates will give a pleasing, traditional portrait effect, but much of the subject will fall out of focus. Ensure that you focus properly on the eyes, as it is the most important part of the image to have sharp. A wide aperture will not be forgiving of small mistakes. Get it right, however, and the results will be stunning.
In this example above, the light source is coming from a window behind the camera and the background is a dark sofa. The day this session was photo was a typical grey winter UK day, but there was just enough daylight coming through the window to softly light this gorgeous baby.
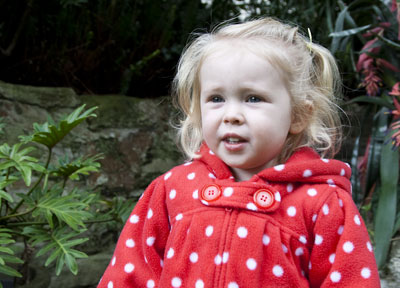
Reflectors
Reflectors are an inexpensive and invaluable addition to your photographic toolbox. They are a simple way of getting light bouncing back onto your subject if there isn’t enough coming naturally from the direction that you want.
You will probably need someone to help you out by holding the reflector and following your instructions. Most people are thrilled about getting involved in the session and enjoy the role of assistant if called upon, so don’t be shy to include friends, parents and even siblings.
Hold the reflector below the subject’s face and tilt it upwards at an angle of roughly 45 degrees. This isn’t strict mathematics, so keep moving the reflector around, while keeping an eye on how it is affecting the shadows on your subject’s face.
Use the silver side of the reflector for a crisper light, and if you prefer to add warmer tones, flip it over and use the gold side.
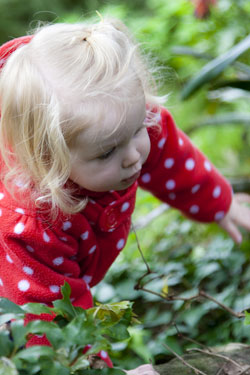
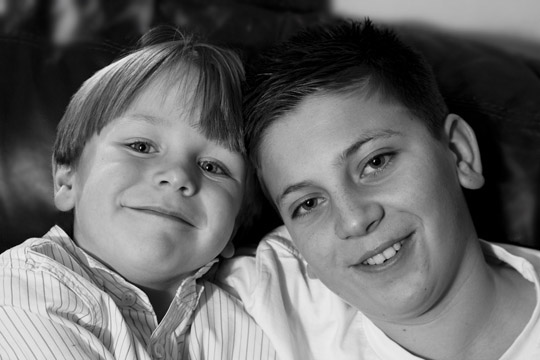
Reflectors are particularly useful when added to sidelight from a window as in this photo to the left. This angle of light creates dramatic shadows and an interesting effect. If that is the result you seek, there is no need to do anything else.
If, however, you are after a result with less contrast, hold the reflector on the opposite side from the window and the light will bounce back in and remove most of those shadows.
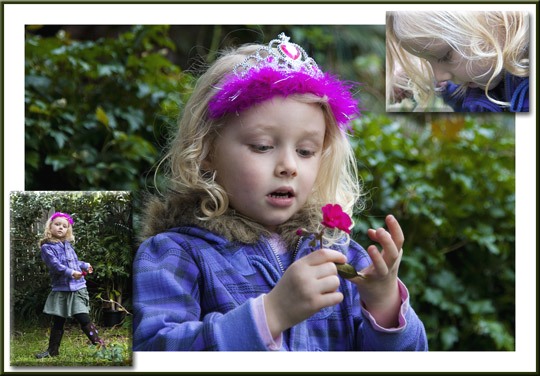
Flash and Umbrellas
Learning how to use a portable flash unit will really open up your options when taking portraits, especially with those energetic toddlers! Using flash as your light source gives you much greater control over your shutter speed, which means you can get fantastic action photos of that exuberant kiddie and still have a beautiful, crisp image.
A simple flash set up will include a speedlight flash*, an umbrella, umbrella stand and remote hand-held triggers. The flash will be your biggest investment, but the rest of the gear is relatively inexpensive.
*Note: A speedlight flash produces strobe type flashes which produce much shorter and more intense bursts of light.
By photographing the flash through a photograph-through umbrella (flash pointing towards the subject and the light passes through the translucent material) or bouncing the flash backwards into the inside of an umbrella (white umbrella with a black background), you are scattering the rays over the scene and your subject.
The result is even lighting that illuminates your portrait. And by taking the flash off your camera and placing it on a stand, you can control from which direction the light comes. Finally, by using a hand-held remote trigger, you can be photographing from different angles and directions from the light source. The results are evenly lit images with soft, flattering light.

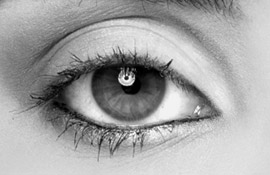
The other advantage of using flash lighting is that you will always get catch-lights in your subject’s eyes. Catch lights are those little glints of light that add sparkle in the eyes of your subject and are an important element in good portraiture.
And don’t forget, flash lighting can be used outdoors as well as indoors, and is a good tool for overcoming harsh, bright midday sunlight. Also, shadows falling from a building or other source of shade also work well and they are a free resource.
If you are looking to improve your portrait photography, really take some time to learn as much as you can about both natural and flash lighting. Invest time in learning about the different qualities of light and take advantage of the ease of using digital equipment to keep experimenting.
If you have the money to invest in some simple lighting equipment, all the better. You will open up the doors to a variety of portrait opportunities.
The key to all of this is trial and error, and experimentation. No amount of theory or reading can substitute for good old-fashioned practice. Just keep having fun with photographing children .
by Cathy Topping
Article and photos: © 2014 Cathy Topping. All right reserved.


Leave a Reply