
There are at least three good reasons to do aerial photography:
~ A client needs your aerial photography skills;
~ You want to create Art with a different perspective;
~ Because you can – for the excitement and fun.
An aerial photography business requires the same set of skills and attention given to the craft of sports, landscape or wildlife photography, but in order to be successful, some additional knowledge will be needed.
Aerial photography can provide a new set of photographic challenges and rewards.
The Aerial Article Series
In this series, I will discuss how certain camera settings and features of equipment will impact the end results in an aerial environment. I will review some of the fundamentals of digital photography as they apply to aerial work and explore some topics that you may not have considered (nor are necessary) with ground-based photography.
So why do aerial photography? Above all, because it’s fun! Not only will it expand your photographic horizons (literally), but it will provide a new perspective on the craft and possibly help to launch an aerial photography business. Put simply, things look different up there!
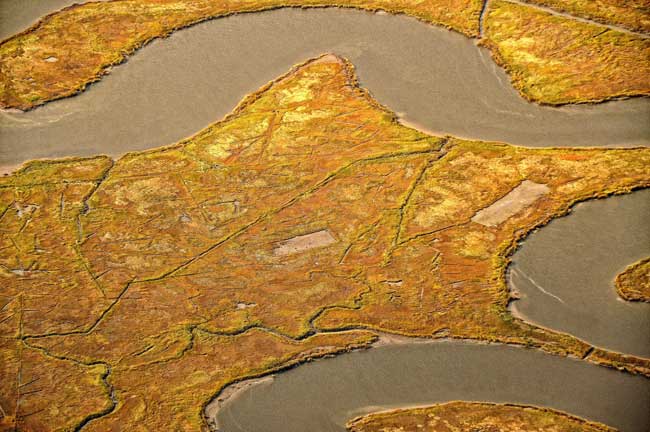
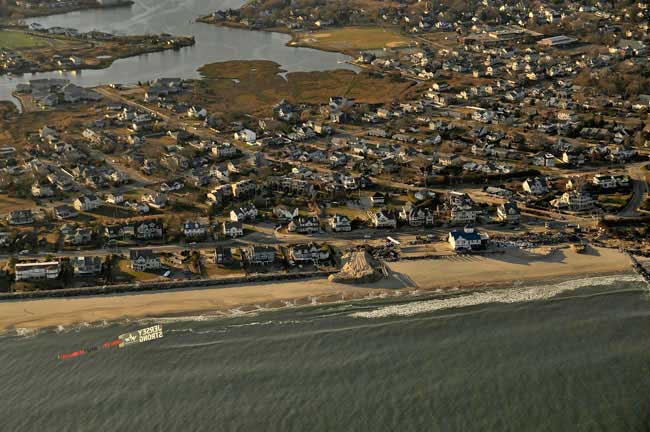
Landscape photography takes on a new dimension
when you’re looking down on a different palette.
Requirements for Creating Aerial Images
An understanding of the relationships between shutter speed, aperture, ISO settings, contrast, EV values and so forth is very important, along with being thoroughly familiar with your camera equipment – fumbling around trying to figure out the camera settings while you’re flying is not advisable.
There is only one light source with which to work – the sun. How you use that light makes all the difference. As with any worthy endeavor, practice in a chosen field is a key component.
This kind of photography can also require substantial monetary funding (a good reason to have paying clients), depending on the chosen source of rising into the sky.
Be willing to learn something about the wonderful world of aviation.
Oh yes, and most important – if flying high and looking out and down creates distress, you’ll need to stay with those photo genres that keep your feet on the ground!

Doing aerial photography does not require jumping out of a perfectly good airplane.
Getting There is Half the Fun
In order to enjoy aerial photography, one major objective must be accomplished – a gain in altitude. And that involves defying one of those pesky Newtonian Laws of Physics – gravity. It’s that invisible force that keeps 99% of us planted on terra firma most of the time. The “problem” with gravity is it seems to work all of the time, not just some of the time. When that law is defied in pursuit of aerial photography, it’s good to keep in mind that it works without fail. What goes up will most assuredly come down! It’s the return trip that is of most concern – getting back to earth safely.
There are a number of ways to gain altitude, all of which involve breaking the law of gravity – airplanes, helicopters, hot-air balloons, and even hang gliders. Rising high involves personal preferences, available financial resources, and above all – your objectives. I know of one photographer who uses kites to help his camera gain altitude; though in my view, that sort of defeats the purpose of “getting up there.”
Even sky-diving is a means to enjoying aerial photography, but a word of caution: most of the photographic activity takes place on a one-way trip. A very fast trip! It would be challenging to change ISO settings while remembering to pull the rip cord. Multi-tasking is not advisable in this environment.
It is advisable to make sure your harness is attached to
avoid making an unscheduled visit to the neighbor’s pool.
High Wing, Low Wing, Rotary Wing – Oh, My!
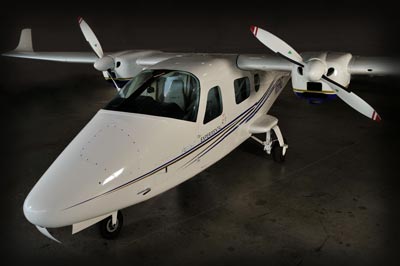
For most aerial work, the more conventional means of gaining altitude are airplanes and helicopters. For clarity, I will refer to these as “fixed-wing” and “rotary wing” – more on that later. All aircraft types have pros and cons when it comes to photography, but there is a rule of thumb that always works – low and slow is better. Certainly, spectacular aerial photos can be made from a jet (another type of fixed wing), but most “common folk” don’t have access to such aircraft. Besides, things happen so quickly in a jet, it’s hard to keep up.
Very fast aircraft are not necessarily
the best for aerial photography.
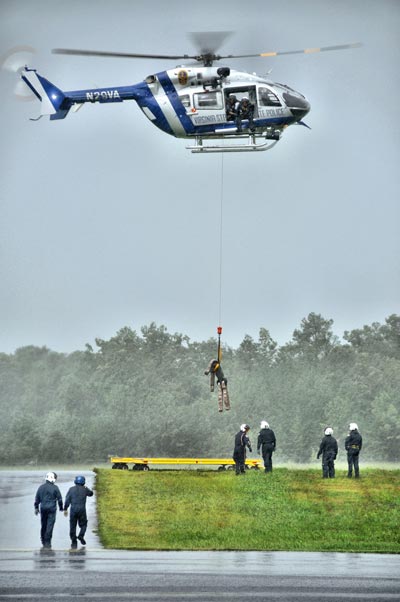
Vibration from a helicopter can quickly
make you feel like the poor fellow in the sling.
In the fixed-wing category, high-wing aircraft are preferred for most aerial photography. It’s much easier to see the ground without that silly wing blocking your view.On the other hand, if you want to do some up-close-and-personal portraits of clouds, you might find that a low-wing aircraft is more suitable. Remember your objectives?
In general, the slower you fly, the more opportunity you have to ponder the next image. With aerial photography, time can be a seriously limiting factor. Anything you can do to get more of it will pay dividends in the number of and quality of images you can make. This is a major reason why helicopters are such a popular platform. There is something to be said for having the ability to hover over your objective – it gives you time to consider your composition.
Helicopters have a major drawback, though. In addition to being notoriously expensive to operate, rotary-wing aircraft are prone to vibration which can adversely impact the sharpness of your photos. This is in part because the lift-inducing mechanism – the rotor, which is actually a wing – is pushing air toward you at several hundred revolutions per minute. Add to that the inherent vibration created by transforming the lateral kinetic energy produced by the engine into vertical energy (powering the rotor) – you get the picture.
How do you fight the vibration monster in rotary-wing aircraft Certainly a fast shutter speed in combination with optical stabilization in your camera or lens (you are using a DSLR, aren’t you?) will help. But the ideal solution is a gyro-stabilizing platform on which to mount the camera. Problem is, most professional-grade stabilizers are quite expensive (several thousand dollars) and out of the reach of most of us, though renting is always an option. Here are some instructions for a “D.I.Y. low-cost gyro stabilizer” – might be useful for the tinkerers among you.
Equipment Basics For An Aerial Photography Business
It has been said that “the best equipment is what you have in your hand.” This is certainly true in most cases – nothing says you can’t use a point-and-shoot for aerial work. But there are certain kinds of equipment that just work better in an aerial environment. First and foremost, consider the lens – regardless of what kind of camera to which it’s attached.
If all you have is a point-and-shoot, that’s OK. Just rely on the optical zoom segment of the camera’s focal range. Avoid using the digital zoom – all it does is crop the image captured by the sensor while creating a fertile breeding ground for “the shakes.”
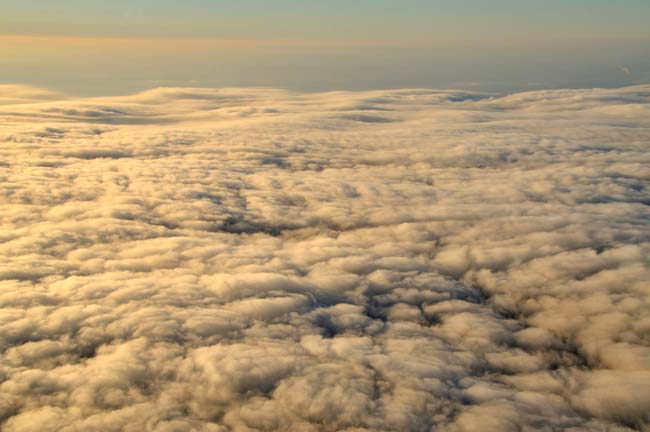
Portraits of clouds can appear very different when you’re looking down at them.
What kind of lens should you use in an aerial photography business? Again, it depends on your objectives. I always advise using a zoom lens (preferably one of high quality) for the simple reason it is much easier to re-frame a composition with the zoom feature than it is to re-position the aircraft a couple hundred feet one way or the other as would be required with a fixed focus lens. Pilots get cranky when asked to move the aircraft a half-degree for the sake of composition (“What are you, an FAA examiner?”).
While very-wide-angle lenses can produce some extraordinary panoramas, you have to be very careful in framing your composition (especially with cropped sensor cameras) to avoid getting wheels, struts or wings in the photo. At the other end of the spectrum, long lenses are very prone to the shakes (even on a stabilizer platform). Mechanical vibration and turbulence can ruin an otherwise stunning photo (more on that in another article). I personally prefer my go-to lens: 18 – 200 mm zoom. Covering the entire spectrum from wide-angle to telephoto, it is very utilitarian, though I find that 90% of my aerial work in concentrated in the 85 mm to 135 mm range at altitudes most useful for aerial photography.
It helps to have a good quality camera, too; preferably one that has some kind of optical stabilization (either in the lens or in the camera). I use a DSLR simply because that’s what I’m used to. It allows me to change certain parameters – shutter speed, aperture, EV, white balance – on the fly in response to changing conditions. Trust me, conditions can change rapidly in aviation – ask any pilot.
Pilots are also essential “equipment” for aerial photography. Unless you have very a sophisticated remote-control setup, I strongly advise against trying to fly and take photos at the same time. We humans are not very effective at multi-tasking.
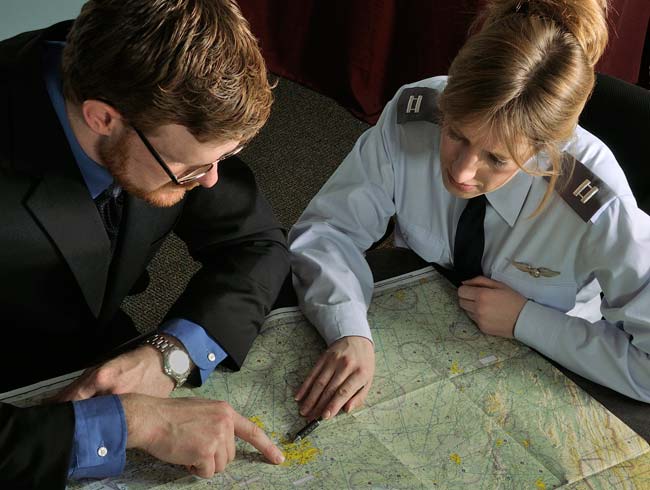
A pilot is essential equipment. She will plan the mission to the
smallest detail and advise you on conditions you might expect.
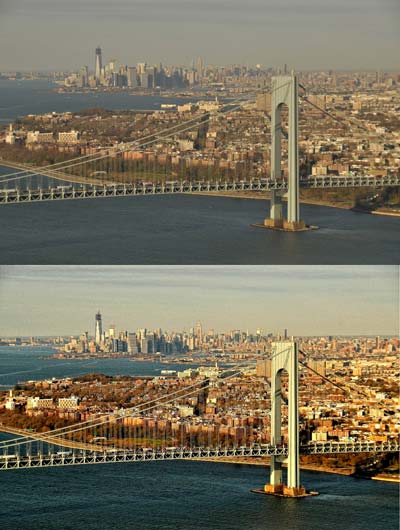
Haze is a fact of life in aerial photography, but we can deal with it without using filters that can compromise the sharpness of your photos.
To Filter, or Not to Filter
Finally – a word about filters.
The aerial landscape, especially at certain times of the year, can be plagued with a high level of haze due to atmospheric conditions. I don’t use filters, not even a UV “haze” filter.
Now, I know what you’re thinking, “But UV filters are meant to cut down on haze.” That’s true to a point. The amount of haze reduction provided by a filter is insignificant compared to the haze you are likely to encounter on an aerial sortie. And the tradeoff – reduced sharpness induced by even high-grade filters – isn’t worth the small incremental improvement you’ll get from using a UV filter. Some people will argue that a high-end filter (those costing upwards of $100) won’t compromise an image. That may be true for ordinary ground-based photography, but the aerial world is an extraordinary environment. Because of the great distances involved with aerial photography, even the slightest disruption of the photons reaching the sensor (as introduced by a filter) can have a major impact on the sharpness of your photos.
And by all means, stay away from polarizing filters. While glare and reflections can be minimized by using polarizers, most of these filters have an unfortunate tendency to induce a bluish cast into the image. You’ll find you have an overabundance of blue to deal with – you don’t need more.
In another installment, I’ll show you how to mitigate the effects of haze, glare and bluish conditions without resorting to the use of filters.
Let’s Go Flying!
Now that we’ve established our objectives and selected our equipment and aircraft, we’ll devote the next installments of this series to making all this stuff work together so you can proudly display your work.
Technical data for all photos:
Camera – Nikon D90
Lens – 18-200mm zoom
Format – RAW
Light source – sun
by Allen Moore
All text & photos: © 2013 Allen Moore. All rights reserved.
Leave a Reply