
As more and more digital photographers are turning to Photoshop Elements as their choice of image editors, we need to come up with ways to accomplish some of the common tasks we have learned to do in Photoshop CS2 using Elements instead.
As I have said many times, Edge Burns add much impact to a photo. In Photoshop, it is a relatively easy task to accomplish this using masks and the blending mode “multiply.” (See my article here to learn how to do this in Photoshop.)
Elements has a different working space and does not have a “add vector mask” command. So we can’t use a mask to control the blending of a copy of the background with the original background layer below it. We have to find away around this problem if we use Elements.
Actually it turns out it is pretty easy, and maybe to most beginning digital photographers it is going to seem more intuitive. So let’s learn how to do it.
In this tutorial, I will also be introducing you to the Transform tool. It is a handy way to correct perspective distortion in your photographs.
I’ve opened up this image of the “Denver Civic Center at Sunset” for us to work on.
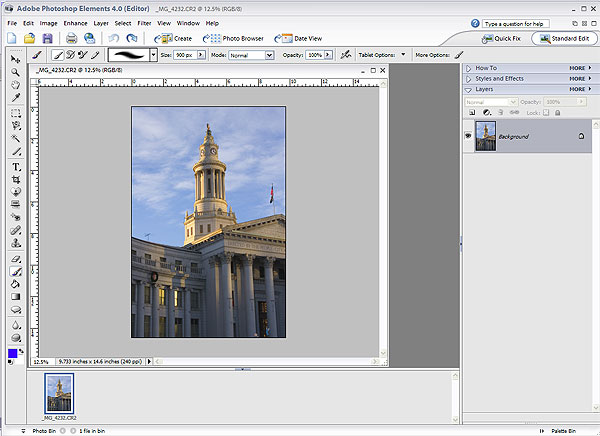
Note that I have also closed all of those annoying pull-down menus on the right except the one I need, “layers”.
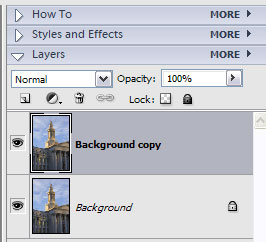
Let’s begin by making a copy of the background layer. I am doing this because I will be permanently altering this new layer, and I want to be able to change my mind later as to the extent of my changes, or whether I even like my changes, after I come back to this image in a few days.
This is called “non-destructive editing” and it is a great feature of both Photoshop CS and Elements. It is also a wonderful thing for those of us who have commitment issues. We can always change our minds later and get away with it.
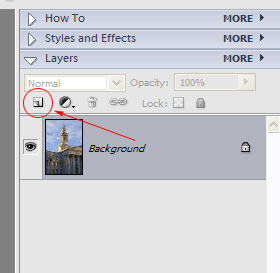
To make a copy of the background, click and drag the background layer over the “make new layer” icon in the tool bar directly above the layer in the layer palette.
It should now look like this:
Look at our image carefully (see above). Because the camera was pointing at an upward angle, it caused all of the vertical lines to start to converge towards the top. Look at the pillars on the right. Do you see how they are not parallel? We want to fix this so that it reflects the reality of the building.
And we need to this first before we do anything else. We will do this with the “Transform Tool” found in the tool bar at the top of the Elements window Image>Transform.
![]()
Notice that I have chosen “Distort” and not “Perspective.” If we look in the image we will see the perspective distortion is more apparent on the right than the left because of the angle at which the picture was taken. “Distort” will let me adjust the right and the left edges of the image independently, as well as the top and bottom.
The “Perspective” tool moves both opposing edges at the same rate. If I used that, I might fix the pillars on the right of the photo, but mess up the lines on the left in the process. “Distort” is almost always the better tool to use.
Upon clicking on “Distort”, Elements creates little boxes, or “handles” on the corners and at the middle of each side.
If you can’t see the handles, and if you don’t have some gray background around your image as shown in the above illustration, (or directly below) zoom out a little. You can do this quickly by using the quick key command for zoom out, “cntrl, -“.
In other words, while holding the control key down, type on the hyphen key (or minus sign) on your keyboard and the image will zoom out. (“Cntrl, +” lets you zoom in.)
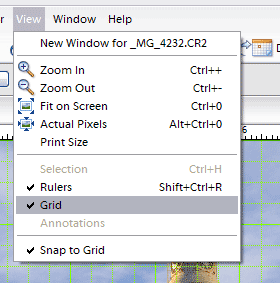
The Grid can be turned on by going to View>Grid and clicking on grid. When the check mark is visible the grid is on. Clicking it again will turn it off. Going to Edit>Preferences>Grid will allow you to change the spacing of the grid as well as its color.
Here I changed the spacing to 2″ and the color to bright green so I could see it against my image.
![]()
Now you should be able to see the handles, and you have some real estate in which to move around. Starting at the top, grab the handles and move them back and forth.
There are no vertical and horizontal guides to help you do this, as there are in PS CS2, but there is a grid that can be turned on to help you find true verticals and horizontals. (See above.) You should find that as you are moving either corner, the middle is getting distorted as well.
That is what the middle handle is for – to correct any changes that need to be made along the center axis.
When you have it where the vertical lines are parallel as they are in nature, double click inside the image to make the change.
Now you will have an image that more accurately reflects the architect’s intent. Professional architectural photographers use a special lens or camera where they can preserve their parallel lines when they take the picture.
(Bonus: Using the Transform Tool to Correct Perspective also included)
by Michael Fulks
Leave a Reply