
There are times that our photo is more effective when everything is not tack sharp. Sometimes we may need a slight blur to create the effect of using a diffusion filter when taking a portrait. At other times we may need to compensate for the tendency of digital camera lenses to create too much depth of field in our images.
We can accomplish both of these tasks by creating a selective blur.
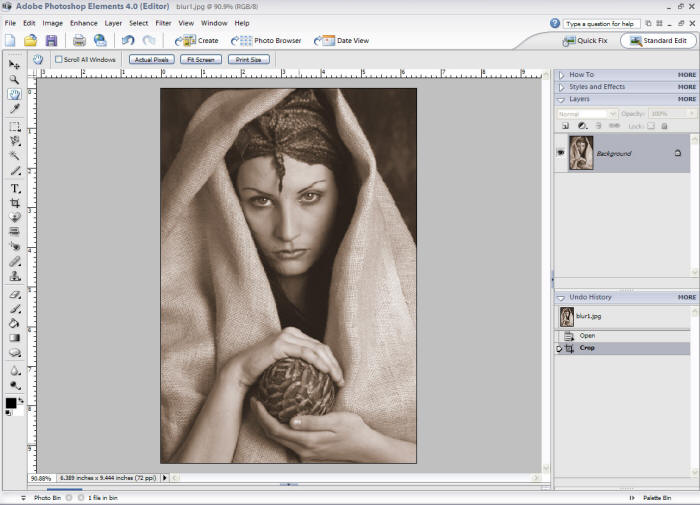
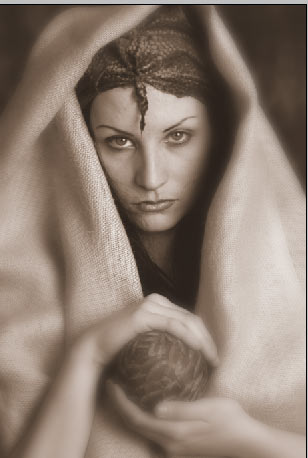
Let’s open an image up in Photoshop Elements.
This image could be improved by selectively blurring around the center, much as if we had used a lens with a diffusion filter. In Photoshop, we would begin by copying the background layer and adding a mask so that we could selectively apply the blur just to certain areas. Unfortunately, Elements lacks the ability to create masks. So how is it possible?
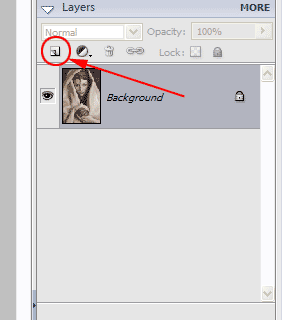
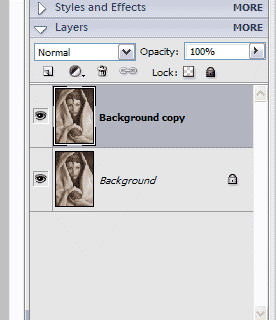
This is one of the times you have to do things differently in Elements to create a desired effect. But it turns out it isn’t such a problem. So let’s begin by copying the background layer. Drag the background layer over the “Create a new layer” icon right above the layer in the layer palette.
 —–>
—–> 
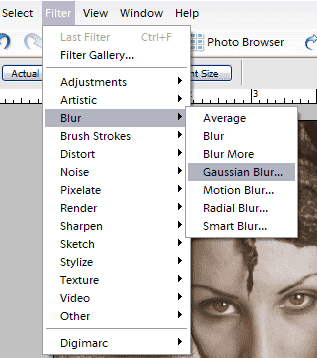
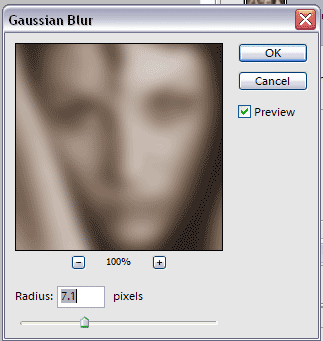
With the new layer highlighted, go to the menu at the top of Elements and choose Filter>Blur>Gaussian Blur. When the Gaussian Blur dialog box appear fill in a value of about 7.1. You may a different value for your image. Use the slider until it gives you enough blur.
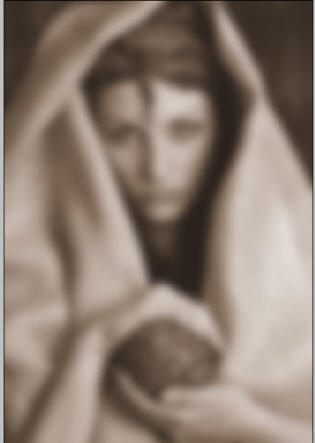
Your image will look like this.
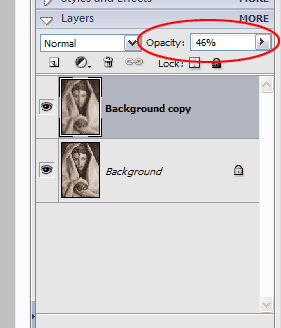
If we want to create a slight glamour blur as is done in much fashion and portrait photography, we need just lower the opacity of this layer until we have result we want. In this case I have chosen about 46% opacity and I get a nice glamour blur.
 —–>
—–> 
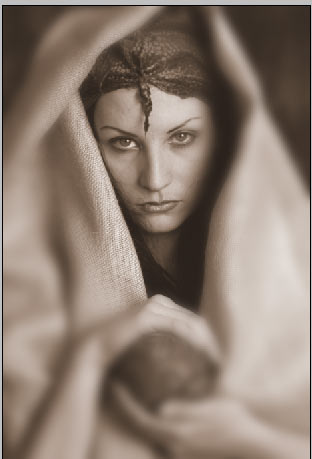
Let’s say we want to do something similar, this time blurring only a portion of the image. This might create the illusion of a shorter depth of field, or the use of a diffusion filter in order to draw more attention to the model’s face. We can’t add a mask as we would in Photoshop.
So we have to do the next best thing. First, return the layer opacity to 100%. Now you have the same blurred image as above. To selectively bring back the lower, sharper layer, through this blurry one, we are going to choose the eraser tool to do the job.
Making sure that the background copy layer is selected (A), choose the eraser tool (B), and a large, soft brush (C). Now paint with the eraser tool through the middle of the image as shown (D). You can control the speed of which you are erasing and gain more control by adjusting the brush opacity (E) down a little.
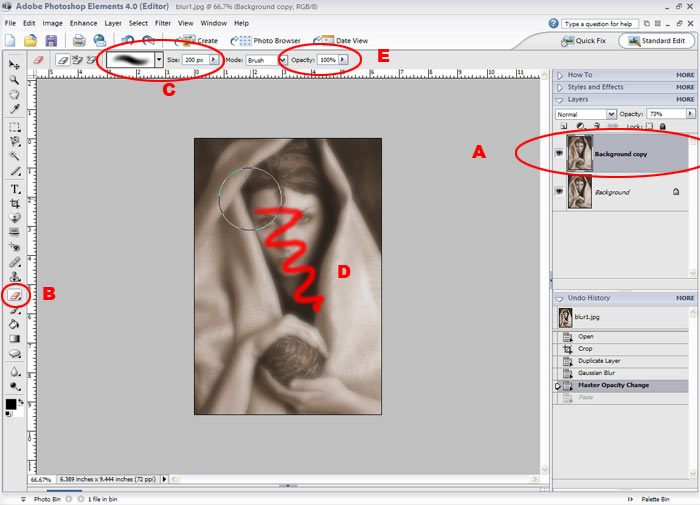
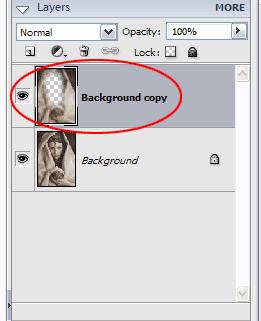
What we are doing is erasing portions of this background copy layer so that the original background layer can show through. If we look at the layers palette and the resulting background copy layer we can see what we have actually been doing.
 —–>
—–> 
Did you give it too much blur? If so, simply lower the opacity of the background copy layer as we did in the glamour blur. If you need more, simply delete this level by dragging it to the trash icon in the layers palette and start over. This time, instead choosing 7.1 in the Gaussian blur dialog window, choose something higher like 15.
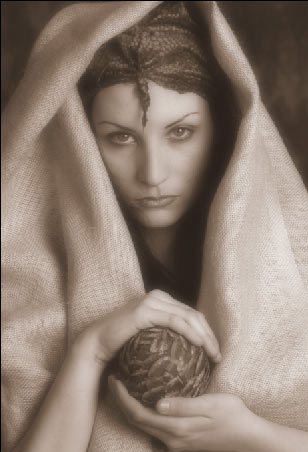
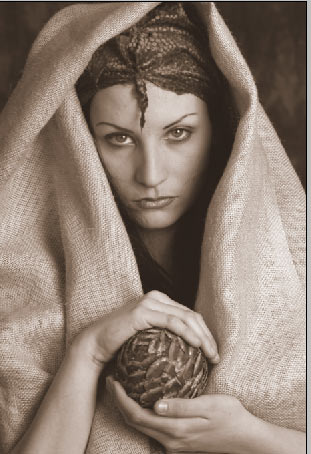
Or experiment until you find the right degree of blur that suits your needs. Let’s compare our before and after.
Can we do it this way in Photoshop? You bet! But without a mask we can’t “unpaint” the blur by painting with the mask selected and using white.
That is why the mask is so much more flexible. When using the eraser tool, if you want to adjust the range of the blur a little, you have use the history palette to return to a “before” eraser tool state, or easier still, trash the blur layer and start all over again.
Article, photos and screen shots: © Michael Fulks. All right reserved.
Leave a Reply