

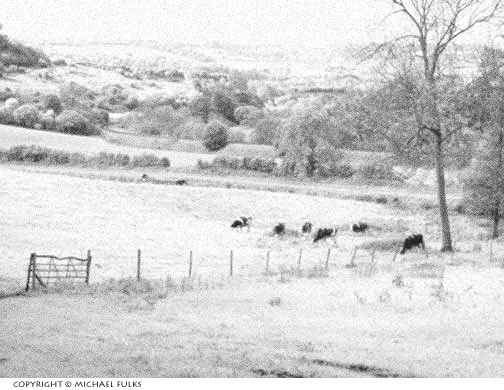
Figure 1
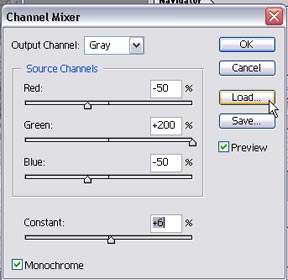
Figure 2
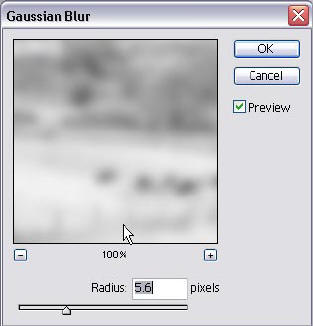
Gaussian Blur Window. Apply a hefty amount of blur to a copy of the background layer.
A previous
article about creating infrared images with your digital camera – Digital Infrared Photography Made Easy, by Dale O’Dell. As the author mentioned in that article, some cameras have an internal, infrared filter that prevents infrared light from reaching the “film” plane. If you have one of these cameras, like I do, all is not lost. You can still create images that have the look and feel of a real infrared photo using Photoshop. Like many things in Photoshop, there are many ways to accomplish this. Let’s look at one way. (NOTE: This is an older article, but it still applies in updated versions of Photoshop.)
Open your color photo. We will be using this pastoral scene taken outside of Bath, England (Figure 1). Our first step is to create a new, “channels” layer. In the Channel Mixer dialogue box, click the monochrome check box and begin by increasing the green channel to 200%. Because we want the green to appear the lightest, we must boost this green channel mix to the max. As you do this, you will notice that this causes the image to become “burnt out.” Following the rule of thumb that these percentages must add up to close to 100%, you must next reduce the blue and red channels. This will restore the highlights of the image. For simplicity, I have set both of these channel to 50%. You should play with these two to see what gives you the best result.
After finding the best combination of values, you may still find that the image is a little darker than you wish. So, now, set the “Constant” slider at the bottom of this window to about 4% or whatever gives you the lightness you are looking for. The image is now close to what you might find with infrared film, especially Konica, or one of the other “near-infrared” film (Figure 2).
Kodak’s film has a characteristic glow to the highlights. If we want to accomplish this, we may want to apply a little Gaussian blur. To accomplish this, first flatten your image and then create a duplicate layer of the background layer. On this new layer apply a good amount of blur. Using a radius of 5 – 6 pixels is a good start. When the blur has been applied, you will have to adjust the opacity of this blurred layer to 40% or lower. This will create a diffused, halation effect that simulates the “iridescence” seen in Kodak’s film.
Kodak’s film is also very grainy. If you want to see this in your image as well, you will need to add some noise. Flatten your image again, and then go to Filter > Noise > Add Noise. Add a hefty amount of noise depending upon the size of your image and the amount of “grain” you need.
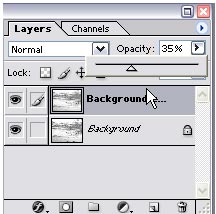
After applying the Gaussian blur to the duplicate layer, reduce the opacity on that layer to about 35%.
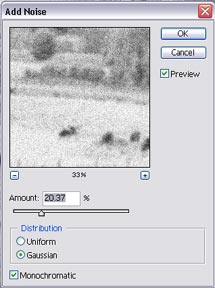
To create the grainy look of
Kodak Infrared Film, “Add Noise.
Here is how our final image looks. I also like to add a slight edge burn to my images.
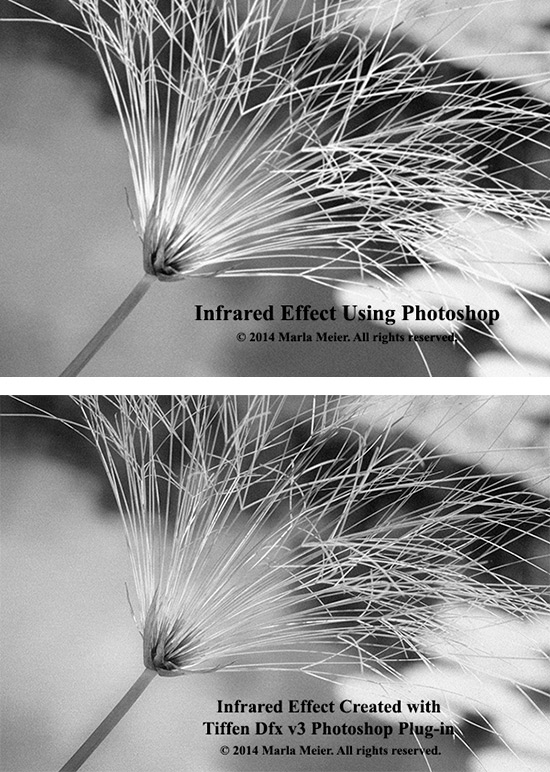
And in today’s world, many companies provide Photoshop plug-ins that can give you that infrared look and it’s easy to adjust the parameters to get the look and feel you want.
by Michael Fulks
All text and photos: © Michael Fulks. All Rights Reserved.
Leave a Reply