
It’s good to be your own worst enemy…..especially when it comes to critiquing photographs that you have taken yourself…and especially when it comes to looking at your body of photography work and deciding what’s great, good and what’s not so good.
Every year, there should be growth and the images you review from five years ago should not hold up to the photos from the same location today.
When looking at your photographs and self-critiquing, do so as an editor or potential fine art buyer would – with a very discerning eye. Those who go to a camera club and have their work critiqued by qualified people know how much help a good critique can be.
Look at your work with an objective eye, try to leave the emotions and memories of the location aside, and try to do a thorough critique to see if an image passes the grade.
Tips To critiquing photographs You have taken
IN THE FIELD
You can do some critiquing in the field before you click that shutter button. If you are allotted the time when setting up, ask these questions.
Note: They can also be asked later when going through your work, but if caught early enough then they won’t be an issue during the critique.
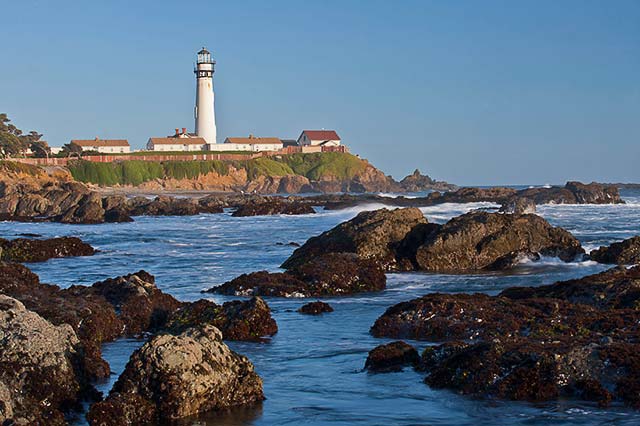
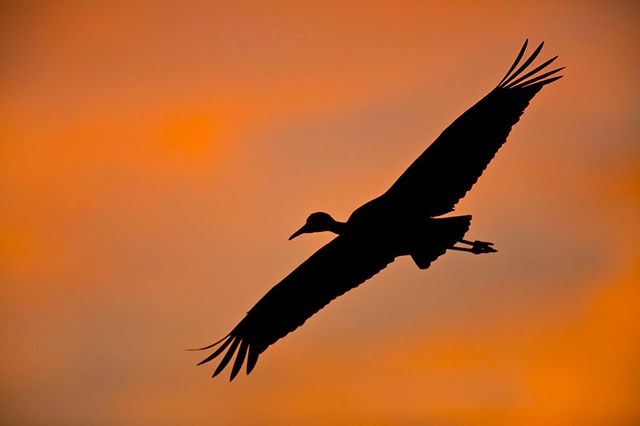
Does the image have visual weight?
Where do your eyes immediately go? Where do you want the viewer’s eyes to go? If you’re trying to direct the viewers’ attention to a certain part of the photo, but the first thing you look at is something else, then the photo needs a different composition. Too often when setting up the scene, you see the main subject, but never look at everything else in the frame to see how they work together.
This is more the case with landscape and nature than with wildlife where speed is more of a concern. The rule of thirds is a great way to make photos, but don’t do it for the sake of it, it needs to work for your photograph.
There are plenty of times a centered photo will work best, or even slightly off center, or low or high on the horizon.
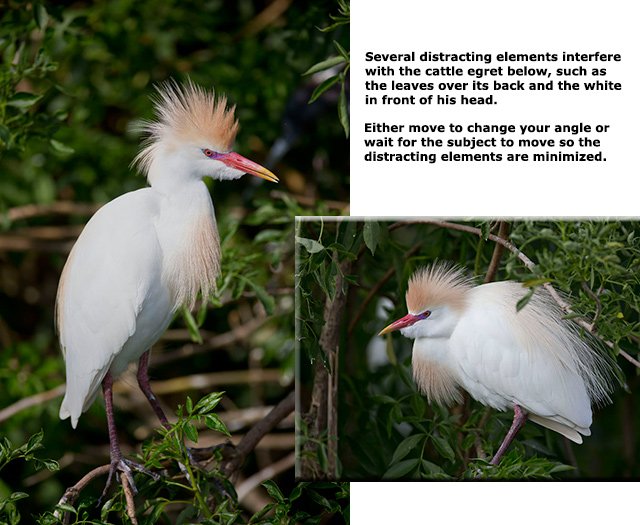
Are there distracting elements in the image frame?
Whatever isn’t adding to the photo is taking away from the photo. Photography is more a process of elimination than anything else. My guide is… If an element doesn’t add to it being a great image, then do whatever possible to eliminate it from within the frame.
If there’s a branch leaning into the photo, or a distracting shadow covering part of the scene, then they’ll likely be taking away from the overall impact.
Try to have a clean background so the main subject has separation and there are no distracting elements. This also plays a role in the visual weight of the photo.
Another problem for which to pay attention is when there are lines that lead out of the photo taking the viewers’ eye with them.
Was the image metered properly for the correct exposure?
It is possible to photograph with the wrong metering mode causing poor results. The camera doesn’t know how to correct the exposure. Most of the time this happens when the camera is on evaluative metering when it should be on spot so it can meter for the correct part of the photo and not the whole scene.
This will occur especially if there is a lot of contrast between darks and lights.
If your metering is fine, but it’s still coming out too light or dark, then you know what you have to do with exposure compensation. Sayings, “I’ll fix it in post processing”, are the words of a bad photographer. Get it right in the camera and you won’t have to spend as much time in front of the computer and you’ll become a better photographer.
Some people seem to think the computer can fix most problems, but there’s a limit to what can be done.
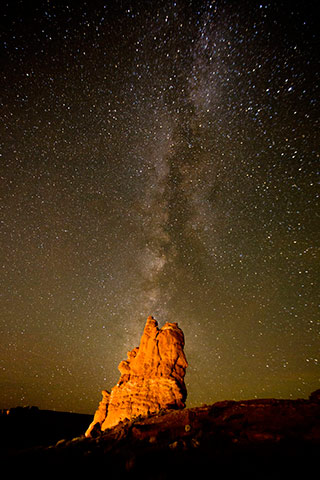
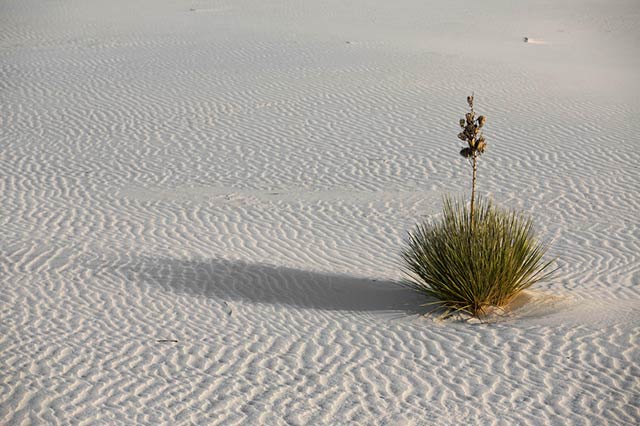
Have you used the proper focal length?
Adjusting the focal length can change the perspective of the photo – the longer lengths appear to push everything in the scene much closer together. Using a larger focal length lens for landscapes will help condense space if the objective is to highlight part of the whole scene.

Using layers and varying color to walk the viewer’s eye easily from the bottom to the top of the image. Notice how the anchor tree on the right side does not have any part of the right side cropped. Focal length was worked with the 70-200mm lens to make sure cropping would not need to be done.
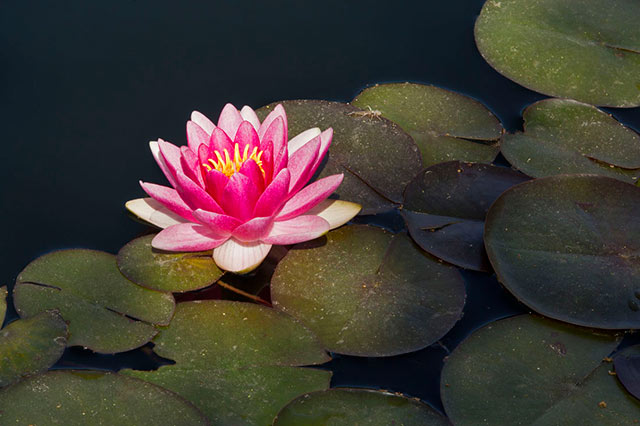
Did you create an image with good depth of field?
Did you use the right camera setting for the scene / subject? A great tool on the camera for this is the depth of field preview button. Practice using this until it becomes easy to read and understand through the viewfinder.
Typically, landscapes images will have a greater depth of field so all of the elements can be seen from the front to the back of the scene, while close-ups of flowers will have a shallow depth of field so you can blur the background and make your subject pop.
Is the photo cliché?
We all see a lot of cliché photography out there, and we’ve probably all been guilty of it at some point in our lives, but it’s best to try and avoid it. This is an important factor when critiquing photographs. The majority of cliché photos come from a lack of photographic inspiration, or perhaps because you didn’t take the time to create something new and interesting.
It can lead us to taking photos of static wildlife portraits, flowers or sunsets. By all means, get those cliché images out of the way and then start to look at the scene with a new perspective.
ONCE YOUR HOME AND VIEWING YOUR IMAGES
Critiquing your work is a skill in itself, but with time and practice, those skills will also improve.
Don’t forget to give yourself kudos for what you did do right – give yourself feedback.
Maybe you metered just right and made and image with outstanding color. Maybe all distracting elements were eliminated. It’s a step in the right direction. Learn from those and from the mistakes so you’ll get it right next time.
Things to look for in technique include:
– FOCUS: Is the image sharp? If not, is it intentionally soft and successful?
– EXPOSURE: Is it too light or dark? Are there blown out or underexposed areas?
– DEPTH OF FIELD: Is DOF used properly to control the viewer’s eye?
– LIGHTING: Is the lighting too contrasty, too flat or just right?
– COLORS: Does it have neutral colors or a strange color cast?
– CLEANLINESS: Is it free of scratches, dust spots, stains, lens flare, etc.?
How’s is your composition?
A photo can be affected by the camera viewpoint and / or the focal length of the lens. It can raise an image from a technical success to an artistic success.
– What should and shouldn’t be in the frame?
– Does it need a bit of cropping?
– Is your eye drawn to the main subject immediately?
– Is the image aligned correctly or is it crooked? If you angled purposefully, was it effective?
– Is the arrangement of the elements positioned effectively?
– Is there a strong center of interest, pattern or design?
– Is it simple, yet complete and without distracting elements?

How is the emotional appeal?
The vital element for a truly great image is making it unique and memorable so it stands out in the crowd.
– Does the image evoke any emotion? Does it excite the imagination?
– If a portrait, did the photographer connect with the subject or do they look tense or stilted?
– Does the photograph tell a story?
– Does it show a familiar subject in a new or unusual way?
– Does it grab and keep your attention – have the “wow” factor?
When critiquing photographs, just continue to critique your own work and you’ll become more proficient at it, and along with learning more techniques, your photography skills will keep improving.
by Andy Long
First Light Photo Workshops
All text & photos: © 2014 Andy Long. All rights reserved.
Leave a Reply