
Landscape photographers are bedeviled by the fact that the camera cannot record the full range of brightness that the human eye can perceive. But although this simple statement of fact describes a problem at a technical level, it ignores a far more important aspect of human perception–the ability of our minds to process images so that we “perceive” a wide range of contrasts in even the lowest-contrast real-world situations.
The mind can adjust for contrast, color, and tone locally in the real world, but it cannot do so with the limited information available in a print.
With the arrival of the digital darkroom, photographers can now undertake to manipulate images in ways that allow a viewer’s mind to believe that the image it “sees” is truly representative of what the photographer saw when taking the picture.
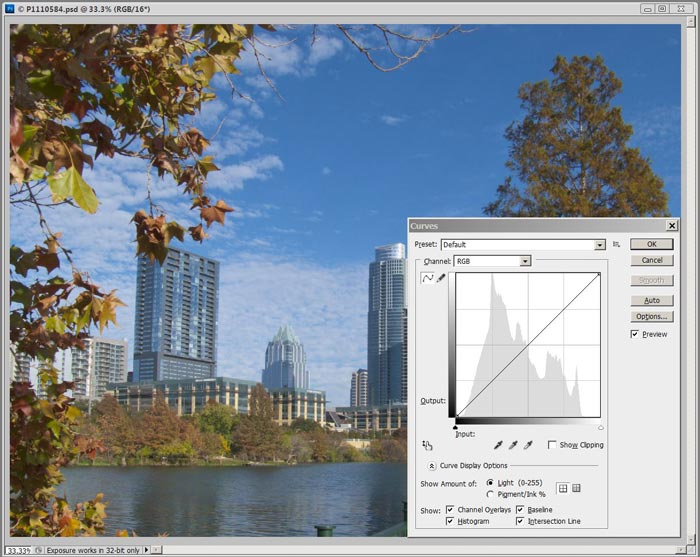
In most outdoor photography, the histogram may assume something similar to a bell-shaped curve, such as seen here in this typical city scene with its histogram showing in the lower right corner.
© 2012 Gary Nored. All Rights Reserved.
As you can see, most of the tones lie in the middle. The spikes are caused by buildings.
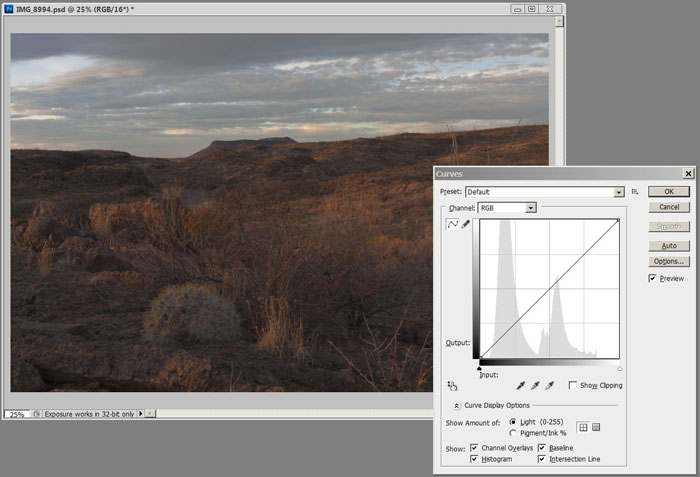
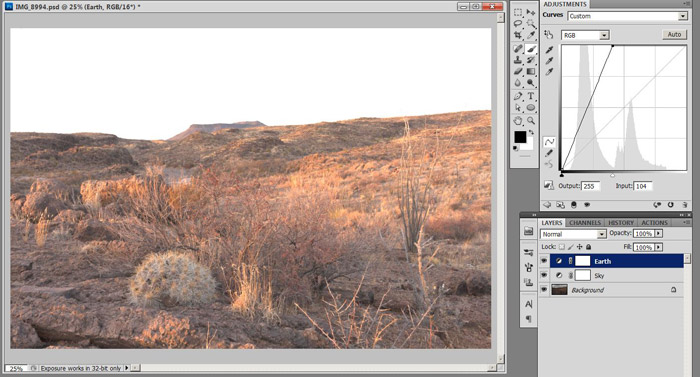
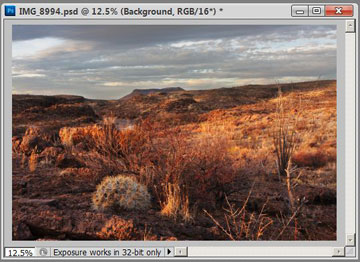
Here in the Chihuahuan Desert of Texas, the earth and the sky typically register with a great difference in brightness; moreover, giving each a contrast range that allows a photograph to be accurately seen requires different adjustments for each.
© 2012 Gary Nored. All Rights Reserved.
A typical Chihuahuan Desert scene displays a “camel-back” shape as seen below. Notice the separation of the tones seen in the sky and those of the foreground. Even though the full range of tones is captured in the RAW file, no amount of simple brightness/contrast manipulation can reveal the beauty of this scene.
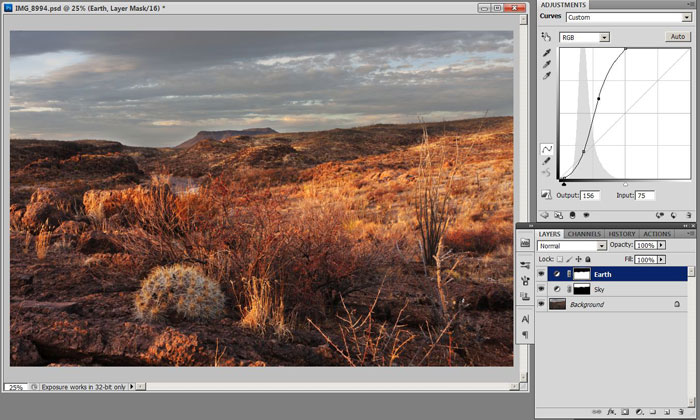
My way of working with this photographic challenge is to make use of my Photoshop tools. I apply two Curve Adjustment Layers, one for the earth and one for the sky, each with a Mask that is used to limit its action to one portion of the picture. I use this approach so often that I have written an action to create the layers, and it is the first thing I do when opening any photograph.
Masks
A Mask is simply a gray-scale image that, when applied to a Layer, conceals that Layer’s content or editing-effect in the dark areas of the Mask and reveals it in the light areas. Adjustment Layers are always created with a Mask, but you can add a Mask to any layer.
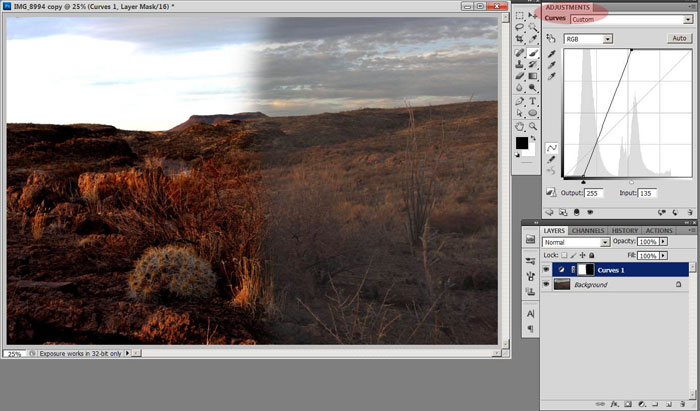
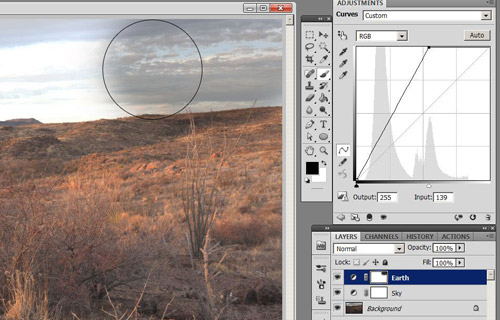
In the following image I’ve taken the example image and added a Curves Adjustment Layer with an extreme adjustment curve. Then I painted the right side of the Mask black. You can see how the Mask prevents the curve from affecting part of the underlying image.
© 2012 Gary Nored. All Rights Reserved.
Create the Masks
After opening the image and doing any minor clean-ups needed, add two Curves Adjustment Layers.
There are numerous ways of creating Masks – you can fill them with gradients, derive them from the image itself, or simply free-hand them. Free-handing is the easiest, so let’s start with that.
1. After opening the image and doing any minor clean-ups needed, add two Curves Adjustment Layers. Name one “Earth” and the other “Sky.”
2. Apply an extreme curve to the “Earth” Layer, similar to the one shown below. Modification of this curve will occur later. For now, its only purpose is to help draw the mask.
© 2012 Gary Nored. All Rights Reserved.
![]()
3. Activate the Layer Mask icon by clicking on it. A white border appears around the icon.
4. Using a large brush, very soft, loaded with black, start painting over the sky. Because the Mask was selected, the paint applies to the Mask rather than the original image. As you paint, the original sky begins to appear.
Both photos: © 2012 Gary Nored. All Rights Reserved.
Don’t worry too much about changing part of the horizon. You can refine the mask later.
![]()
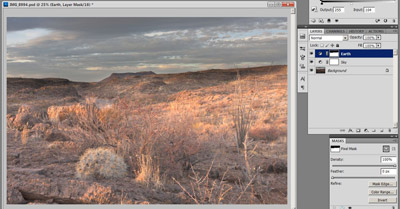
5. Paint the top of the image until the sky is completely restored to its original appearance. Once finished, the “Earth” Layer should look something like this.
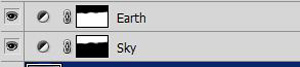
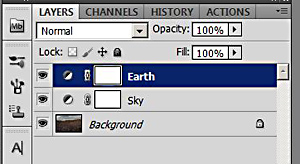
6. It is important that the “Earth” and “Sky” Masks fit together accurately. The quickest way to ensure the fit is to simply copy the Mask you’ve created for the “Earth” layer into the “Sky” layer and invert it. I usually Alt-drag the “Earth” Mask to the “Sky” Mask and agree to replace it when queried. Then I invert the “Sky” Mask. The Adjustment Layers look something like this.
There are now two Adjustment Layers with complimentary Masks, one for the earth and one for the sky and the curves can be adjusted to enhance the image. You can click one layer or another to see how the layers histogram reflects only what it can “see” through the Mask.
Editing the Photograph
Bringing out the tonal range and contrast of the foreground is often all you will need to do. I’ve adjusted this image’s “Earth” curve to brighten the ground and applied an “S” curve to bring out the contrast.
© 2012 Gary Nored. All Rights Reserved.
In this image I decided to brighten the sky just a bit. Here’s the sky curve for the finished editing.
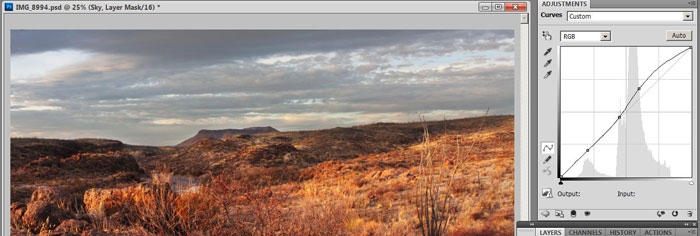
© 2012 Gary Nored. All Rights Reserved.
The image is completed to my satisfaction. As you can see, this simple technique is very powerful.

© 2012 Gary Nored. All Rights Reserved.
Original Image
© 2012 Gary Nored. All Rights Reserved.
Finished Image
When a Simple Free-hand Mask Won’t Work
© 2012 Gary Nored. All Rights Reserved.
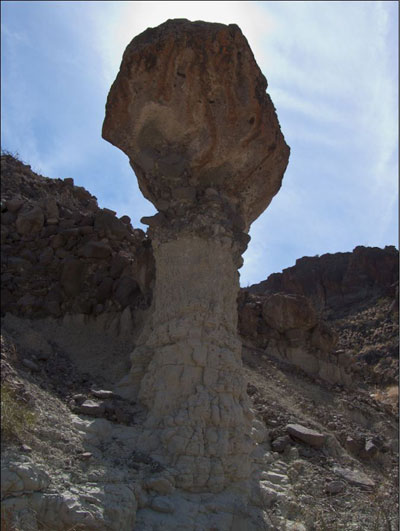
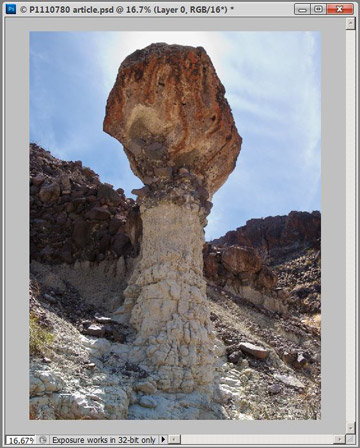
Sometimes you can’t brush your way to perfection. In these cases, you may need to create your Adjustment Masks from the image itself. The process is more complex, but the principles are the same. Consider this hoodoo image (also called a tent rock, fairy chimney, and earth pyramid).
As you can see, there’s no useful horizon line in the image and hand-painting with a soft brush just won’t work. But I wanted to enliven the hoodoo, so I decided to generate a Mask from the image itself. I liked the sky just the way it is, so I needed a Mask to protect it from unwanted changes.
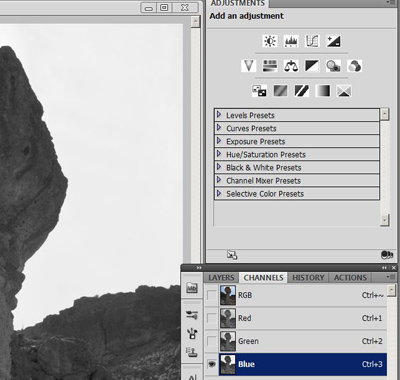
The place to start is with Photoshop’s Channels Palette.
1. Open the Channels Palette and examine each of the channels, looking for the one with the best contrast. In this case (as in about 99% of the cases for landscape work) the best channel is Blue.
2. By turning off the other channels and selecting the Blue Channel you can see the blue information for the image.
3. Use a copy of the Blue Channel to make the Mask. Duplicate the Blue Channel. The new channel will be labeled “Blue copy.”
4. In reality, a Channel is just another image – in grayscale. Use a Curves Adjustment to intensify the difference between the sky and the foreground in the Blue copy Channel.
5. Simply moving the white and black points creates a Mask that’s just about ready to use. Use a black paintbrush to fill in the white areas in the foreground.
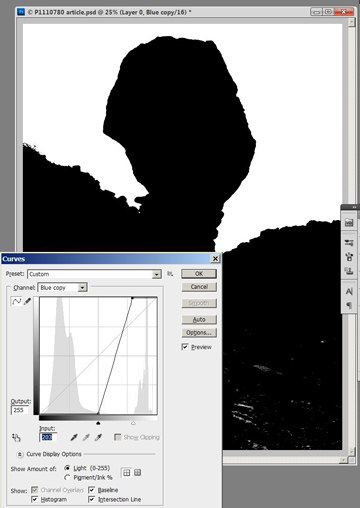
Adjusted curve for blue channel.
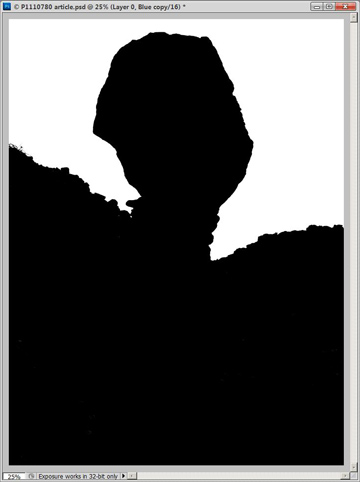
Finished Channel
To use this Channel as a Mask, select the entire image (in the Channel Palette) and copy it.
- Click the RGB Channel Thumbnail and return to the Layers Palette.
- Add a new Curves Adjustment Layer. Again, I’ve named it “Sky.”
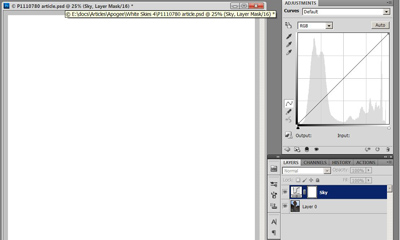
- Alt-click the Layer Mask Thumbnail. A white image appears.
- Paste the Blue copy Channel into the Layer Mask. Invert the image (we want the curves to affect only the foreground – not the sky.) Do the inversion in the Channels Palette too.
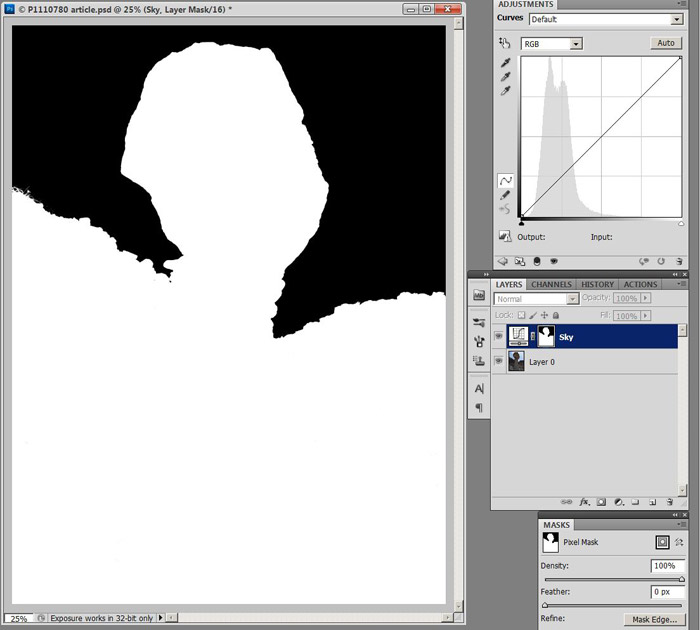
Inverted mask for sky.
6. Adjust the curve to taste. Here’s the curve I used for the hoodoo.
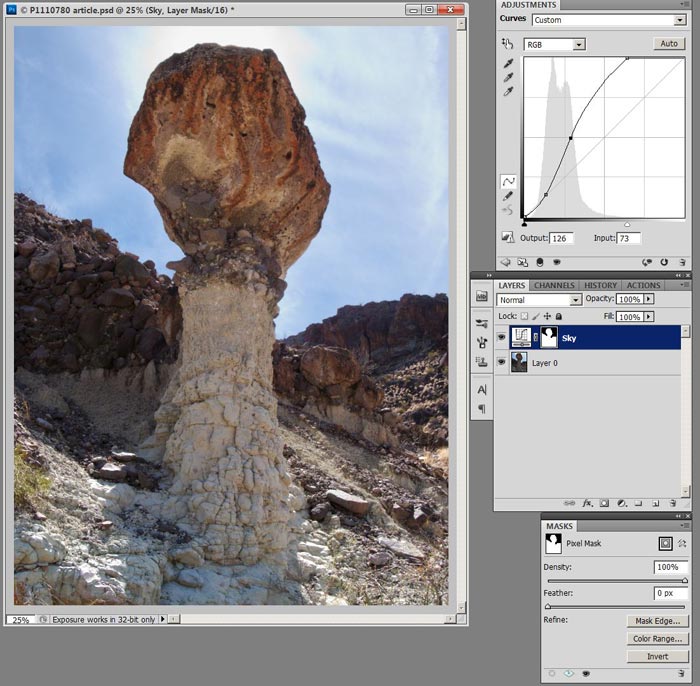
Adjusted foreground to my liking.
This is a remarkable improvement to have been made with a single Adjustment Layer!
Dealing with Edge Effects
When you create Masks this way it can sometimes create annoying halos. For small reproductions this may not be a problem, but for larger ones it can be obvious. There are a number of ways of dealing with this situation.
Refine the Mask Edge
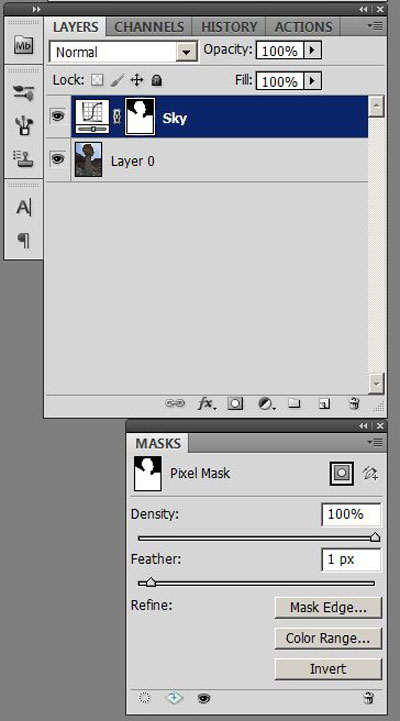
In CS 5, selecting the Layer Mask icon invokes a Mask editing dialog box. The advantage to using this box is that any changes made here are not permanent. You can experiment and/or change your mind, etc., until you achieve the desired result.
In this image there were some small artifacts along the horizon-line. I feathered the Mask by 1 pixel, which corrected the problem.
Expand or Shrink the Mask
Sometimes the Mask’s effect extends too far into other parts of the image and creates the halo. To fix this:
1. Alt-click the Layer Mask Thumbnail.
2. Use the Magic Wand to select the white or dark side of the Mask.
3. Using the Selection Menu, expand or contract the selection.
For example: If I wanted to shrink the active part of this Mask, I would select the black portion and expand the selection by 1 pixel. You can also nudge the selection up or down, feather it, and/or try other changes.
Fill the new selection area with the appropriate color. This will often repair edge artifacts.
Retouch the Mask
With care you can retouch the Mask. A useful technique for doing this is to load a paintbrush with 50% gray, lower its opacity, and then lightly go over the offending areas. The 50% gray will neutralize the Mask’s effect in the retouched areas.
There are endless possibilities for editing and refining masks. To learn about them I recommend reading Katrin Eismann’s excellent book Photoshop Masking & Compositing.
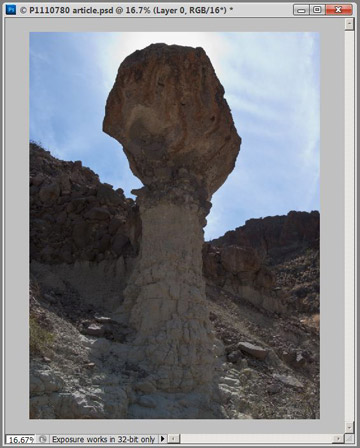
Original hoodoo
Finished hoodoo
Using the Mask in Other Ways
Once you’ve made a Mask, you can use it for any other type of adjustment you want; I often use the same Mask with Color Balance Layers or High-pass Sharpening Layers. You can use it to create composite images (for example, adding clouds to a dull sky), to separate parts of an image for particular attention or even to hide parts of an image you don’t want to show. The possibilities are endless.
I hope you find this a useful technique to add to your “bag of tricks” in Photoshop.
by Gary Nored
Leave a Reply