

Each season has its own beauty. Come Fall, there are rosy-hued streaks of light at sunrise, crimson and gold in the trees, and crisp morning light. Some years, Autumn is our most beautiful season. Life changes its pace, and we can refine our photography skills as well.
It’s a fine time of year to simplify our compositions. See if these 7 Tips will work for you: Move In, Go Low, Frame Vertical, No Proximity, Calm Your Background, Expose More, Subtler Color.
![]()
PHOTOS 2, 3 WEB: Watching the edges made me move in closer, and get rid of the black line at frame bottom. This changed the emphasis to the center of the spider web, where the photographer’s reflection in the water was placed. Tilting the camera slightly lined up the angle of a strand in the web with a similar angle of a dock line. The principle behind this camera tilt, and the camera raise which cropped out the black area, was to respect the frame.
1 MOVE IN AND WATCH THE EDGES
While getting closer can improve our compositions, the main thing we must practice, when moving in close is to check the edges of our frame. “Respect the Frame” is a key concept for pro photographers. By ‘hitting’ the framing right in the camera, just like a group of musicians comes in all together to hit the opening beat of a number, there is little need to crop in post-processing.
So, when you get close, check all four frame edges twice before you press the shutter.
2 GO LOW, HUG MOTHER EARTH
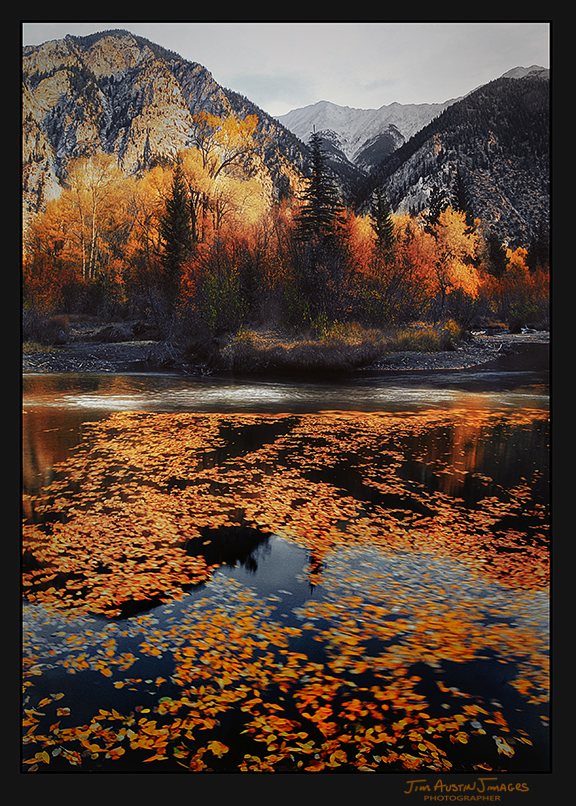
To simplify a composition, ask youself this question as you move the camera lower: “What Do I Want to place in the bottom 1/3 of the frame?”
Complicated photographs are often top heavy, with lots of “stuff” in the upper two thirds of the image. A classic example in the Fall is the overdone, typical configuration of looking up at Fall trees. However, to make more powerful compositions, place compelling subject matter in the bottom one third of the frame.
3 VERTICAL FRAME
When you change to a vertically oriented, portrait framing composition, remember to “respect the edges of the frame.”
Advanced Tip: When you focus the lens, place your focus one third of the way into the frames plane of focus.
4 MOVE YOUR CAMERA POSITION to CLEAR OUT OBJECTS NEAR YOUR MAIN SUBJECT
The idea here is to simplify the composition by letting just one dominant subject stand on its own, without touching other objects. For many years, Apogee Photo Magazine features articles about Gestalt, and the Gestalt Proximity Principle. This principle says that objects that are close to each other form groups.
Think of the MC Escher black and white image with fish below, touching and turning in to shapes that become birds above. Our brain isolates separate whole objects from their backgrounds. It does this with visual perception, using colors, sizes and other things.
To simplify your composition, try to have only one figure against the ground, or one main subject instead of two or three bumping into one another. Getting lower can help, and so can opening up your aperture and using a shallow depth of field, also called plane of focus.
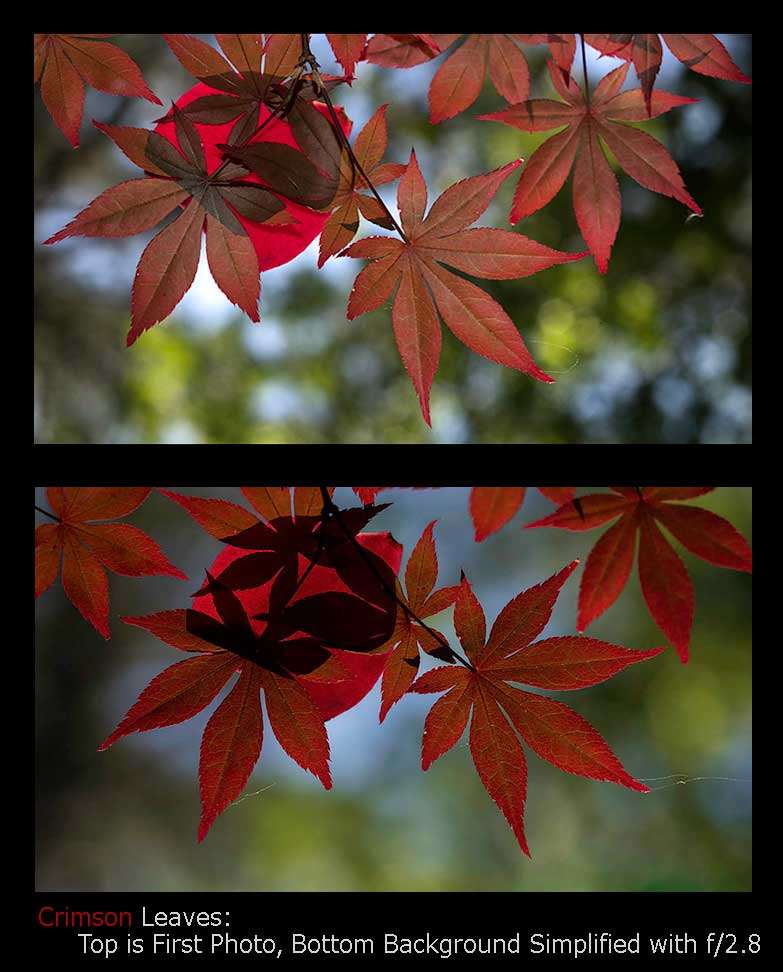
Photos 4, 5: Aperture Mode with a wide f/2.8 aperture helps defocus the background.
5 CALM YOUR BACKGROUND
To calm, and defocus your background, dial in f-stops that are open and wide. The aperture is the lens opening that allows light in to the sensor or film. To soften and calm your foreground or background, try wide apertures of f/1.2, f/1.4, f/1.8, f/2, f/2.8 for your photographs. You may want to change to Aperture Priority Mode.
6 TAKE MORE TIME, EXPOSE MORE FRAMES
For some challenging compositions, in low light or when I am experimenting, I play a mental trick on myself and assume that, right or wrong, the first exposure is from the wrong position. This gets me to MOVE, and then STOP and STARE. I repeat this again and again. I’ve learned that changing camera position, even by millimeters, can make a dull composition into a compelling one.
So, do a slow dance with your camera around your subject. As you do this, take more time, and take more exposures.
7 TRY SUBTLE COLOR: MAKE FALL COLORS SECONDARY
Subtle, seldom seen colors come out with the low sun angles in the Fall.
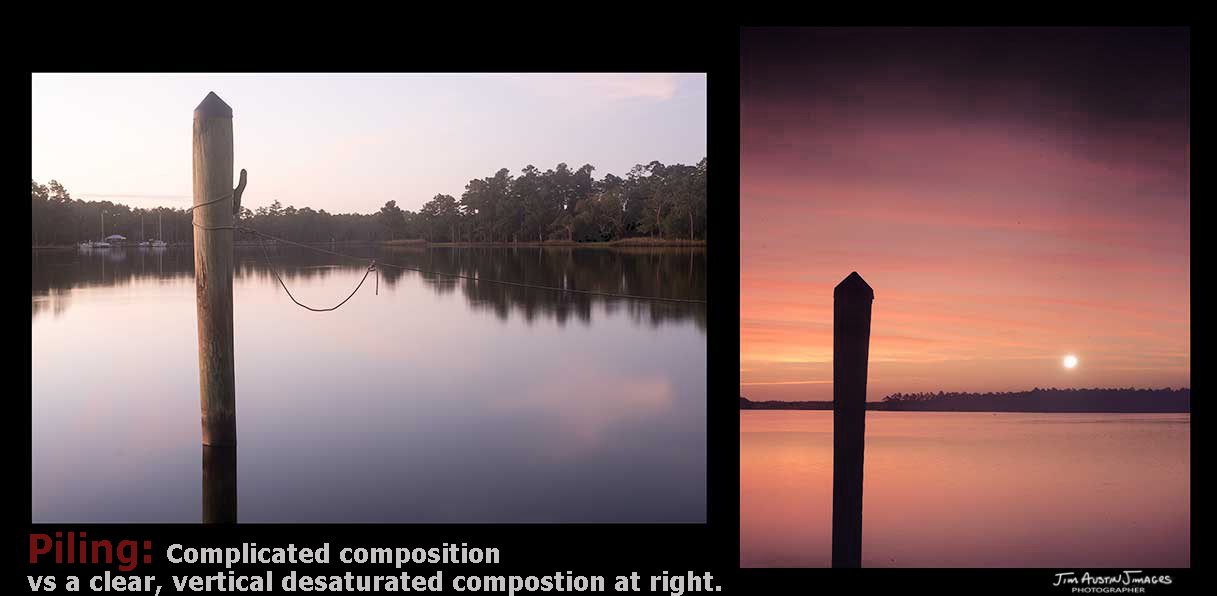
Above at LEFT, I took a photograph of a piling before sunrise. The far shore was the background, and it interfered with the main subject by dividing it. Then, I turning the lens a quarter turn to the sunrise over the river, and took two shots, a double exposure in-camera.
The first frame was predawn light behind the piling, and then I layered the October moon in with the second frame. So, the double exposure was already one frame, in camera. It was easy, in post processing, to take just one more step. To make the color a secondary element, enhancing the visual weight of the piling, I desaturated the .PSD file by dragging Photoshop’s Saturation slider 20 points to the left.
8 BONUS TIP: Micro and Macro
Try extreme closeups. You’ll find many articles on this in Apogee Photo Magazine. When you photograph in the micro and macro realms, you are exposing with an extremely shallow depth of field, and with this method, it is a joy to melt the hues in the scene into glorious color harmonies.


Leave a Reply