
Part two of real estate photography, concentrating on the external aspect of home photography
Daylight Externals
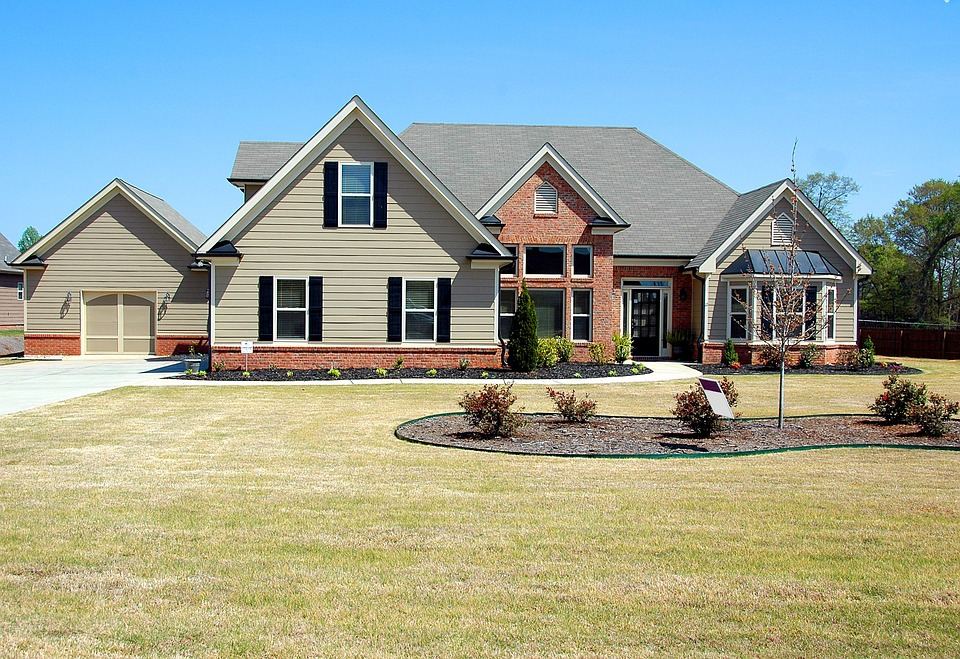
Take a look through a hastily put together real-estate flyer, and you’ll see how poorly homes can be photographed from the outside. However, excellent results can be obtained by following some simple guidelines:
1.) Don’t use a super-wide lens up close (unless doing so is unavoidable). Not only will you lose the roofline, but you’ll also make the perspective distortion obvious.
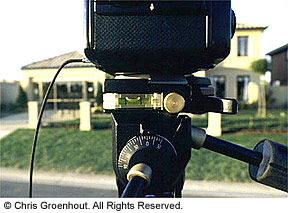
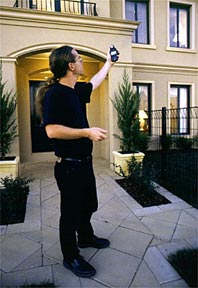
Check the level before shooting
2.) Keep your camera parallel to the floor. (It’s not that difficult, but photographers seem to have a problem with this.) Using a tripod helps (especially one with a spirit level). If you’re feeling wealthy, invest in a shift lens or even a view camera to utilize the vertical rise for such situations. More often than not, a careful choice of viewpoint and foreground, plus a sturdy ladder, will save the day.
3.) Don’t merely shoot the façade. Try to include a little of the house to show perspective. It’s fine to shoot the front square-on, but be sure to have the camera completely parallel to the house and ground.
4.) Try to show the roofline. Move your viewpoint back or up, if needed.
5.) Minimize the less attractive aspects of the house (i.e. the garage, any permanent signage, fences, etc.) by whatever means you find necessary.
All of these pointers are useless if you photograph the house at the wrong time of day. Shooting into the sun rarely does your subject justice, so come back another time or consider shooting the home at dusk (see below). Early morning and late afternoon shoots can also be problematic. Watch for excessive color shifts and long shadows from fences, architectural details–even the photographer!
Dusk Externals
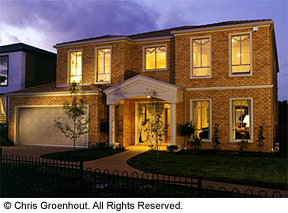
To photograph a display home exterior at dusk, you’ll need to do more preparation than you will if you shoot the same house during the day. The trick is to subtly light the building when the sky is a deep blue tone and not pitch black.
Depending on the orientation of the house (and the weather/time of year), the tonal range of the sky will vary. I personally prefer it when the house faces away from the sunset at a slight angle, which gives you a nice gradation in the sky. A little cloud can be an asset, reflecting the last rays of sunlight and introducing additional color into the sky.
I suggest using tungsten halogen lights to fill the foreground, since they’re cheap, easy to use, and predictable.
Very cheap options include those $30 security lights from Kmart (500W). For a few hundred dollars, you can buy a pair of Lowel Tota lights which fold up and generate 800W of pure and even halogen light.
A spotlight is also handy to highlight areas such as detail in the roofing or portico. However, using more than three lights can make the situation more confusing than necessary and increase your risk of “over lighting” the subject.
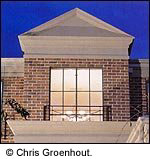
Example of dusk external (detail) using tungsten balanced film
Bring a good ladder and tripod, lots of extension leads, a few spare light bulbs (for lamps inside the house that are often without bulbs) and a basic tool kit you can use to remove a sign or intrusive fence or fix your photographic equipment in a hurry.
Locate a discreet power-point and run extension cords from it around the perimeter of the property. Be careful not to trip pedestrians with your cables, and try to anticipate potential problems with traffic that might happen later when you’re actually shooting.
For example, one evening I was set up on a back street, standing on a chair, when a car careened around the corner and screeched to a halt only two inches from my tripod! Never assume you’re safe (especially when you’re in the middle of the road).
Set up a floodlight at each side of the house and a spotlight somewhere in the middle, leaving heaps of slack in the cable for quick changes once it’s dark and you can see how it all looks. Avoid too much light on the foreground garden, and watch for reflections from the camera’s viewpoint of the lights in the windows.
This is probably a good time to remove doormats, any labels from the plants, and all stray rubbish or garden mess. Also, do a walk-through in the house turning on all the lights (avoiding the fluorescent ones, of course) and adjusting curtains and furniture that might be visible from the outside.
(Later, you might need to re-enter the house to alter the balance of lights between various rooms.)
Camera positioning is often determined by environmental factors (for example, unmovable signage, flagpoles, fences, or trees), but can generally be improved by a high viewpoint (hence the ladder) placed slightly to the side of the home (to suggest three-dimensionality) opposite the side where the garage is.
Ideally, keep your parallels straight. The foreground can always be cropped out later, if necessary. Visibly distorted buildings rarely work, especially when shot was taken square-on.
When you realize dusk is approaching, take an incident light reading (from the subject’s viewpoint) and a few frames, if only to practice.
Compositional and lighting problems may become apparent and are easier to fix at this point than they will be later when your light is failing at a dramatic rate. I suggest metering the brightest point and bracketing up to +2 stops over from that in half-stop intervals. For now, ignore the light levels from the windows. They’ll take care of themselves.
Do a series of shots every ten minutes or so. If not, you might miss the “magic moment” when you achieve the perfect balance and everything looks fantastic. In that second, you’ll realize why you do photography and marvel at the spender of it all–or maybe you’ll be too busy firing the shutter.
When the sky starts to look like night (inky black), pack up and go home!
I use Fuji Provia 100 for dusk shots. And while tungsten-balanced lighting is supposedly only daylight balanced, this intentional “mistake” gives brick houses some much-needed warmth.
Tungsten balanced film (such as 64T) can also be used, but your results can be a little too “cold” on brick facades. On the other hand, light-colored render can look too warm with daylight film, so tungsten balanced emulsions can come in handy, after all.
The added bonus is that the built-in blue cast gives the sky an added boost of blue, even on cloudy days!
These techniques may sound a little “hit-and-miss,” and to some extent they are, but the results are well worth the risk. The trick is to make an ordinary house look glamorous and inviting with a warm glow emanating from each window and a deep blue twilight providing contrast overhead. Try being artistic once, and you’ll be hooked (as will your clients).
Shopping List
Camera – I use a Bronica SQAi 6×6 system for all my work, because the electronic shutter times perfectly up to sixteen seconds, and the lens range is affordable. Other choices I would suggest include the Hasselblad and Mamiya RB/RZ range. If you plan to use 35mm, make sure your camera has manual exposure and focus override and is capable of long, timed exposures.
Lenses – It’s very useful to have at least two wide-angle lenses to cover most situations. On the Bronica, I use a 40mm, 50mm, and occasionally an 80mm (standard) lens for details or compressed perspective shots. In the 35mm format, you can’t go wrong with a 20mm and 28mm or 35mm lens, as well.
Nikon and Canon both have high quality, expensive 17-35mm zoom lenses to consider, but you’re probably better off putting your money into decent lighting gear. Fixed focal length lenses tend to be faster, better quality, and make you a more disciplined and careful photographer, anyway!
Lights – As previously mentioned, high-power monobloc (self-contained) flash units are best for this kind of work. A couple of 1000 or 1500 w/s heads should suffice, but don’t forget to budget for some decent stands and white umbrellas, as well.
Softboxes are a nice luxury but can be extremely bulky on location. For dusk externals, a set of cheap tungsten lights is generally sufficient – lights with a broad, even light (and cheap replacement bulbs) are best.
Other – Don’t overlook a good tripod and light meter, ladder, extension cords and double-adapters, gaffa tape, and a good book to read while you’re waiting for the sun to set. Good luck!
by Chris Groenhout
Leave a Reply