
Lighthouses are more helpful than churches.”
~ BENJAMIN FRANKLIN, 1728.
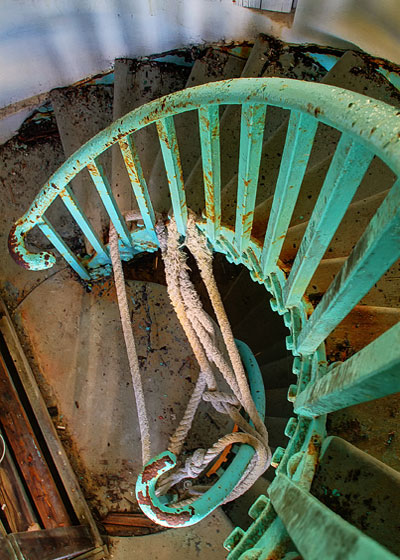
Staircase in the Great Stirrup Lighthouse

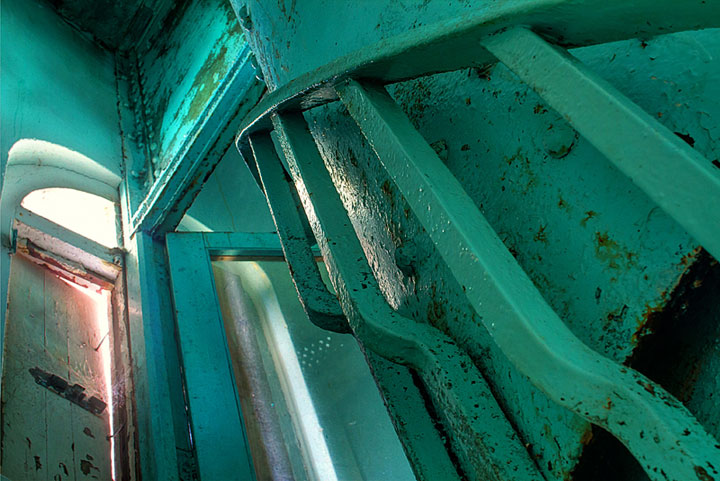
Ceiling in the Great Stirrup Lighthouse
” . . . it is a sweaty, 5-minute climb 80 feet
up to a claustrophobic lens room.
From cerulean to ultramarine, a billion shades of blue
dance on the sea outside the lighthouse windows. ”
~ the Author
Where will you find the best HDR?
Inside you. In your open curiosity and your inner vision.
The images: HDR photography in two different Bahamas lighthouses.
The theme: your personal qualities, or your inner lightroom if you will, make for your best HDR photography.
While high dynamic range camera gear is vital to your photography craft, the essential quality that makes your HDR unique is your inner vision. When carefully crafted, HDR images are lucent, like an orbiting, sweeping lighthouse beam, changing the perception of their viewers once and again.
Like Harry Potter commanding “Lumos! ” to light up a room, what counts is the radiant impression an HDR image can push in to a viewer’s memory.
This mental impression gets painted, carved, attached and thrust outward from the vision of the photographer into the high dynamic range image itself. The inner vision of the photographer illuminates the image.
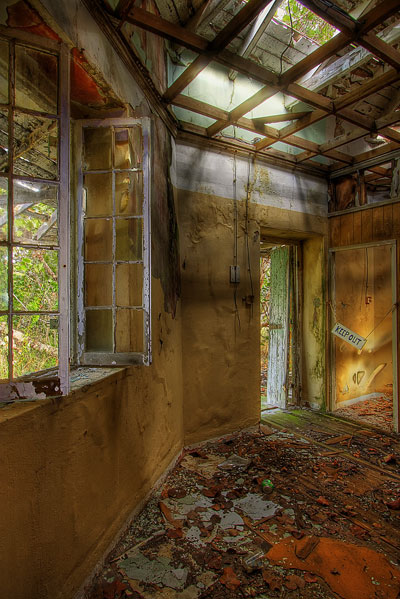
Great Stirrup Lighthouse Bannister and Upper Doorway, Bahamas
Part One: Inner Visions of the Great Stirrup Lighthouse
While footloose in the Bahamas, one photographer took along an inner vision. The two Bahamian settings were so remote that the locals said, “You make your own sunshine.” They meant you are completely on your own on far-flung, windswept islands.
Imagine the scene. On an isolated rock in the Berry Island chain, a lighthouse beckons. The Great Stirrup Cay Lighthouse is abuzz. In the heat, flies buzz around its doorway. Skirting the hazards, crackling electrical cables spilling out from the newly-installed batteries and humming flower-wasps, it is a sweaty, 5-minute long climb 80 feet up to a claustrophobic lens room. From cerulean to ultramarine, a billion shades of blue dance on the sea outside the lighthouse windows. Beams of dusted March sunlight pour through these same windows, warming my tiny 35 mm lens and huge first-order Fresnel lens overhead.
All of Great Stirrup’s out buildings, the oil house and keeper’s quarters, are completely overtaken now by palm, sea grape and tamarisk. These surrounding buildings rest on rock that was once living coral under the water. The rhythmic beam from the Great Stirrup light sweeps over the island and the sea around its shores, at night, all day and all night, over and again…
I set up a small tripod.
KEEP OUT!
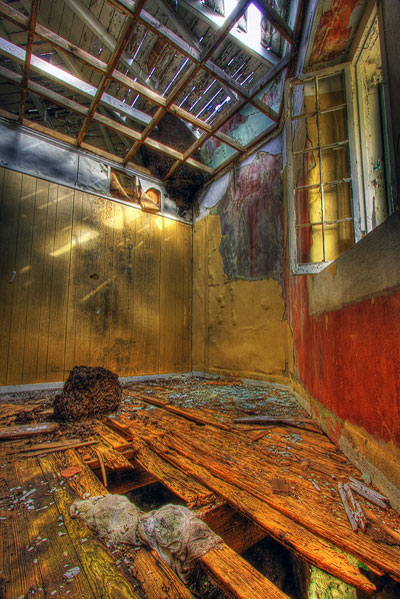
Great Stirrup Lighthouse Termite Mound
Interior of the Great Stirrup Lighthouse
Gear Tips for HDR Adventures
1. Download Photomatix Pro. Learn the program and its terminology. Understand its settings and how it combines exposures. It is an amazing program. Its sliders include global operators and local operators to enhance your HDR image. Take your time to understand the difference between these two functions. Use default settings to create an HDR to keep it simple at first. Later, fine tune your tone mapping once you understand how Photomatix works. Spend a lot of time understanding what tone mapping means, as it is the essential step in creating fine art HDR. There are many tutorials about tone mapping on the web and YouTube.
2. Tripod: A full-size tripod is helpful. A lightweight carbon fiber, 4-section tripod is an asset, but if it’s out of your budget, just be sure you choose one that is strong, can hold the weight of your camera gear and is versatile. A small tripod is also helpful when you are climbing or hiking long distances.
3. Cable: A cable release is helpful to get sharp images and reduce camera movement. I also use mirror lockup sometimes to reduce movement artifacts.
4. Camera Settings: Use RAW. Set the lowest ISO possible. Set the Mode to Manual or Aperture Priority so you can consistently use the same aperture as you bracket shutter speeds. Five to seven exposures will cover the contrast of most scenes. Some photographers use a spacing of 1 or 2 stops, some use 1 ½. Use what works for your scene and workflow.
HDR for Your Inner Lightroom: Part 2
Learn about high dynamic range methods and workflow.
by Jim Austin
All text and photos: © 2012 Jim Austin. All rights reserved.
Leave a Reply