
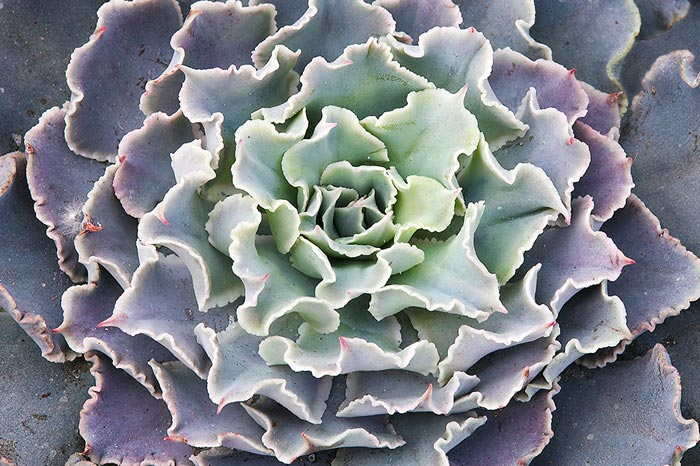
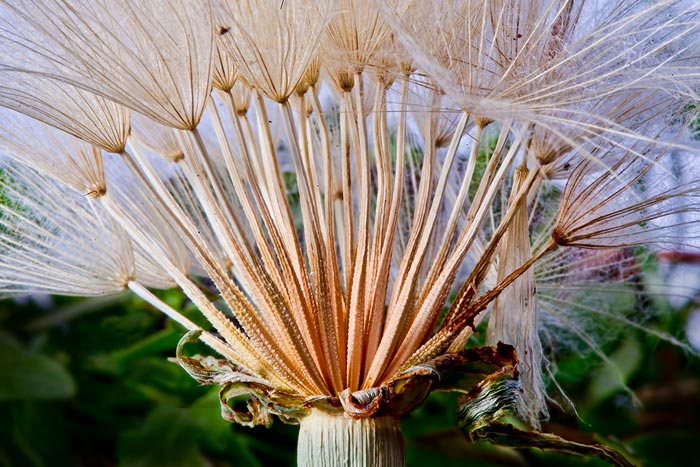
Flowers come in a variety of sizes and shapes. Be sure to take that into account when deciding how to approach flower photography, whether it’s a close-up or wide angle photo of the entire garden. Take more than one photo of each subject you decide to photograph.
But just taking multiple images of the same thing, with the same settings will accomplish nothing. Be sure that you adjust your point of view, your angle, your depth of field, and your composition as you photograph.
Then when you get home you can try to determine which combination worked best. By studying the results you will learn the best way to capture those stunning images on a more consistent basis.
Camera Settings For Flower Photography
Sweet Spot – Optimal F-Number
All lenses have an aperture setting, or range, that is called a “sweet spot” for sharpness, which is the aperture at which you will get the sharpest images. Each lens is different, but as a general rule of thumb, the sharpest images are taken with the aperture two f/stops above the widest opening.
So if your camera has a lens which is wide open at f/2.8, then the “sweet spot” will be two stops above that, at f/5.6.
But you will also get “softer” images with the aperture at its smallest due to diffraction (light rays get slightly “bent” as they squeeze through very small apertures, resulting in you getting progressively less sharp images). When you use smaller apertures (larger f-numbers) to achieve a greater depth of field, at some point the aperture size will cause some softening due to the effects of diffraction.
So it is also a good idea to use apertures at least two f/stops below the smallest opening. So if your minimum aperture is f/22, then you should use f/11 or larger.
That doesn’t mean that you can never use a wide open, or smallest opening aperture. You may still want to photograph with the aperture wide open when the lighting is poor, or when you want a small DOF. But knowing the limitations of your lenses will help you in understanding how to best use them in flower photography. more – photographing witch hazel flowers
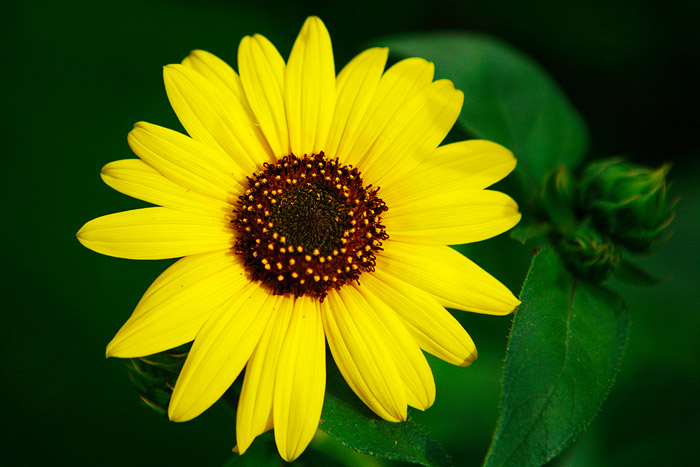
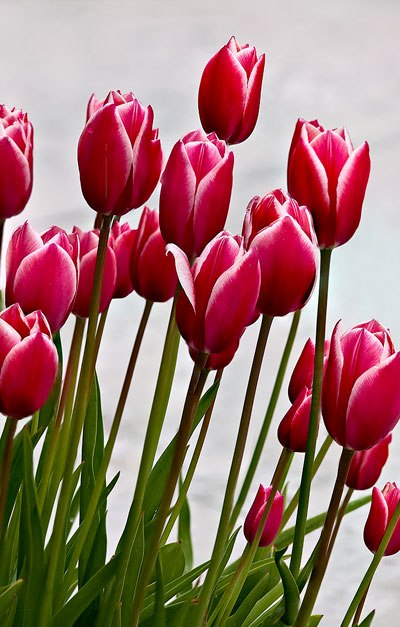
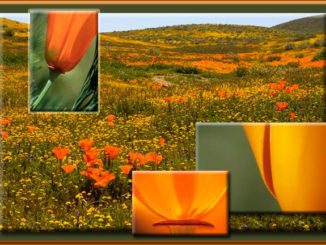
Keep it Simple With Flower Photography
If you take a look at the best professional flower photos, you will notice that more often than not they are very simple and to the point, without a lot of distractions or competing elements in the photo. Make it easy on the user to find and focus on the focal point, without having their eyes roam the photograph trying to find it. This is a case where the old adage of ‘Less is More’ applies.
Wind: Friend or Foe
When photographing flowers wind can be a big problem, however there are some things you can do to minimize the effect of the wind.
1. Wait until the wind dies down. That could be a couple of minutes, or hours, or days.
2. Build a wind barrier. Your location will determine what type of barrier you can use. It may be a camera bag, a person, a reflector, or any other object that will block the wind. Make sure to keep the barrier out of the photo.
3. Photograph early in the morning, when the wind is generally calmer.
4. Photograph at a faster shutter speed. This may come at the cost of depth of field, and you may have to increase the ISO.
5. Use a Plamp to steady the flower in a light breeze. If you don’t have a Plamp, you can tie the stem to a thin garden post with string or fishing line.
6. Get creative and use the motion of the flowers to create an abstract look.
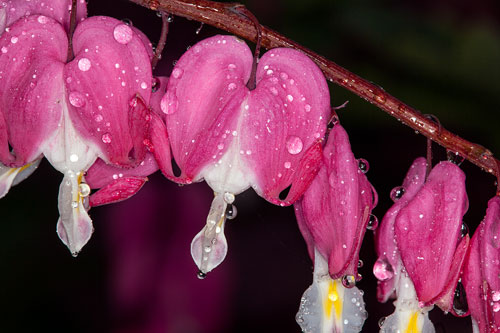
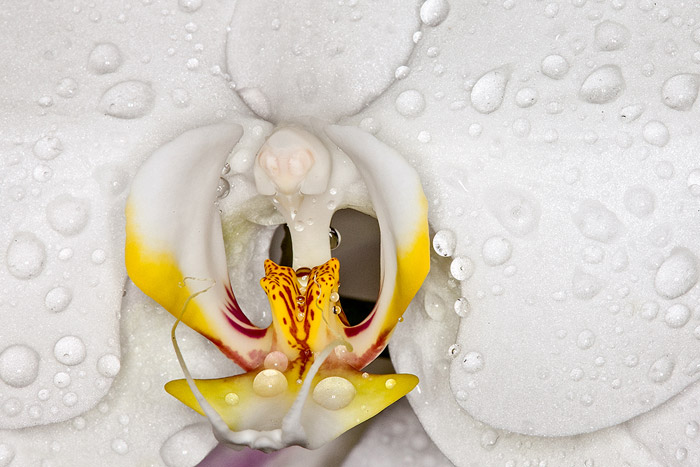
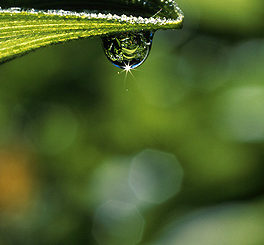
Raindrops
Raindrops can add a great amount of interest to an ordinary photo. What, no rain in sight! Not a problem with your flower photography. Many photographers add water drops to otherwise dry flowers. You can add a single drop of water or glycerin with an eyedropper or use a spray bottle of water for multiple drops.
Raindrops act like miniature lenses and reflect and refract tiny images of whatever is behind or around them.
Get in close and focus on the colors within the raindrop. If you want to show a flower within your raindrop, place a flower in front of the raindrop and capture the flower image within the drop. If you also want to capture the flower that is being refracted in the raindrop, move the flower around so both are captured in the frame.
Flora and Fauna
There are so many great photographs of flowers, adding an extra element can really make them stand out. Combining flowers with insects, or other animals, can help you capture a great image. A good macro with a long focal length can help you in capturing an image with an insect by allowing you to be further away from the subject, so as not to scare the insect away.
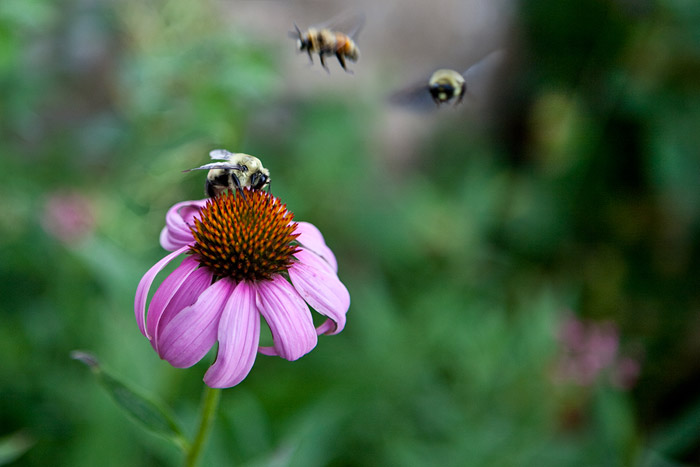
You could also use a large telephoto zoom lens with one or more extension tubes. The long telephoto will help you to zoom in to where you can focus and the extension tubes will allow you to fill the frame with the subject.
Focus
Focus is very important in any type of photography, but especially so when photographing flowers.
When using Auto Focus with flower photography….
~ Make sure that the focus point is on the focal point of the image.
~ If you use the focus lock feature, make sure you are in the One Photo or Single AF Focus mode.
~ Be sure to only use one focal point (preferably the middle one), rather than the auto, which will focus on the closest point in the image.
~ When focusing, make sure there is enough light and/or contrast to enable the lens to get a good focus.
When photographing macros, manual focus usually gives you the best results.
~ Make sure that your view finder diopter is adjusted accurately so that you will get the sharpest focus.
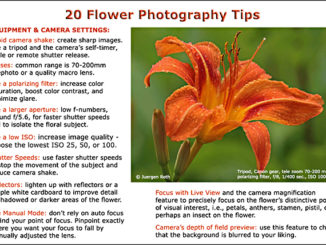
~ If you have live view, use it to get an accurate focus. With live view on, hit the magnifier to get the largest image possible and then focus on your subject. Be sure to move the focus point to the point that you want to have the tack sharp.
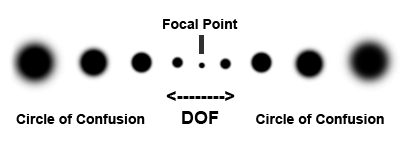
Focal Plane
The focal plane, or principal plane of focus, is the plane (an infinitely large, flat surface, perpendicular to the camera, with a thickness of zero), where your lens is actually focused. Any point before, or beyond that plane immediately begins to lose detail, even if it is not perceived by our eyes.
Once our eyes perceive when that point begins to lose detail, or sharpness, we give it a term called the Circle of Confusion.
When do our eyes perceive when a point begins to lose sharpness, or in other words, when do we notice the Circle of Confusion? When talking about the Circle of Confusion, or what is considered to be in focus, it is usually described in terms of looking at a print, from a specified distance, then determining if “the focal point” is sharp, crisp, or in focus, to a person with 20/20 vision.
The normal viewing distance of the print is usually expressed as something close to the diagonal size of the print. The viewing distance of an 8×10 print, using this guideline, is about 12 – 13 inches away. So if you looked at the print from that distance and it looked sharp and in focus, then you can say that the print has an acceptable sharp Circle of Confusion.
For a 4×6 print, the viewing distance (close to the diagonal size), would be about 7 inches.
Any discussion beyond this about the focal plane, or the Circle of Confusion, becomes a discussion about mathematics and formulas.
If you want to do the math, you can use the Circle of Confusion, viewing distance, viewing resolution, magnification, pixel size, diffraction and lens artifacts to determine what image resolution you need for the print size you want, at the viewing distance it will be viewed at.
Or you can just make your images as sharp as possible by concentrate on the Depth of Field (DOF), and have it printed by a very good printer.
With a month of flower photography tips and techniques you should be all set to create beautiful images of your own.
more helpful flower photography articles
Part 1: Brad Sharp takes a deeper look at how to photograph flowers
by Brad Sharp
All text and photos: © 2012 Brad Sharp. All rights reserved.
Thanks for the tips. I am new to photography and I wanted to start with flowers, I thought it was easy sadly it’s not. Thanks for your help.