
There are only two ways to adjust the amount of light that enters through a lens: Shutter Speed and Aperture. ISO does not affect the amount of light that enters the lens. ISO is a measurement of the sensitivity of the camera’s sensor.
Higher ISOs are more sensitive and don’t require as much light to get a good exposure, but result in more noise in the image. Lower ISOs are less sensitive and require more light, but give you an image with little if any noise.
It’s real simple:
A lower ISO = less noise (graininess) in your image = more fine detail & better definition = sharper images.
A higher ISO = more noise = less contrast & less detail = duller (used as opposite of sharper), images.
The problem with noise is that it dulls the image. This is not good when you want “tack sharp” images.
When would you want to use high ISO settings? At your child’s indoor dance recital where no flashes are allowed; concerts; outdoor sporting events under the lights; inside churches and cathedrals where flashes and tripods are prohibited; indoor sporting events where you need higher speeds. And while your ISO may be higher in these situations, the general rule still applies: Always use the lowest ISO possible.
There are software programs that do reduce the noise in an image, but at the same time they remove some of the very fine detail and sharpness. Your best bet is to always use the lowest ISO possible, but don’t let that override your minimum shutter speed. It is better to have a little noise than to have a blurry image.
FOCUS
How well you focus directly affects the sharpness of an image, which makes proper focusing very important. It is important to know if your image is blurry because of motion blur or camera shake (both caused by a shutter speed that is too slow), or simply because it was out of focus.
You can tell if your image is out of focus if part of your image, other than your subject, is crisp and sharp while your subject is blurry or soft. If this happens, it means that the part that is sharp and crisp is where you actually focused, when you actually wanted to focus on the subject. If the out of focus is due to motion blur or camera shake, the entire image will be out of focus and/or blurry.
AUTOFOCUS
Autofocus (AF) automatically adjusts the camera’s lens to acquire focus on the subject, which will determine if you get a “tack sharp” image or one that you will end up deleting. There are three factors that influence how successful using Autofocus will be.
1. Contrast: AF systems on most digital DSLRs work by sensing the difference in contrast between edges, even those that use Phase Detection Autofocus. When there are no sharp edges or contrast, or when there is not enough light to detect the contrast, the lens’s Autofocus will keep searching for an edge and will not be able to focus.
For example, if you try to focus on a solid colored wall with no contrasting edges, you will not be able to acquire automatic focus because there is no contrast.
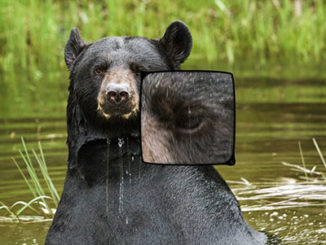
2. Light: If you are photographing a black cat in a dimly lit room, your camera will not be able to acquire an automatic focus on the cat, or if you are shooting on a dark night with very little light, you will not be able to use the automatic focus feature.
3. Movement: If your subject is moving towards you too fast, the automatic focus system in your camera will not be able to keep up with the movement. When your subject is moving directly towards you, it is best to focus on a spot through which the subject will pass through, then when the subject is about to reach that spot, start shooting in continuous mode until the subject is past the focus point.
FOCUS LOCK
If you use the center focal point, be very careful that you don’t lose sight of the composition in the image. If you use the center focal point, the point that you focus on will therefore be in the center of your image. In most cases you don’t want your subject exactly in the middle of the image.
Focus Lock allows you to set the focus on your subject, then recompose the picture while still maintaining the original focus. In order to use this feature, you must be in the One Shot/Single Mode.
Problems with Focus Lock
1. If you are shooting with a shallow depth of field and you acquire a focal point on your subject, when you move the camera to recompose, the focal distance may also change from your original focal point. With a very shallow depth of field, this could put your original focal point out of focus.
2. If you use Focus Lock and you decide to change positions by moving closer or further away, or you have your subject move closer or further away, this will definitely cause your image to be out of focus, which of course will prevent you from getting a “tack sharp” image. Instead, try panning slightly to one side or the other.
When you are shooting with a very shallow depth of field, even simply leaning in closer or leaning back, or tilting your camera up or down when you have the Focus Lock on, could throw your subject out of focus. This is why most professionals will use manual focus when working with very shallow depth of field.
You can then compose your image the way you want, then focus on the subject rather than focusing and then composing the image.
3. If you forget to change the AF Focus Mode to One Shot/Single and you move the camera to acquire a better composition, your focus point will also move and your subject will be out of focus.
AF FOCUS MODE
If you have the wrong focus mode set, your chances of capturing a “tack sharp” image greatly diminish. You should set the Focus Mode depending on if your subject is moving or stationary.
Stationary Subjects: select Single Servo AF-S (Nikon), or One Shot (Canon), or a similar setting for other cameras.
Moving Subjects: select Continuous Servo AF-C (Nikon), or Al Servo (Canon), or similar settings for other cameras.
The setting AF-A (Nikon), and AI Focus (Canon), automatically switches from Single/One Shot to Continuous/Al Servo when it senses the subject moving. This is why you want to have the AF Focus Mode set to One Shot/Single when using Focus Lock.
The Focus Mode becomes very important if you are trying to shoot a moving object. When your camera is in the Continuous or Al Servo mode, pressing the shutter release half way down will allow it to focus on the moving subject.
Once focus is obtained, the camera will continue to re-focus as the subject moves, as long as you keep the focal point on the subject as you track (pan) the movement with the camera. When you take the photo by pressing the shutter release the rest of the way down, your subject will still be in focus and should be “tack sharp”.
If your camera is moving when you take the shot, the background will be blurry but the subject will be in focus (if you have the right shutter speed) because the AF will keep the focus. This is why you want to have the AF Focus Mode set to One Shot/Single when using Focus Lock, so that the AF won’t maintain focus on the subject when the camera moves.
MANUAL FOCUS (MF)
There are some cases where the Autofocus will fail. When this happens the lens will move from one end of the focus range to the other, back and forth, trying to find something on which to focus. When this happens, manual focus would be better than auto focus.
When to Use Manual Focus:
1. When the focal point has no texture, lines, or high contrast edges on which to focus.
2. When there is not enough light on the subject.
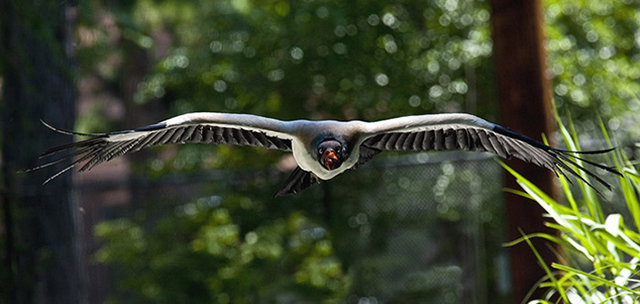
3. When you are at a zoo shooting animals (with a camera of course), through a wire fence or a cage. This may confuse the AF system. In this case, one option would be to switch to manual mode which allows you to focus on your subject behind the fence or window.
When combined with a large aperture (small f/number), you will decrease the depth of field which will make the image stand out more, and may even eliminate any sign of a window or fence. This will be your best option to get a “tack sharp” image.
4. Macro photography has an extremely shallow depth of field, and exact, precise focusing is vital to capturing a “tack sharp” image. If your focus is just a tiny bit off, or if it focuses on the wrong part of your subject, it can completely ruin the shot.
This is a case where your camera may be able to autofocus, but it would be better to use manual focus, which gives you better control when you are trying to focus on a specific spot that you want to be “tack sharp”.

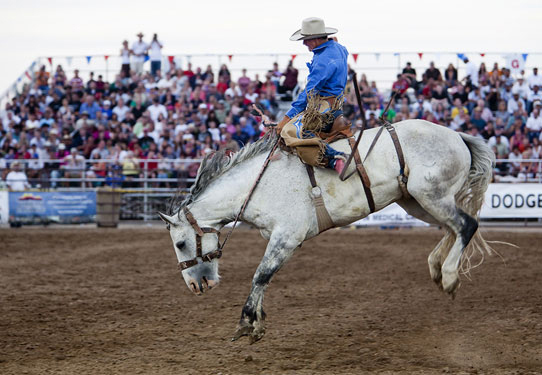
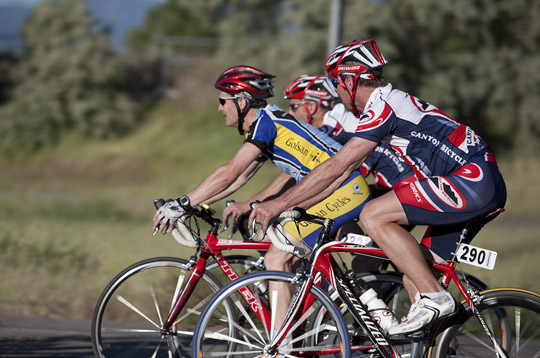
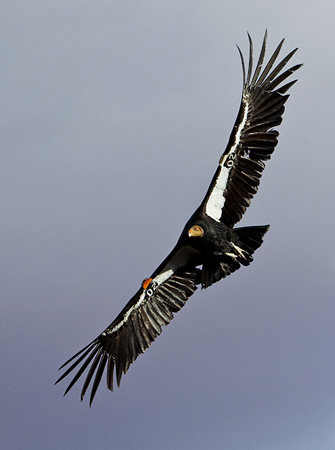
5. When a subject, like birds, cars, racers, etc., moves horizontally (right to left or left to right), it is fairly easy to track and autofocus on the fast moving subject.
However, when a fast moving subject is moving towards you, the autofocus system will not be fast enough to keep up with the subject and you will end up with a blurry image. In this case, manual focus will allow you to pre-focus on a selected location where you anticipate the subject will be, then snap the shutter release when the subject reaches that location.
Shooting a burst of multiple exposures using the continuous shooting mode will help ensure that you capture the subject in the pre-focused area.
Note: It should go without saying, but sometimes even the best professionals forget making changes in the settings of their camera (I think that is true, but I have no proof).
When you are having problems with autofocus, or for any other reason you decide to use manual focus, and you reach down and turn the focus ring on the lens until you have the focus you want, you may end up with an image that is out of focus.
Why? It’s because you didn’t flip the switch on the lens from AF to MF. If you leave the lens on AF, but focus it manually when you press the shutter release, the lens will acquire focus automatically, which may not be where you focused manually.
MIRROR LOCK-UP
In order for you to see through the lens (TTL) when you take a photograph with an SLR camera, a mirror is used to reflect light from the lens up to another mirror, called a Pentaprism, which reflects the light through the viewfinder. When you press the shutter release, the mirror moves up out of the way and allows the sensor to capture the exposure. The mirror then returns to the viewing position.
In order to eliminate any vibration from the movement of the mirror, you can use the Mirror Lock-up feature of your camera. On some cameras this can be done on the back of the camera, while others (Canon), require you to open the menu, then navigate to the Mirror Lock-up feature to enable it.
When you use this feature, you should always use a remote shutter release. In this instance, the mirror moves out of the way so the sensor can capture the exposure and it is “locked” in position when you press the shutter release. When you press the shutter release again, the sensor is exposed to the light, the shutter closes, and the mirror drops back down into its original position.
I suggest you test the mirror lock-up yourself to determine how well your camera does without it. You may also want to test it by looking at the results of a photo test. There are some people who suggest that the mirror lock-up actually causes your image to blur slightly when using very slow shutter speeds.
Others suggest that by not using it the image will suffer and that mirror lock-up, combined with a solid tripod, is the best way to get quality images. You need to be your own judge on this one.
Try all of your camera’s focusing features to see how they will help you achieve “tack sharp” images. Just enjoy the process and have fun capturing those images.
Photos by Brad Sharp
Copyrights on Text and Photos: © 2015 Marla Meier, Apogee Photo Magazine, LLC. All rights reserved.


Leave a Reply