
What equipment do you ideally require for Photographing flowers? My second tutorial looks at the photographic equipment which might come in useful for this subject.
(part one of photographing flowers is here)
Don’t feel like you need to have all of the equipment I talk about in this article in order to take great photographs. Although good equipment will help you make better pictures, they don’t guarantee that your pictures will be great.
There are many great photographs taken by all types of cameras. But taking the time to think about what you want to capture and how you are going to use what you have to get the best possible image (equipment, light, subject, background, flash, etc.) will be a much greater factor in how your images turn out than what equipment you have.
Good to High Quality Lens
As a general rule, the better the lens, the better the photograph. And while the newer consumer grade lenses are capable of taking good pictures, using a professional grade lens will make the pictures even better.
A midrange prime (55mm – 100mm) lens works really well for shooting flowers. A 17-55mm, 24-70mm, or even a 100-200mm lens (to get close-ups of flowers when you can’t physically get close to them) also works well when photographing flowers.
Macro Lenses
Macro lenses are designed to focus very closely to the subject. Most macro lenses give you a 1:1 ratio (live size) and some will allow you to focus even closer. Do not confuse ‘Macro Zoom’ lenses with actual Macro lenses. The Macro Zoom lenses will not give you a 1:1 ratio.
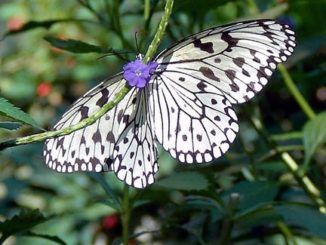
The best macro lenses are autofocus models, which typically have focal lengths from 50mm to 200mm. A macro lens between 150mm and 200mm is generally preferred. These lenses will give you a greater working distance between the lens and the subject. If you want to shoot insects and can’t get close to them without having them run or fly away, then you should use the 180mm or 200mm macro instead of the 60mm lens. Most all macro lenses are of high quality.
Shooting with macro lenses will give you an extremely shallow DOF. The slightest movement in the flower or the camera will give you a blurry image, so it’s always best to make sure your subject doesn’t move, and use a tripod and the camera’s self-timer or a remote shutter release device. If you are shooting subjects that move, you will have to have more light (Macro Ring Lights / Flash, work great), in order to be able to increase the shutter speed to stop the movement of your subject.
Extension Tubes
Extension tubes fit between the camera and the lens but they contain no optical elements (glass). They allow you to focus closer to the subject by moving the lens further from the camera’s focal plane. They are an inexpensive way of getting quality close-up macro-like images.
When combining an extension tube with a telephoto lens, you will be able to capture close-ups of flowers without the need to get really close to them, such as with a macro lens, but you need to be very careful in focusing because they will give you a very shallow depth of field. (They don’t often work with wide angle lenses).
Remote Shutter Release
While a tripod will drastically reduce camera shake and will allow you to take long exposures with slow shutter speeds, the movement from pressing the shutter release will make the camera shake enough to prevent you from getting tack sharp images. In order to minimize camera shake and get the most out of using a tripod, use the camera’s self-timer function or a cable or wireless remote shutter release so that you don’t have to touch the camera.
Sturdy Tripod
A tripod is an absolute necessity when shooting extreme close-ups or extreme macro photos of flowers and is advantageous for several reasons:
1. Keeps the camera stable.
2. It allows the use of a smaller aperture (larger f/number), providing greater Depth of Field (DOF).
3. Smaller aperture = less light to the sensor. Less light requires a longer exposure time = the use of a tripod.
4. You can easily change and lock the angle of the camera in the desired position.
5. You can raise or lower the camera effortlessly and still have the camera stability you need.
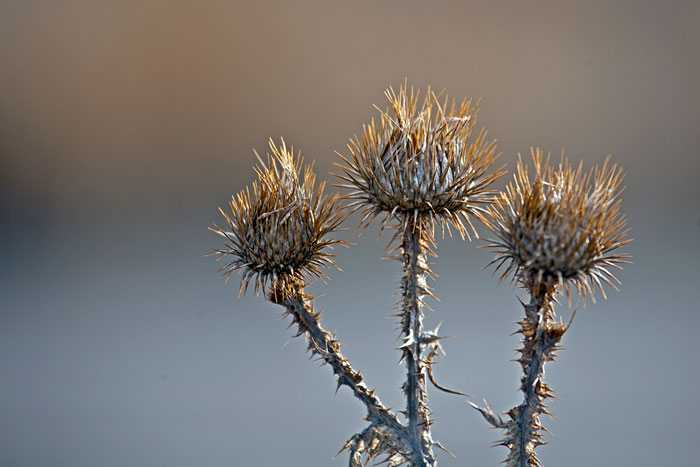
MACRO
Macro photography is very interesting and reveling. It captures and makes visible details and intricacies which we don’t normally see. But in order to appreciate these details, they must be sharp and crisp.
Many photographers have problems with capturing an image with a depth of field
that is large enough to include all of the subtle details of the subject. In my opinion, the goal in macro photography is to include a complete depth of field when taking shots of small subjects. In order to do so, you need to have a small aperture (f/16 or higher), use a sturdy tripod and a remote shutter release or use the camera’s self-timer. You will also need to have good lighting which may include a flash system to light the subject and to freeze any movement. Macro photography is best when you fill the frame with the subject, and the background should be free from distractions and clutter.
Polarizer
A circular polarizer can help you improve your flower images by increasing the saturation of colors and reducing the glare on the shiny surfaces of the flower or leaves. One way to visually preview the effects of polarization is to look at the flower through polarizer sunglasses. Polarizer lenses can be tricky to use, so be sure that you know how and when to use them.
Reflectors
Sometimes you are not able to get that dynamic lighting exactly where you want it–reflectors to the rescue! Reflectors are aptly named, since they reflect (bounce) light onto your subject.
The reflected light ads contrast, brightness and color to the subject and are great to reflect light into those dark shadows deep in the flowers. Reflectors generally come in white, silver, and gold. White reflectors reflect a soft light. Silver reflectors reflect more neutral colored light, but it is also the harshest and the coldest. Gold reflectors add a warm glow to the subject. By experimenting with different colored filters you will be able to find, and learn, which one to use on different subjects (flowers).
When positioning the reflector, you should start with the sun either to the side of the subject or behind the subject. Make sure that you watch how the reflection bounces off the subject in order to get the optimum effect. Of course on a cloudy day, or in full shade, reflectors won’t do you much good.
Diffusers
A diffuser is any material that lets the light shine through it, thus diffusing the light. You can purchase them in almost any size or you can make one yourself. The ones that you buy are flexible and can be folded up for easy portability.
A diffuser allows you to shoot in bright sunlight by diffusing the light–eliminate the bright, harsh, high contrast light.
You can have an assistant hold the diffuser, use a Plamp or put it on a tripod stand.
Image Stabilizer in Lenses and Cameras
You can lower the minimum shutter speed required to get tack sharp images (2-4 stops slower with no camera shake), which will in turn allow you to use a smaller aperture (larger f/#)and achieve a greater DOF, by using a lens or camera that has image stabilization.
Optically stabilized lenses have been around for some time, but the sensor shift camera body technology is a more recent addition to some digital SLR camera brands. Whether within the lens or the camera body, both compensate for the pan and tilt of the camera when shooting without a tripod, and detect minute horizontal and vertical movement, then makes adjustments accordingly in order to provide you with crisp, clear photos.
And of course there are differing opinions on which is best, lens or camera body technology, so do your homework, study the advantages and/or disadvantages, and come to your own conclusion on which technology you would prefer.
Note: When shooting with a tripod, which you should be doing for most flower images, some camera manufacturers recommend that the Image Stabilization be turned off. Some of the new lenses allow you to keep the Image Stabilization on when shooting with a tripod. Make sure you check with the manufacturer of our lens.
Note: Each manufacture has a different name for this technology (Image Stabilization – IS, Vibration Reduction – VR, Shake Reduction – SR), so it’s probably easiest to just ask them what they use or do a search within a company website for image stabilization.
Plamp
When you are shooting outside, even the slightest breeze will cause the flower to move and cause the picture to be blurry. A Plamp, made by Wimberly, can be used to steady the flower by anchoring the Plamp to your tripod and then applying the clamp to the stem of the flower. It’s also good to hold unwanted distractions (other flowers, weeds, branches…) out of the way and to hold small filters and diffusers.
Off-Camera Flash (Fill Flash)
You should always have a flash with you when photographing flowers. As already mentioned, many of your close-up shots will require a small aperture in order to get a larger depth of field. A fill flash will help light up the subject when using a small aperture.
A flash can be used off camera to provide a more interesting light coming from the side rather than in front. You may also be able to use an off camera flash to add light to a subject when you are shooting a close-up where the lens is so close to the subject that the natural light is blocked.
When shooting macros, a circular flash, or twin flash is very helpful in providing enough light to the subject.
Part 1: Learn about removing distractions, aperture, DOF, focal point, the properties of light and so much more…
Part 3: Brad Sharp gives you some technique tips for capturing great flower images.
by Brad Sharp
All text and photos: © 2012 Brad Sharp. All rights reserved.
Leave a Reply