
I’m a commercial photographer in western, central New Jersey and have a small Meetup Group of about 350 photographers called the Frenchtown Photography Meetup. We range from full-time and part-time professionals to complete newbies. It is a great group and there is always a lot of positive interaction at our meetings.
Our specialty is to do projects. We’ve done quite a few from large to small. One of the more interesting projects that other photographers might be interested in trying is called “Frenchtown 150” and blends photography with Google Earth. Overall the project seems a little complicated but is pretty simple when broken down step by step. It requires Lightroom, Photoshop, Google Earth, an online application and some text editing.
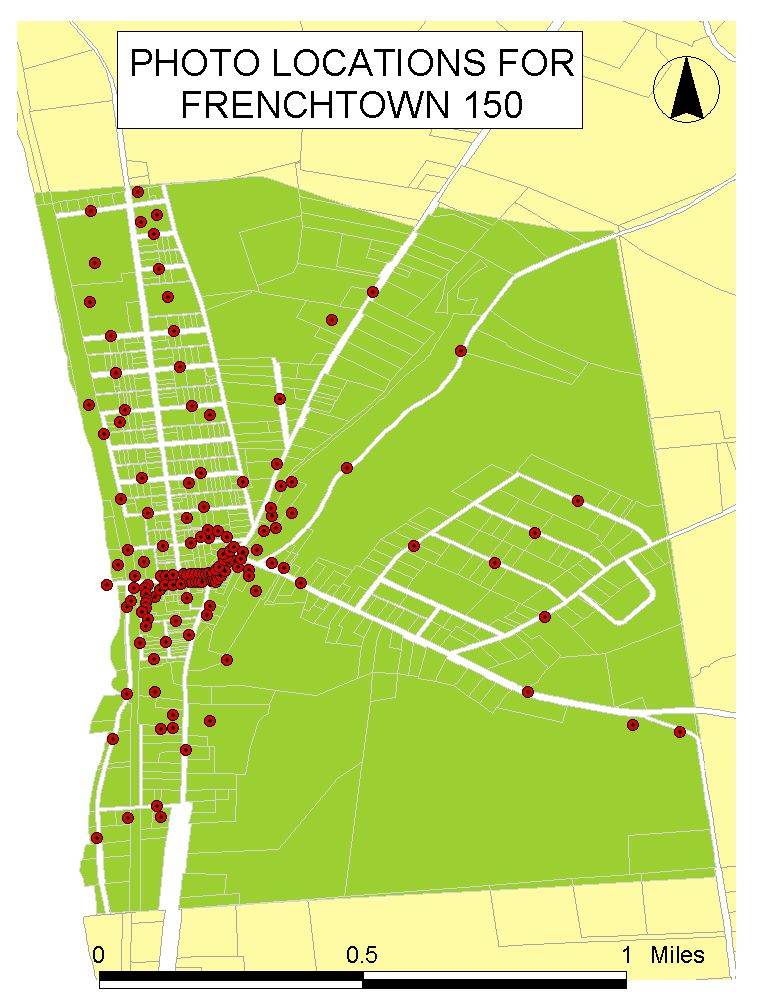
Frenchtown is a small town located on the banks of the Delaware River in Hunterdon County, NJ. 2017 marked its 150th year as an incorporated borough. We used this as an excuse for our project. The objective was to photograph 150 locations in the borough and put the photos on Google Earth Pro.
This required identification of the locations to be photographed, assigning the locations to participating photographers, shooting, formatting, labeling, georeferencing and finally a little bit of coding. It was ambitious, but we pulled it off. About 20 photographers participated and it only took a few weeks from start to finish. It was a fun project and everyone learned from it.
Here is the process from start to finish.
IDENTIFY LOCATIONS
The first step was to identify 150 locations in the borough to be photographed and plot them on a map. Like most towns Frenchtown has a business district along with residential, recreational and undeveloped natural areas. All of the 70 street-level business locations and restaurants were selected along with each of the residential streets, the parks, a few natural areas and some infrastructure like the sewage treatment plant and bridges.
The locations were all named and numbered for easy identification.
The next step was to recruit photographers and explain the project parameters. Their task was to select and photograph the locations of their choice, format and label the photo, geotag it, name the files according to a standard and then submit their files for inclusion in the project.
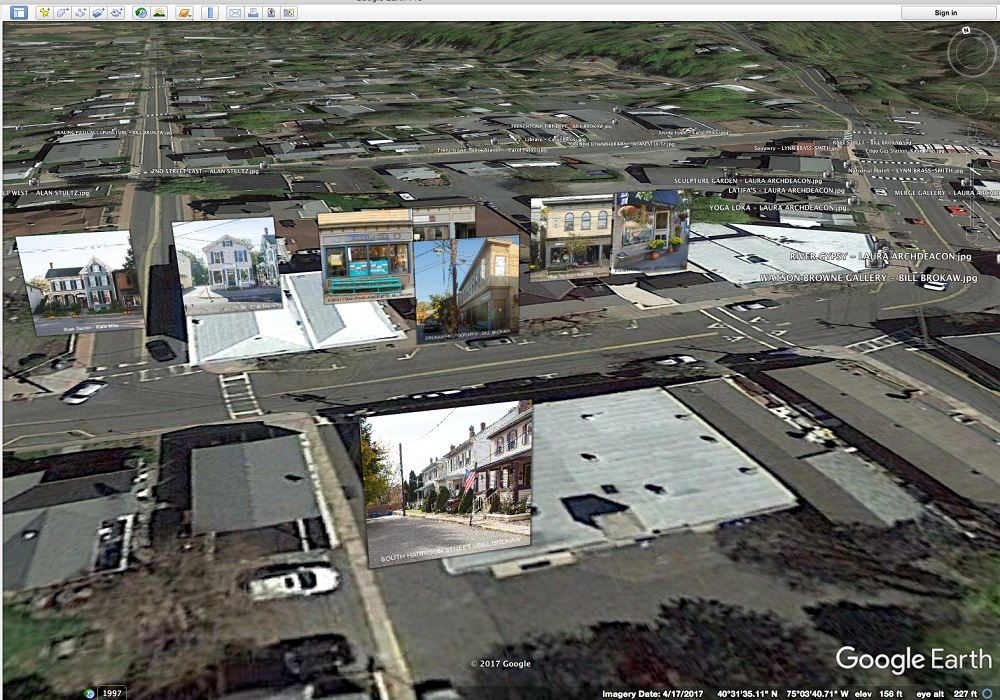
The end product is a collection of photos that can be located and viewed on Google Earth.
PHOTO STANDARDS
Each photo needed to be cropped square at 1200 x 1200 pixels. This made them small enough to manage but large enough to look good on line. Cropping is fairly easy and can be done in most photo software products. The trick was to think ahead when taking the photo knowing it will be square, not rectangular.
Each of the photos was also labelled at the bottom of the image with the name of the location and the photographer’s name. This was essentially a watermark that allows quick identification of the location and assures credit to the photographer who got the shot. The intent was not artsy, award winning photos but instead good, clear, sharp, well-composed images.

The most important standard for the photos was that they needed to be properly geotagged. This was done in Lightroom.
While many cameras can tag a photo with latitude/longitude the problem with this method is that it tags the photo with the coordinates of the camera, not the object being photographed. This would be problematic.
For example, to photograph a business on has to stand back from from it to get the shot. If using the camera geotagging method, the resulting photo will identify where the camera was located instead of showing the coordinates of that business
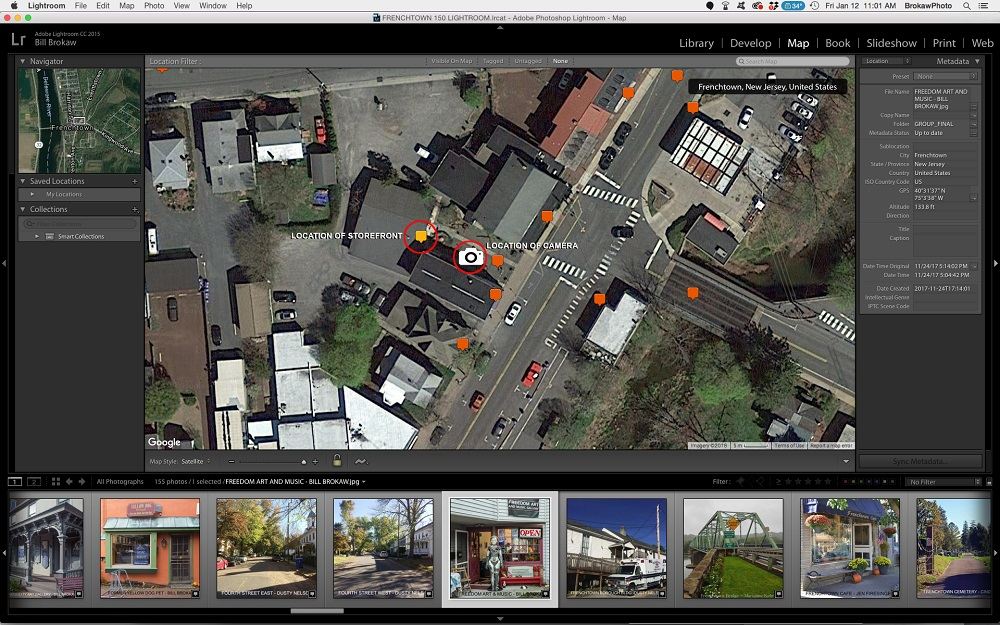
Geotagging in Lightroom is easy. You import and select a photo then click on the “MAP” module at the top of the screen. To find your location type in the town name in the search window and Lightroom will display an aerial photo. Zoom into the location of photo, right click on the map and add GPS coordinates.
There are alternatives to using Lightroom for geotagging but these methods did not format the metadata properly for the project and they had to be redone.
The final step for processing the photos was to name the files according to a standard. All files needed to be named with the name of the location and the photographer’s name, exactly as was done for the labelling. This final step assured that all files would be properly identified and would more easily be incorporated into the final coding needed for Google Earth.
PRODUCING KML FILE
A KML file is a text file with instructions for locating a site on mapping software such as Google Earth or Google Map. These programs can read the coordinate data within the file and zoom the user to that location. The KML file can also contain graphic information such as icons to mark locations, labels and photos.
For this project I used an on-line KML generating application by Timothy Whitehead who is a programmer working for Red Wing Aerobat and lives in Cape Town, South Africa. Timothy published his application on the blog Google Earth Blog.
Google Earth Blog is no longer updated with new posts but the 2015 post where the KML generator was published can still be found at https://www.gearthblog.com/blog/archives/2015/11/importing-geotagged-photos-into-google-earth.html.
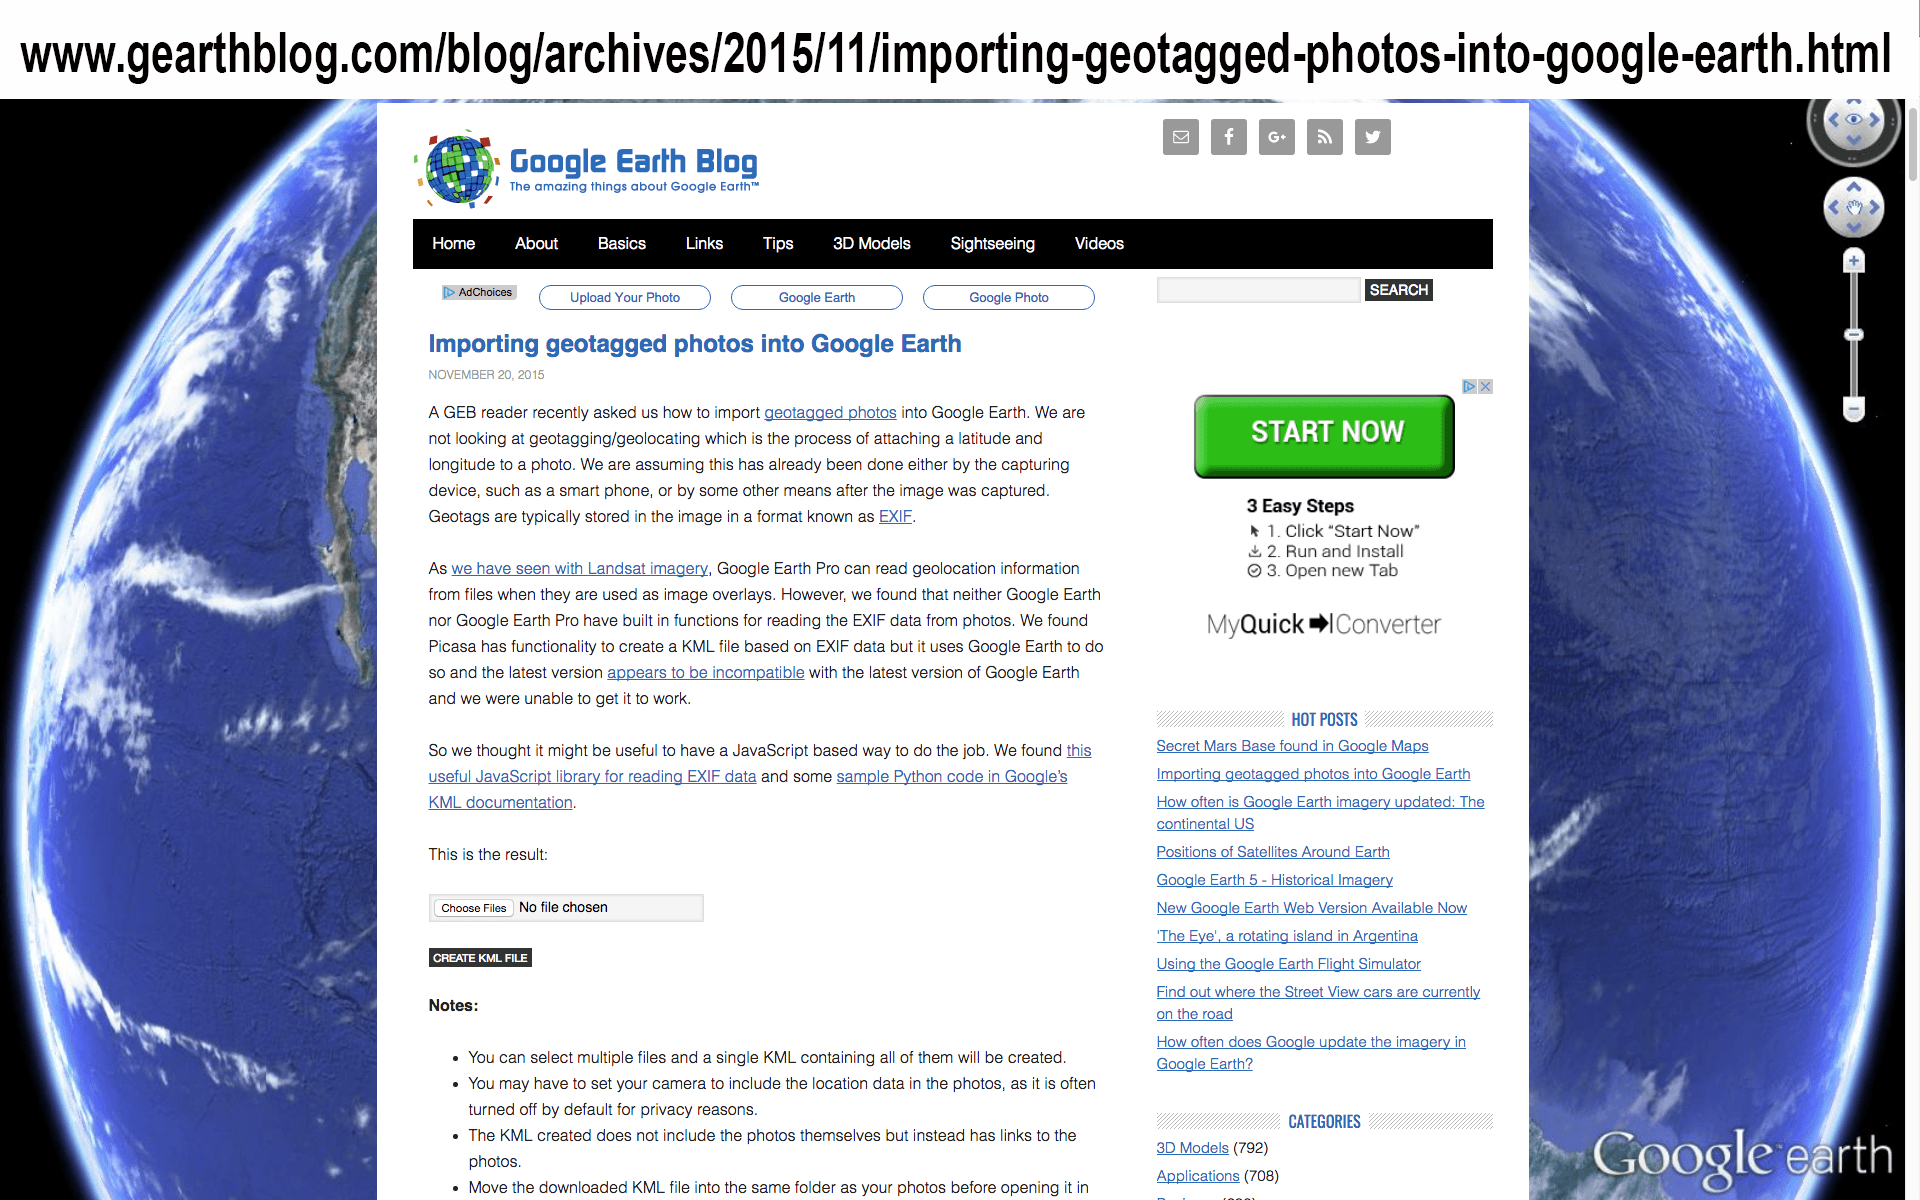
The process is very simple. Just upload a geotagged photo and download a KML file. The application allows batch processing so all 150 geotagged photos could be uploaded and single KML file generated that would display them on Google Earth.
It was during this stage of the project that I discovered only the Lightroom-generated geotagged files would produce a KML file using this application. Files that were geotagged using an on-line application did not produce a KML file and had to be redone in Lightroom.
Timothy’s application performed multiple tasks. It assigned an icon showing the photo location and included coding that revealed the labelled photo at that location. Here is where the need for the square format was made evident. If the photo was rectangular it was distorted into a square when displayed on Google Earth.
The KML file, as generated by Timothy’s app, works well when the original 150 photo files are hosted on the user’s computer but without all the files only an empty square outline was displayed.
To remedy this all the photo files were uploaded to a website and the KML file modified to include the path to the files. This was simply a find and replace action. The text file was searched for the original file path and then was replaced with the path to the on line files.
For example the code for the location of the Freedom Art and Music photo was originally:
“…. <href>FREEDOM ART AND MUSIC – BILL BROKAW.jpg</href>…”
This was replaced with:
“…. <href>http://businessphotos.us/FRENCHTOWN150/PHOTOS/FREEDOM ART AND MUSIC – BILL BROKAW.jpg</href>…”
This was done for all the photos.
VIEWING THE PROJECT
A KML file is not directly viewable on the Internet. It is more like a “doc” file or an “xls” file in that it is viewable using specific software. KML files can be imported into Google Earth Pro just by double clicking on the file or dragging it into Google Earth Pro. A user needs to have Google Earth Pro installed.
Camera icons show the locations of the photos and when viewers zoom in, they are rewarded with the photos, floating above their respective locations.
The project was fun to coordinate and produce. It presented just enough variables to make it challenging but none that were at all insurmountable. As can be imagined, this could have many applications from real estate to land planning.
To learn more feel free to contact me at Bill@BrokawPhoto.com
Leave a Reply