
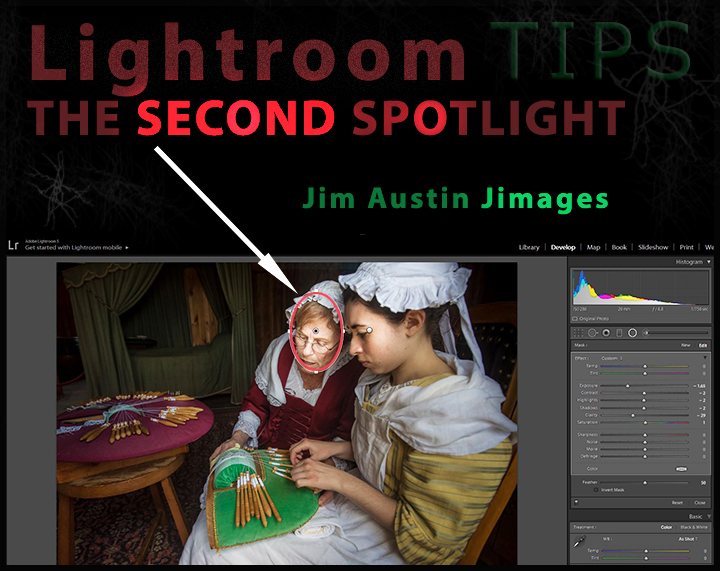
Being in the spotlight can change everything. Here we’ll go from stage to screen. For photographer’s who work in Adobe Photoshop Lightroom, we can illuminate our images with a Second Spotlight, creating it with a fun lighting idea from Photoshop Guy Scott Kelby.
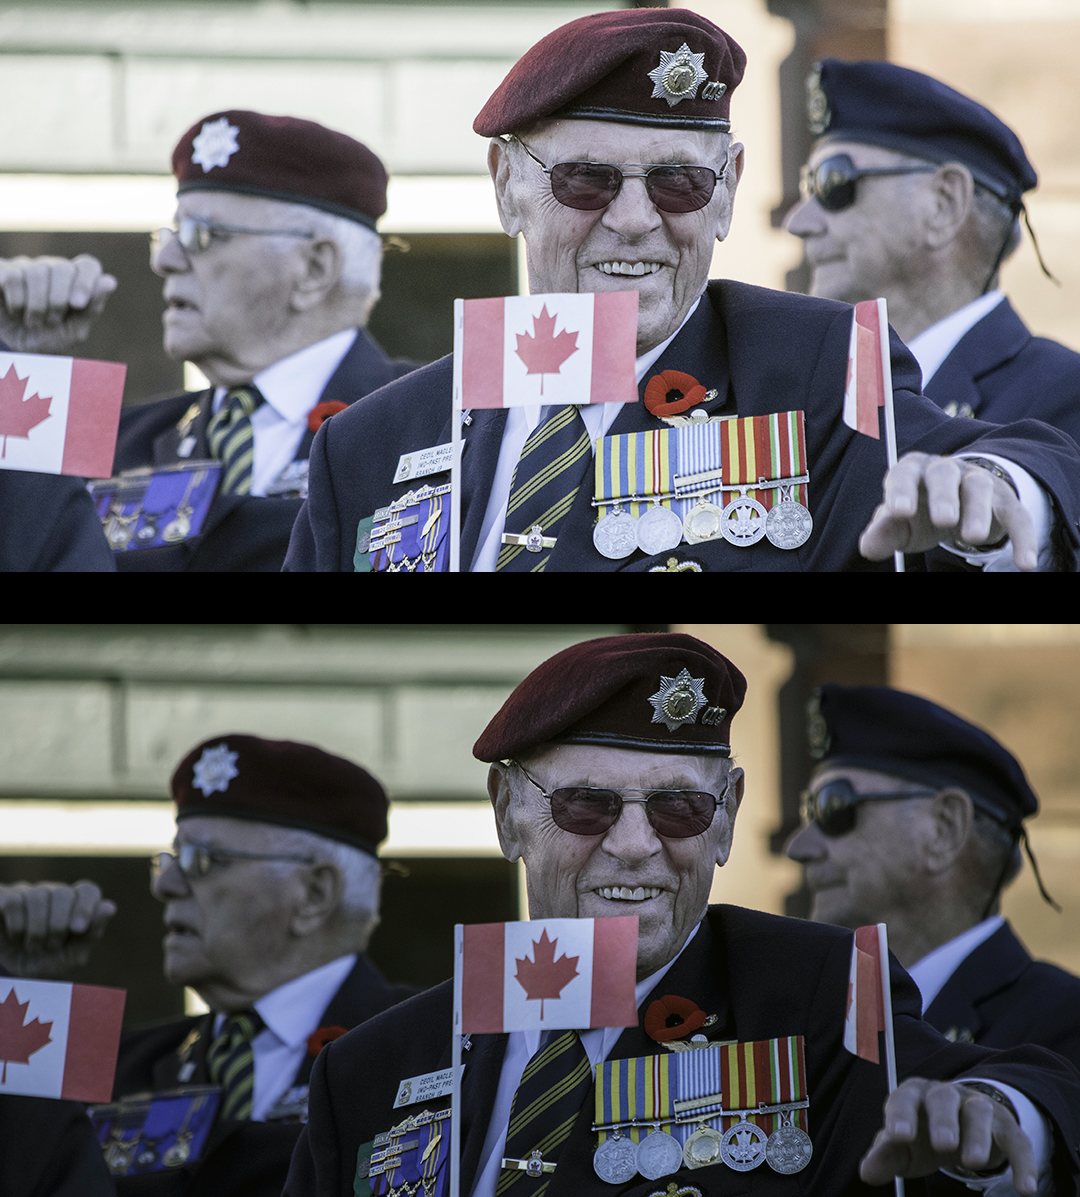
This method lets us add two spotlights to “double light” our subjects. In the photos above, the top image is the original, and in the bottom picture I spotlighted two faces: the foreground veteran and the gentleman at frame right. This Second Spotlight method also lets us darken the background to emphasize faces.
Lightroom’s Radial Filter Tool
The Radial Filter Tool is designed to allow just one spotlight. To work around its design, we check a box in the LR Develop Module. This permits us to place, and control, a second light on an area we want to highlight. The Second Spotlight learning curve is easy, so lets see how to do it with Lightroom’s Radial Filter Tool:
1. START: Open one of your photographs in Lightroom (LR) and click on the 5th tool from top left, the RADIAL FILTER. It is shaped like a circle.
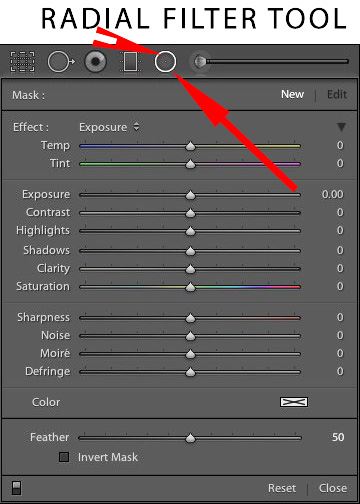
2. SPOTLIGHT #1: Next, to change your LR Radial Filter into SPOTLIGHT #1, just lower the exposure slider. Try lowering it to about minus one and a half (-1.5 exposure) first. Now, Click and drag the Radial Filter in your image window. You’ll see the image get lighter inside the Radial Filter and become darker outside of its area. Click the Done button.
3. CHECKBOX: Now, find the “Feather” slider in the palette just below the LR tools palette . Below the Feather slider, find the check box that says INVERT or INVERT MASK. Click this check box to place a check mark inside the INVERT/INVERT MASK box. Then, slide your Exposure slider to lighten by a value from +1 to +2.
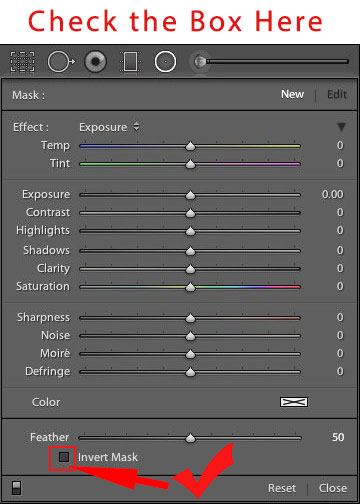
4. SPOTLIGHT #2 FINISH: Click and drag a second Radial Filter Tool circle, and you’ll see a second bright SPOTLIGHT #2 effect. Click the Done button again. Be sure you click done. The key to this effect is that by checking the little Invert Box, you keep SPOTLIGHT #1 active. You can tweak each Spotlight on its own by tapping or clicking on the center dot of each of the Radial Filters you’ve added.
ADVANCED LIGHTROOM USERS
For you advanced visionaries, remember to fine tune your lighting and texture with your Clarity, Vibrance and your other Develop module sliders. For instance, for post-processing of the image below, I moved the clarity slider to the right (added +20 Clarity) for the lighting on the face of a younger woman. In the same image, I did the opposite (subtracted -20 Clarity) for lighting on the elder woman’s face.

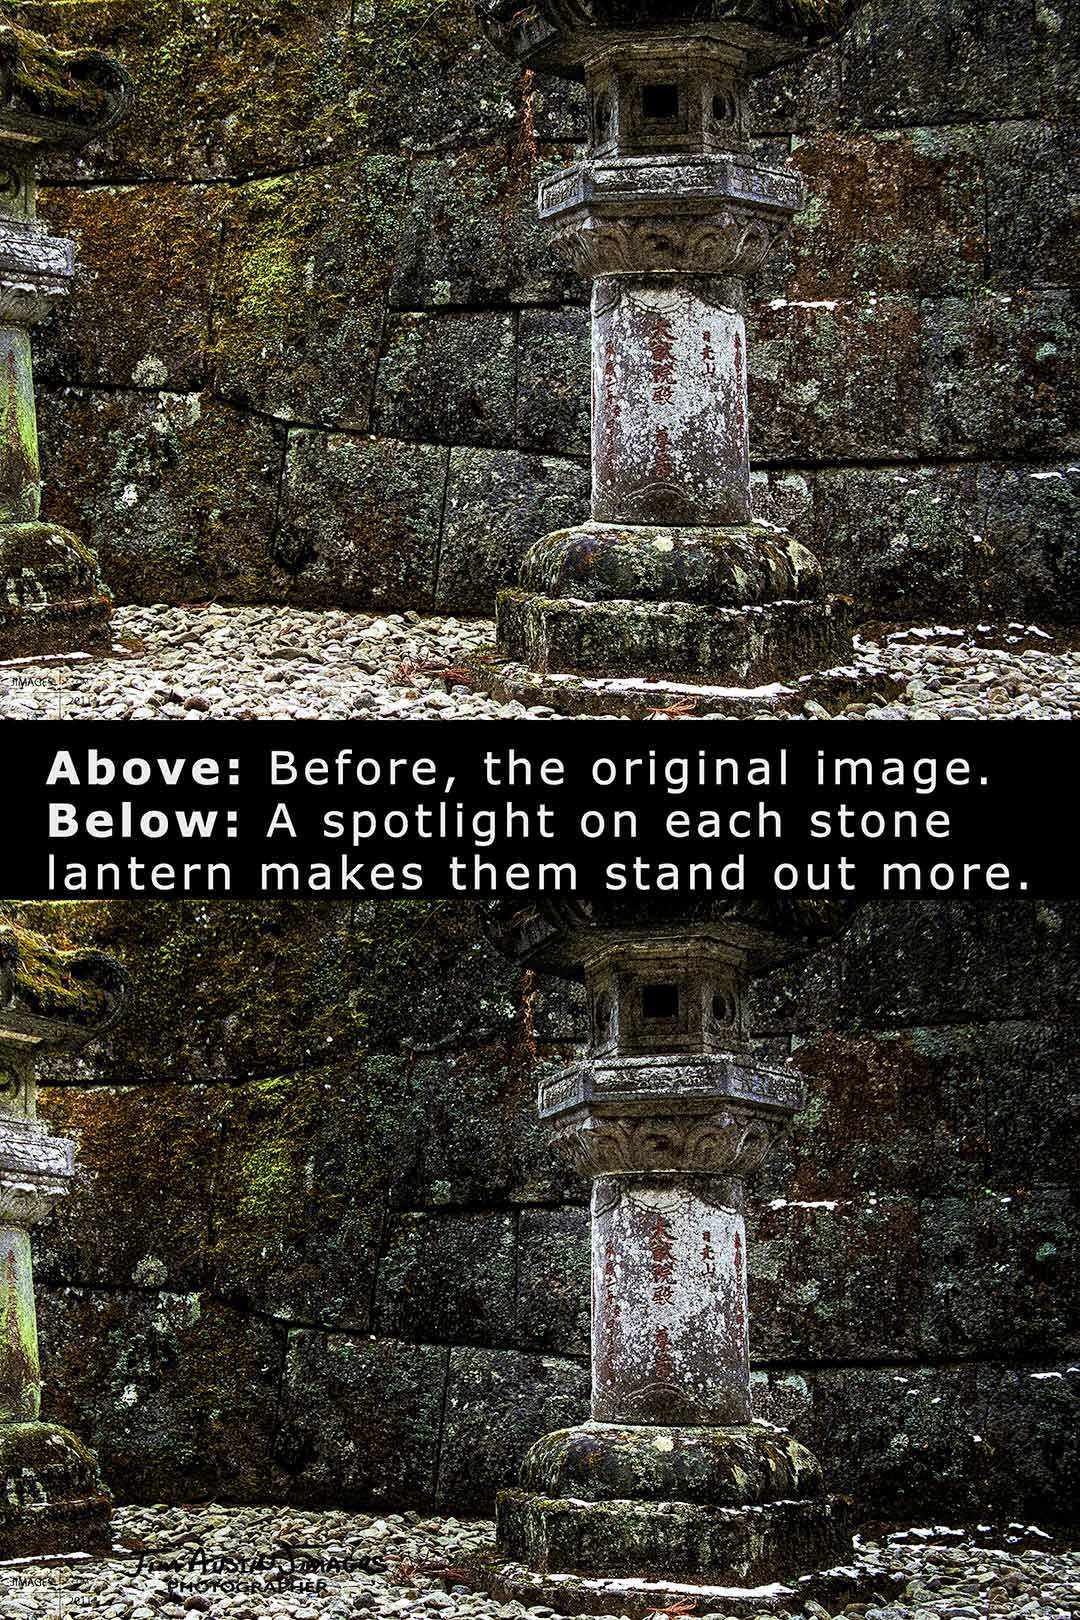
We’ve seen that this effect can highlight and enhance the lighting of faces in a portrait. If you want to learn the effect in more depth, try the Second Spotlight on a landscape image. For instance, these stone lanterns in Japan, at Nikko’s Tosho-gu Shrine were next to a moss covered wall, and because of the winter’s day cloud cover, the contrast in the image was low. I used the Second Spotlight technique on the photo to highlight each stone lantern, at frame left and middle, to make them stand out from the stone wall background.
LINKS:
Mr Kelby’s website: ( https://ScottKelby.com )
Youtube Link to Kelby Double Spotlight: ( https://www.youtube.com/watch?v=y_MTjh4qjZc )


Leave a Reply