
Topic: A detailed tutorial for those who use On1 that shows how to correct portrait highlights using a Luminosity Mask on a Dynamic Contrast Filter.
Software: ON1 Photo RAW 2019. The tools in this tutorial are specific to this photo editor and do not apply to Lightroom or Photoshop. As of March 2019, the version released was 2019.2
Time: 20-30 minutes.
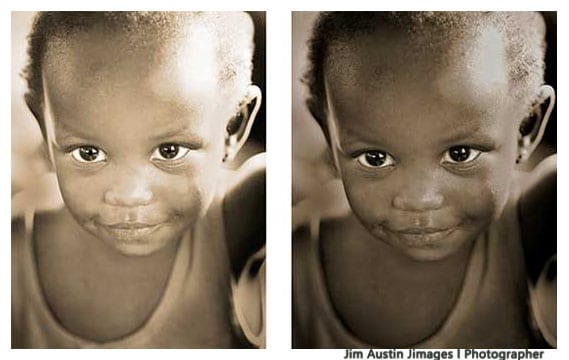
Purpose: Correct tones on areas in a portrait that are too white.
Part 1
Open an image in ON1, open Edit Module and adjust tonality to correct the overexposed white areas.
STEP 1: Open a photograph into ON1.
STEP 2: Click the Edit icon.
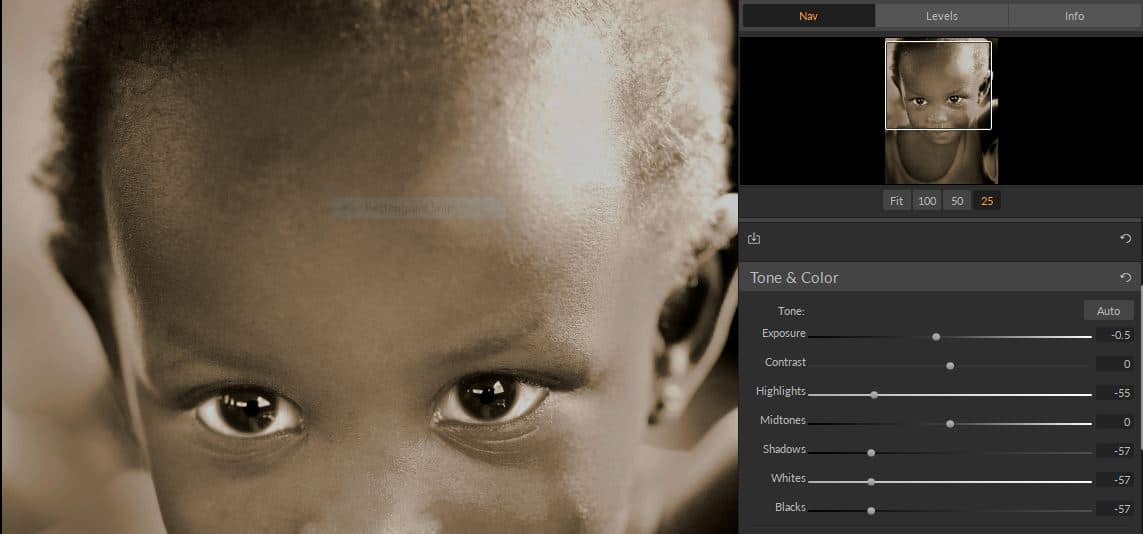
STEP 3: Click the DEVELOP module. Fine Tone & Color tab.
STEP 4: Next, in these sliders in DEVELOP, adjust the following sliders: Exposure, Highlights, Shadows, White, Blacks.
Part 2
Adding a Dynamic Contrast Filter with a natural luminosity mask to improve contrast to a portrait of a toddler.
Masking with a Luminosity Mask
The background and the toddler’s hair was still a little too bright. The next steps are to darken these areas while protecting the face area with a mask. We’ll use a Filter with a Luminosity Mask. To do this, we switch from DEVELOP to the EFFECTS module. Remember: Using masks, white reveals, black conceals.
Luminosity Defined
Luminosity is the brightness (numbers that tell us the values of tones) coming from an object that we perceive. What is a luminosity mask? It is a tool; a reversible, flexible cover for parts of your photograph that lets in light to make some areas lighter, sharper or have better contrast. The goal is to enhance presence in an image so that the scene matches what we perceive, not just what the camera recorded initially.
When we set a mask to black in our photo editor, it hides or protects areas. Reverse the mask and make it white, and it reveals or shows the area it is covering. A luminosity mask is a selection, like a cover for a car or a facial makeup mask, that lets you protect or work on specific areas of your photograph.
For example, you can make light areas darker, lower or boost contrast, remove unwanted color and many more techniques. We can alter the mask with a brush tool; brushing black hides areas, in this example. This is not meant to be a recipe, and your workflow may vary.
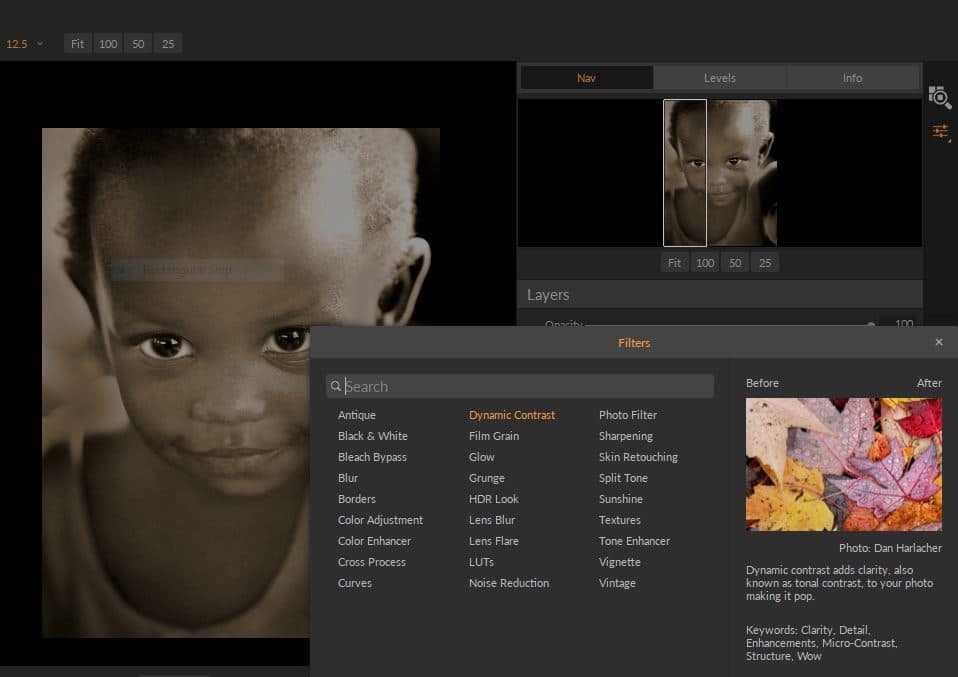
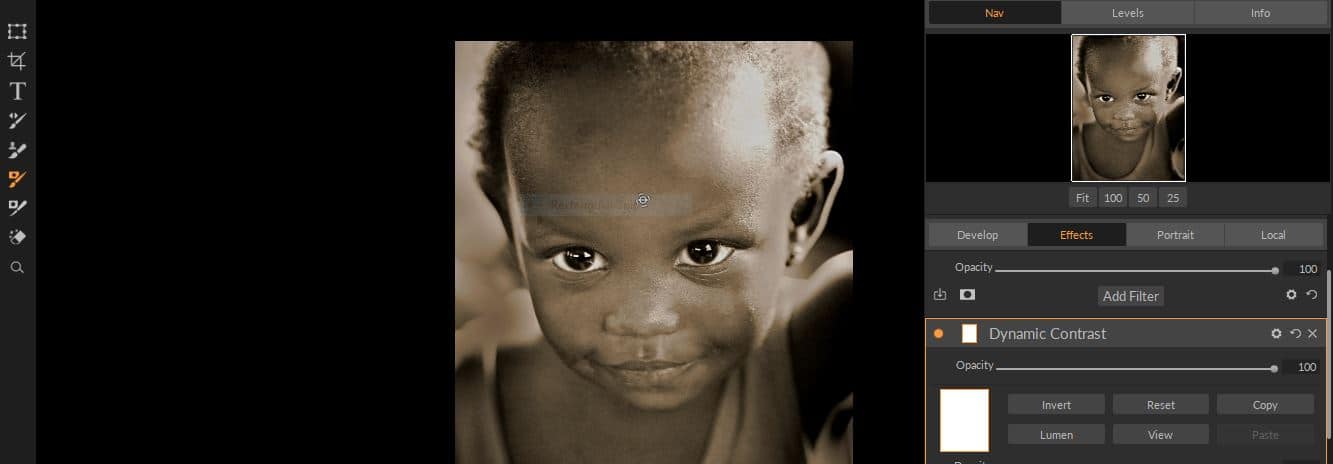
STEP 5: Now click the Effects tab to the right of the Develop tab and find the Add Filter tab.
Click Add Filter and select Dynamic Contrast. Then, choose the Natural icon from the preset styles. ON1 has 6 preset styles, and new ones can be added.
STEP 6: To review, our the sequence is: Edit Module>click Effects Tab>Add Filter (Dynamic Contrast) > click the Natural style preset>click the white thumbnail/Mask to access masking options like Luminosity (Lumen).
![]()
STEP 7: When you choose a filter, the program shows you a tip, in color, what each Filter does. Next, click the white window or rectangle next to the words Dynamic Contrast. This brings up the mask. The white thumbnail (a white rectangle) reveals the entire layer, where we’ve just put the Dynamic Contrast Filter.
To understand what a mask does, this is the rhyme: White Reveals, Black Conceals.
For practice, click the Invert button. Now the black thumbnail conceals and hides the entire Dynamic Contrast Filter. Click Invert to go back to where you were.

STEP 8: Next, click the word Lumen, which stands for luminosity. ON1 makes a mask based on luminosity.
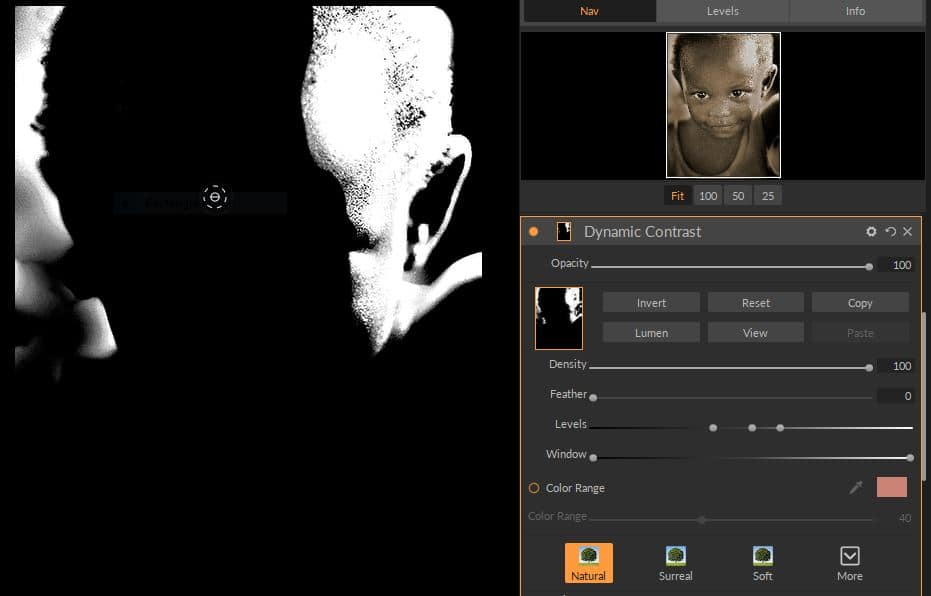
STEP 9: Click VIEW to see the mask. This changes the preview to B/W. We are seeing the mask, not the photograph.
First, bring the LEVELS sliders inward, sliding the white levels triangle leftward, and the black levels triangle to the right. Now, select the Masking Brush (B) to paint black onto the mask.
Notice in the example photo that gradually, all the black areas are painted out with the brush, leaving the white areas. 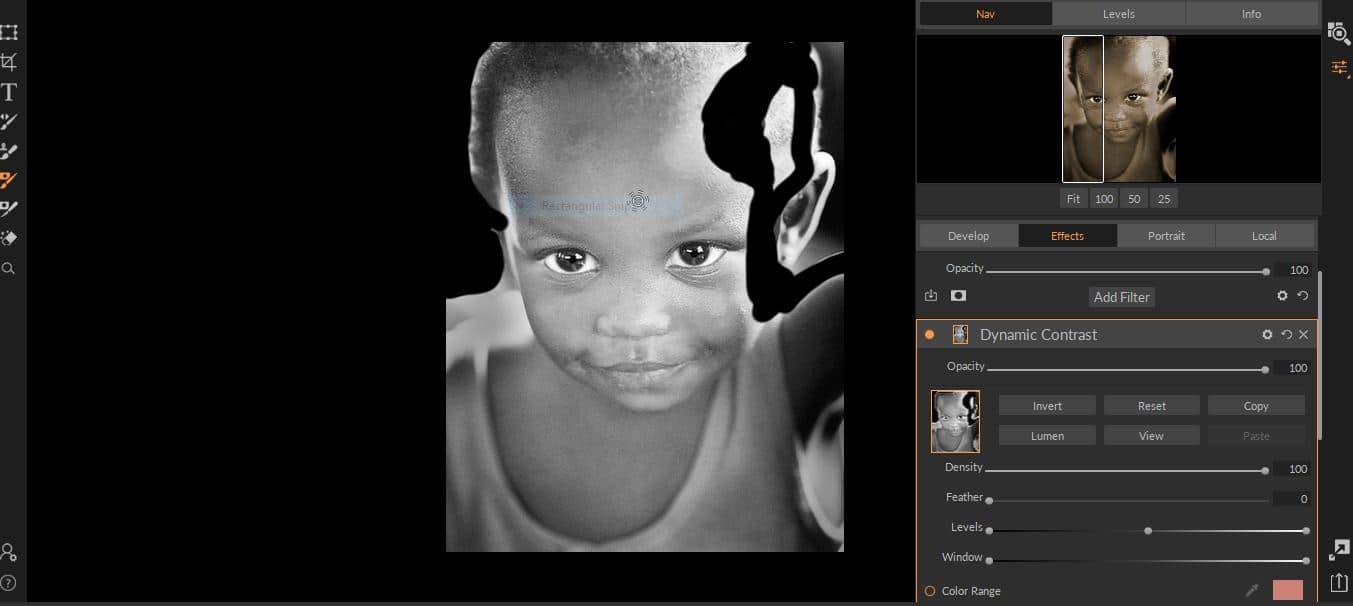
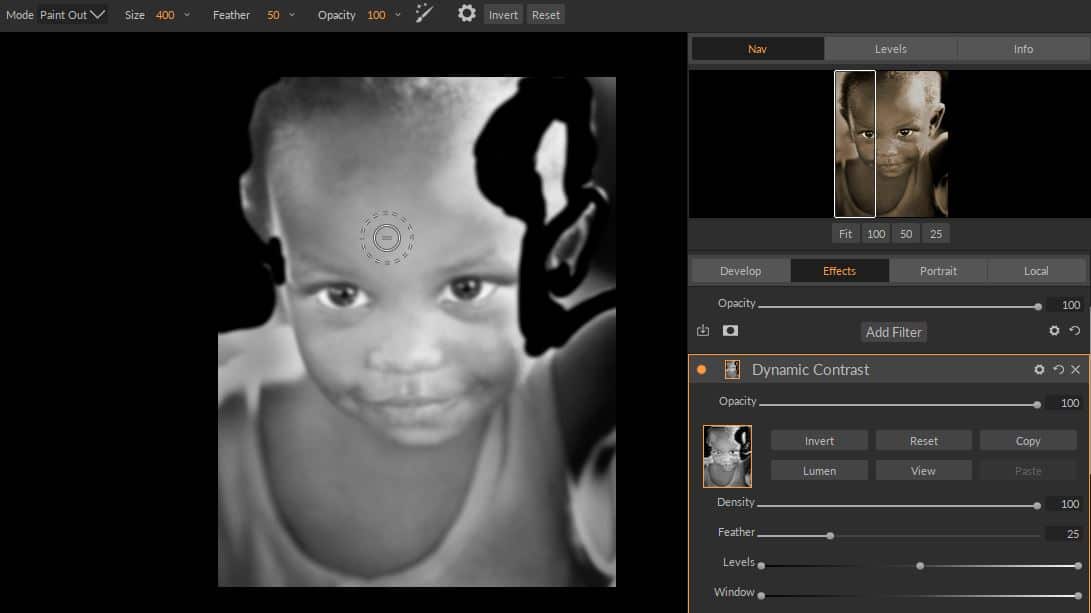
STEP 10: Density and feather are the two sliders at the top of the Dynamic contrast filter module. Click feather and feather the selection.
In this example the amount was 25, you may choose anywhere between 10-40 or so depending on how soft you want your selection. Remember, by painting on the mask we are making a selection.
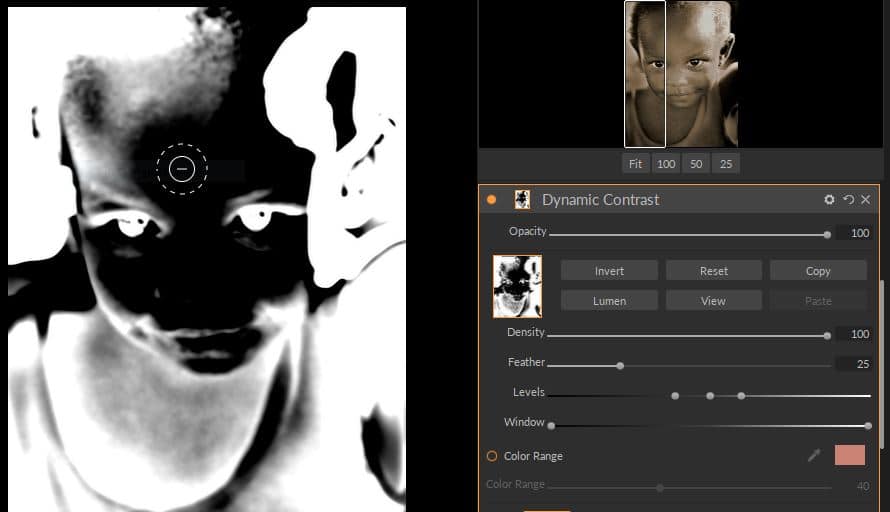
STEP 11: Next, click Copy. Go to the masking options and Click Paste. This puts the mask on the layer. View the mask by clicking VIEW.
It is the same mask we made earlier, being applied to the black areas. We want to apply it to the highlight, white areas around the toddler’s head
STEP 12: Now, click INVERT. Turn the mask off and on to see it applies to the highlights to make them darker and bring the entire portrait into proper tones.
View the mask and turn it off and on to make sure it is applied to these highlights.
Luminosity Mask Links
1. If you are wanting more on luminosity masks, see the work of Tony Kuyper, often called the inventor of them. See TKActions Version 6 on WordPress or Youtube, or find online his book The Complete Guide to Luminosity Masks.
2. Joel Tjintjelaar has in depth tutorials for Photoshop, free luminosity mask actions for Photoshop on his site and blog bwvision. Specifically, see: https://www.bwvision.com/photoshop-action-sets-downloads-luminosity-masks/


Leave a Reply