
In my last article I explained how you can use Photoshop to mimic photomontages of the old days (with slide film). I explained how you can combine two variations of the same images to help make a more compelling and artistic image.
Today I will explain another variation on the theme—combining images to add texture and further dimension to an image. In this case, I will make an image look like an old, worn photograph.
Montage Effect 2: The Look of Old & Worn Photos
Copyright © Lindsay Adler
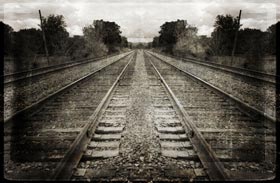
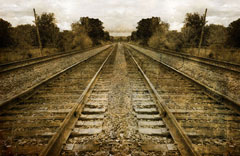
1. This is the final image that we will learn how to create today.
Copyright © Lindsay Adler
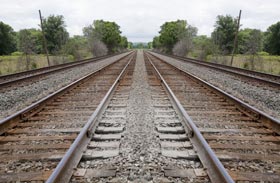
I took this image on the train tracks near my home. I chose to mirror the image to create an extra dimension of symmetry (mirroring not covered here).
Copyright © Lindsay Adler
Copyright © Lindsay Adler
Copyright © Lindsay Adler

Copyright © Lindsay Adler
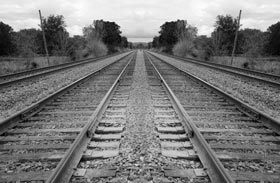
2. To set the mood of the image, I made the image black and white to give it an older and more timeless feel.
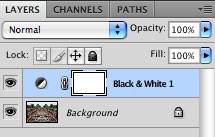
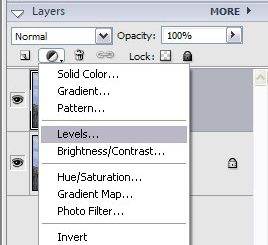
3. You can make an image black and white through a number of methods. You can desaturate, turn to grayscale, and more. I always choose to use the black and white conversion tool in CS4 because it gives me the most control over the appearance of each tone of the black and white.
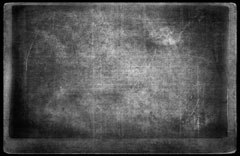
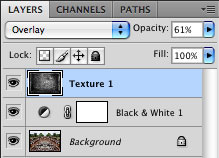
4. I then go and gather various textures that might look appealing when combined with my image. In this instance I searched on the website Deviant Art (deviantart.com) to find some free textures. I opened the first texture (this gray, aged photo texture) and dragged it onto my original image. You do this by opening both images and dragging the texture (using the black arrow for your mouse) onto the top layer of the original image. The next step is for me to change the layer blend mode to “overlay” as seen here.
This is the resulting image with texture 1 turned to ‘overlay’ blend mode at 100% opacity.
Copyright © Lindsay Adler
Copyright © Lindsay Adler
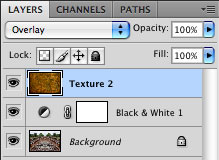
5. Now I want to try the exact same thing, but with a different texture to see the variety of effects that can be attained. Like before, I drag the texture layer onto the original photo and change the texture layer blend mode to overlay (keeping 100% opacity).
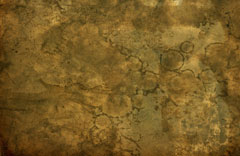
This is the appearance of texture 2 before being applied to the original image.
This is the resulting effect with texture 2 applied. The original image picks ups the tones and texture of the top image (notice that it gets golden and blotchy).

Copyright © Lindsay Adler

Copyright © Lindsay Adler
6. For my final effect I decide that I want to combine BOTH textures to make my photo look like an old and worn print. To do this I put BOTH textures to overlay mode and stack them on top of the original image. For this particular example I made texture 1 have 100% opacity and texture 2 have only 39% opacity.
Here is the final image!!!
There are many variations from which to choose, so have fun experimenting with the textures you like. See what you can create and have fun.
by Lindsay Adler
Leave a Reply