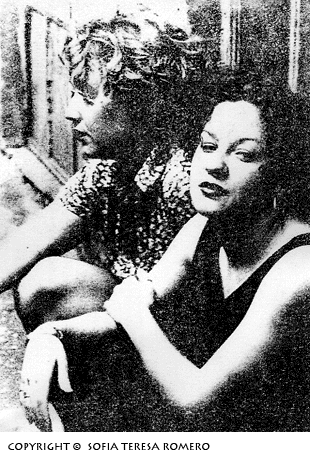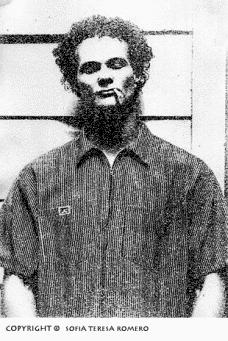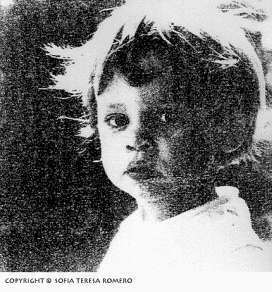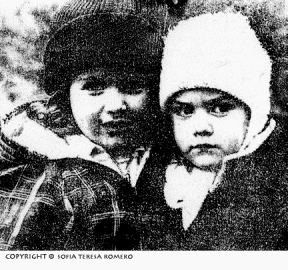
As a photographer, I’m always looking for unusual and interesting techniques that will help me develop my craft. A few years ago, I read about transferring regular or laser photocopies–both black-and-white and color–onto different artist papers. I had never heard about this method before–which I thought was strange, since you can create unique images. So, I decided to go ahead and experiment. Since it’s a simple and inexpensive process, I even started teaching it in my Advanced Black-and-White printing class. Suffice it to say, my students were very excited, especially because the process doesn’t require a darkroom or any special equipment. A well-ventilated working place and a few materials will do.
Black and White Transfers
To begin, you collect the supplies. You’ll need, first of all, one or more black-and-white images that you’ve printed yourself or had done by a lab. Also, make sure you have some masking tape, a clipboard, lacquer thinner, rubber gloves, a baren, a pair of scissors, and a rag.
It’s very important to select a good image for your transfer. You want a print that has a full tonal range and doesn’t look cluttered. If you’re going to print the image yourself, you might want to try doing so on RC paper, since it’s cheaper and takes less time to process. If you have your prints developed by a lab, make sure you give the technicians enough instructions, so you’ll receive the kind of print you’ll need for the transfer to be successful.
There are different methods you may want to try if you’d like to be creative. You can make collage prints, for example, both once you’ve developed your images and afterward with the photocopies. You can select parts of one image or use pieces of several photographs to make the collage. What you need to do is transfer them one at a time and use a photocopy that has no image, only black ink, to blend the borders.
When making the print, you must remember that it’ll reverse when you transfer it. Sometimes this isn’t important, and you might even like the “backwards” version, but in some cases–especially if there are numbers or words in the image, reversal can become a problem. Luckily, the solution is quite simple: all you have to do is flip the negative during the printing process, so that it appears the right way when transferred.

Once you have the final print, you’ll need access to a photocopier. When you’re making the copier print, there are numerous considerations to keep in mind. In fact, this is probably the most critical part of the whole process. You need a photocopy that’s dark enough for the transfer to have rich blacks, but not too dark, since a lot of ink will transfer onto the paper, blocking the details in the dark areas of the photograph. As for the light areas–especially whites, if there’s no ink on the copier print, nothing will transfer to the artist paper.
Contrast is also important. You don’t want an image that’s too contrasty, but neither do you want a flat photograph. Look for the right contrast, where there’s detail and information in all the important parts of your photo. Size is another issue you can decide at the photocopier. You can enlarge or decrease the image size simply by adjusting the percentage button. Not all photocopiers make copier prints that are good enough to transfer. Sometimes you need to try different types or brands until you find the right copier for you. In addition, if you’re copying for the first time, you might want to make several copies of the same photograph to experiment with different contrast and density. By doing this, you’ll make sure you achieve the results you want.
There are different artist papers you can use for the transfer. I don’t recommend any paper that has a lot of texture or is cold-pressed, because the ink won’t go into the pits. Your product will be an image that loses detail and is hard to read. The best thing you can do is to try several brands and types of paper, depending on the mood you want to convey. Learn the characteristics of the artist papers and with which kinds of images they work best. Plus, make sure you’re using an acid-free paper for archival purposes.

I‘ve tried a few papers that gave me great results: Arches 88 is a waterleaf paper that renders good detail. Some great hot-pressed papers come from Fabriano Artistico and Arches. They’re expensive, but they give extraordinary results if you want to use watercolors after you make the transfer. Rives BFK is another drawing paper that produces consistent results. If you want to color your final work with oil paints, you can try the Strathmore 403 pastel paper.
Once you have everything you need to start the process, it’s time to begin. First, cut the artist paper into the final size you want. Tape this piece of paper to a rug, a piece of wood, or a clipboard. Second, lay the photocopy face-down on top of the artist paper using clips or masking tape to keep them together. You’re going to need a small cloth into which you’re going to pour some of the lacquer thinner and then rub, with light pressure, the back of the copier image. (It’s best to use a circular motion.) Remember, you can use the baren if you need to apply more pressure. Always leave a corner of the photocopy un-taped, so you can lift it to check the results. If the inks haven’t transferred, apply more lacquer thinner and pressure until you have the image you’re looking for. When you’re satisfied, untape the photocopy and slowly lift it. Next, leave the paper to dry, a process that can take from ten minutes to a half hour, depending on the weather.
Be careful never to do a photocopy transfer inside a closed room. Always do it in a well-ventilated area or, even better, outside. Use rubber gloves to protect your hands, and if the smell gives you headaches, wear a respirator. Never smoke while working with lacquer thinner or acetone.
Color transfer

The process of transferring color photocopies to artist paper is very similar to the one used in black-and-white transfers. The only difference is that instead of using lacquer thinner to dissolve the inks, you’ll use regular acetone. While most colors transfer nicely, there are others that won’t transfer well. If this is the case, you can always hand color the final image.
If you have a color photograph that you want to transfer as a black-and-white image, just make a regular copier print and follow the instructions for the black-and-white transfer. If you work that way, you’ll end up with better black-and-white images than if you use a laser copier. Also, take into account that the inks from carbon-based photocopies are more stable and archival than color dyes.
I’ve mentioned a couple of times that you can hand color your final images. To be completely honest, I’ve tried doing so without much success, but only because I was never good at drawing, sketching, or even painting. However, if–unlike me–you have some talent, I strongly recommend that you try it. You can use pastel, oil, or watercolor pencils, crayons, oil paints, and/or oil or pastel sticks. There are many brands that offer a large variety of quality colors, such as Caran d’Ache, Conté, Shiva, Derwent, Marshall, and Berol. Just as with anything else, you need to decide which feeling you want to convey, so you can choose the best way to achieve your results. Using an acrylic sealing spray (such as Krylon Crystal Clear or even a gloss finish) to protect your images is always a good idea. Bit if you have hand colored with pastels, first spray them with a workable fixative (Krylon Workable Fixatif) that’s made especially for them.
The whole idea of doing photocopy transfers is to create a special and unique image that is generally not repeatable. Therefore, the technique is all about experimenting and enjoying the process. Just go ahead and have fun. I guarantee you’ll get amazing results.
List of supplies
Light impressions:
P.O. Box 787,
CA 92822-0787
800-828-6216
Archival supplies www.lightimpressionsdirect.com
Dick Blick:
7301 West Beverly Boulevard,
Los Angeles, CA 90036
800-828-4548
Art supplies. (Many stores around the country)
Daniel Smith:
4145 First Avenue South,
Seattle, WA 98134
800-426-6740
Art supplies www.danielsmith.com
Marshall Manufacturing Company:
701 Corporate Woods Parkway,
Vernon Hill, IL 60061
800-621-5488
By Sofia Romero

Leave a Reply