
Photoshop for a Poster
When you create a large work in Photoshop, consistency is important. We’ll be discussing two sample projects. The first is a six-foot wide poster made from digital camera photographs. The second is a seventeen-foot wide mural from scanned prints. For the poster, I was hired to photograph a senior citizen’s fair and print a 4 x 5 foot poster.
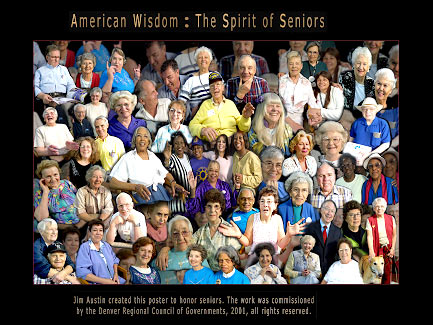
The Poster
Early in the morning in Lakewood, Colorado, the people who attended the Senior Fair with its many displays weren’t expecting to be photographed. I wanted to grab their attention and ask them to volunteer to be part of the project. The Denver Regional Council of Governments commissioned a poster, and my goal was to capture the spirit of seniors. Once the photography was finished, it was satisfying to create fifty different layers in Photoshop. I worked on the Pentium 3 in my studio with 512 meg. of RAM.
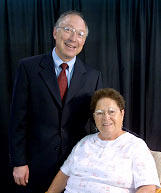
Ken Salazar and friend.
I was fortunate to meet several dynamic people who took part in the event: Colorado State Attorney General Ken Salazar (left), Bertha Clifton and her friends (below left), and Orville Slaughter and his friends (below right). Tina Romero made the project possible. Each of the photos shown here was a small section of the poster and was located on its own layer.
When you do large works–especially if this is your first large project in Photoshop–choose either black-and-white or color–not a mix. Work in layers, and put each picture on its own layer. Make each image consistently the same size. Save the work in layers as a PSD file. (This makes the poster easy to revise if your client wants any changes.) Try to keep the setup simple, so you can get to know your subjects, their names, and their style.
I chose to work digitally, using a Canon digital SLR, a prime wide-angle (for group photographs) and a prime portrait lens (for individuals), a large soft-box, and a tripod with a release (to enable me to pull the camera off quickly, so I could hand-hold the camera for close-ups). All of the equipment was portable enough to be easily carried to the mall.
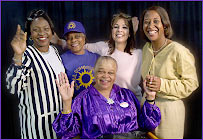
Bertha Clifton and friends.
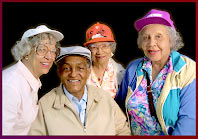
Orville Slaughter and friends.
Two memory chips were essential. One was in the PC adaptor in the laptop for downloads, and the second was in the digital camera. Thus, after they were photographed, people could view the portrait they wanted to purchase.
During the photographing, whenever I could, I invited my subjects to gather with friends. I encouraged them to move around and laugh with each other to add liveliness to their expressions.
3 Tips for Working Digitally:
1) Use a simple background. Graphically, using a black background was crucial to the photography and to the imaging.I didn’t use a fill light and the black background eliminated any shadows thrown by the single main light. In the imaging, having a black background also made it easier to duplicate the layer and to keep the black a uniform tone. (This would not be easy with a gradient or colored studio background.)
2) Keep each subject on its own layer. This technique keeps the layers flexible, so each person or part of the collage can be moved around.
3) Take a laptop and have your assistant show people their portraits soon after you photograph them. Spend time with your subjects, not your equipment.
Photoshop for a Wall Mural
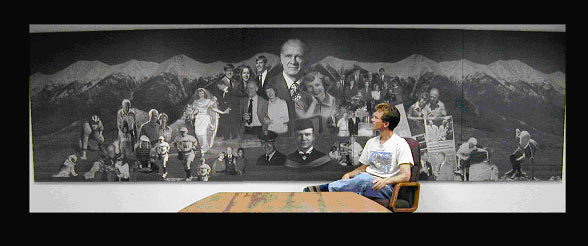
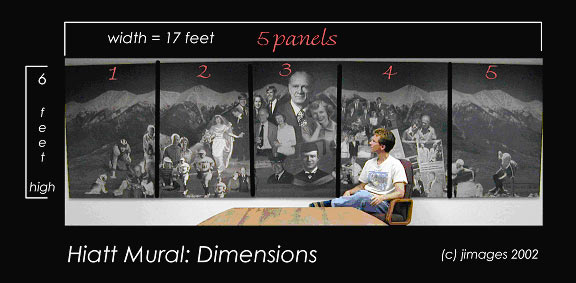
In 1999, I was commissioned to make a seventeen-foot wide mural (shown above). The mural honored Dr. William G Hiatt–scientist, periodontal surgeon, mountain climber, father, and the mural took up an entire wall of the room. Since he was an avid climber of Colorado’s 14,000-foot peaks, I placed the portraits in front of a central image of the San Juan mountain range. For the print output, I gave the mural a warm brown tone, using Photoshop 4’s duotone mode to keep the file in RGB color mode, not grayscale. I planned this in advance, since our service bureau Ikom used a large format printer that was set up for an RGB color model.
Phil Stietenroth, director of the CU Med Center photography lab, had seen my imaging work at the Rocky Mountain camera show and asked me to create the mural for the University of Colorado Health Sciences Center William Hiatt dental library. I spent forty hours doing the planning, layout, and imaging. We had a deadline, because Mrs. Hiatt was ill and wanted to see the piece honoring her late husband while she was still alive.
Again, all the images were the same resolution. They were scanned from prints at 400 ppi. There were no negatives for the Hiatt project–just shoeboxes and albums of family pictures. These prints were scanned in grayscale with a drum scanner and stored at 400 pixels per inch. I reduced them to 300 pixels per inch for the Photoshop work.
For the layout, a plan was helpful. I drew a map of the mural during the initial phase. While the final placement of each portrait within the mural varied, the exterior dimensions were fixed. We knew the mural sections would be printed by Ikom on a large format inkjet–which limited the width of each panel to three feet. Thus, five three-foot panels were printed, each six feet high to fit the space in the library. This created a file in Photoshop 4 that was greater than 250 megabytes. Fortunately, the university photography lab had just purchased a Pentium 3 with 256 meg of RAM (way too little by today’s standards), and I was able to store each of the five panels in individual files and work on them one at a time, to minimize saving and opening time.
by Jim Austin,
Adobe Certified Expert
Leave a Reply