
Insects generally have two things in mind: to get on with the task at hand and avoid getting eaten. The task at hand might be finding food, mating, or just basking in the sunshine. This means that insects are somewhat predictable. Bees, butterflies, and similar insects, for example, might be just bumbling about from flower to flower.
Introduction to Microphotography describes microphotography as the extreme form of macrophotography, dedicated to the photography of very small objects from life-size to modest enlargements of up to about 20.
Working with these large magnifications means that the subject is only a few centimeters in front of the lens. Most of my micros are made at a working distance of a few centimeters.
Seasonal Creatures
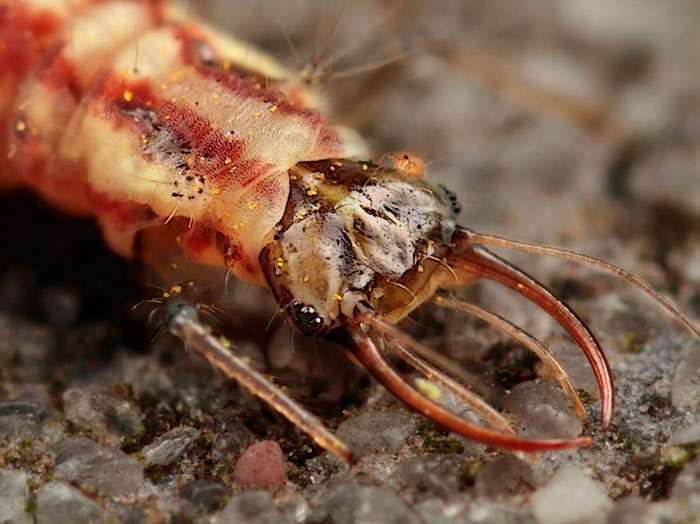
Most insects are seasonal creatures and the larger ones are most plentiful during spring and summer. If you begin looking in late autumn or at the end of winter, you will mainly find insects that measure only a few millimeters in size. Larger than life-size magnification is required to reveal the structure of the compound eyes of such small insects.
The time of day you choose to go out hunting for insects can have a dramatic effect on both the number of insects you encounter and the quality of their demeanor when you photograph them. I take only micros during the day time when the insects are actively foraging and moving from feeding place to feeding place.
Do try to be as prepared as possible, because during these daylight hours they are only stopping for very short periods of time.
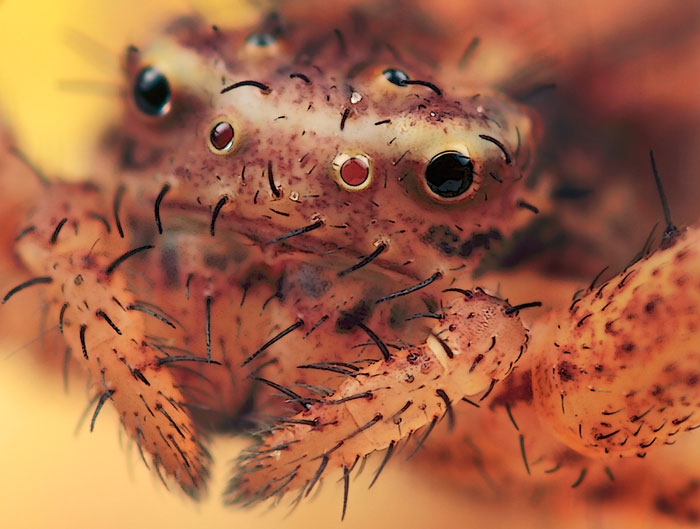
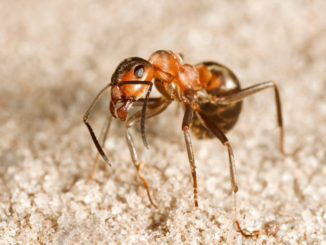
Insects and spiders are literally everywhere and in immensely vast numbers. Walk through any flower garden and your first attention is probably drawn to the beautiful blossoms.
But on closer inspection, you’re also likely to see and be amazed by a myriad of insects that are enjoying the flowers right along with you–bees, hoverflies, and any number of unrecognized insects flying around or walking upon the petals and blossoms. All you have to do is to know for what type of insect you’re looking and a little bit about that insect’s behavior and you’ll know where to start.
Damselflies, dragonflies, and mayflies like water, so if you want to find them, start at a pond or lake. Butterflies and bees like blossoms and blooms, so if you want to find them, go where the flowers are. Grasshoppers like to hang out in groundcovers like grasses. In order to see these small “models” you have to become fairly “narrow minded” with your vision.
Approaching Insects
Although most insects do not have orifices in their body for picking up sound vibrations, many use parts of their body, such as their wings, antennae, or special hairs, like TV antennae to detect vibrations in the environment or in the air.
Any errant movement on your part could cause you to lose a shot, so be sure to tread carefully when approaching your subjects. Your job is to make yourself non-threatening. The first thing you want to do is to move very slowly. Look before you move, look at where you place your feet, look at where your equipment is, and most of all plan where you are going to put the front of your lens.
Many potentially good shots have been ruined by the front of a lens bumping a branch or leaf where an insect was resting, causing it to flee.
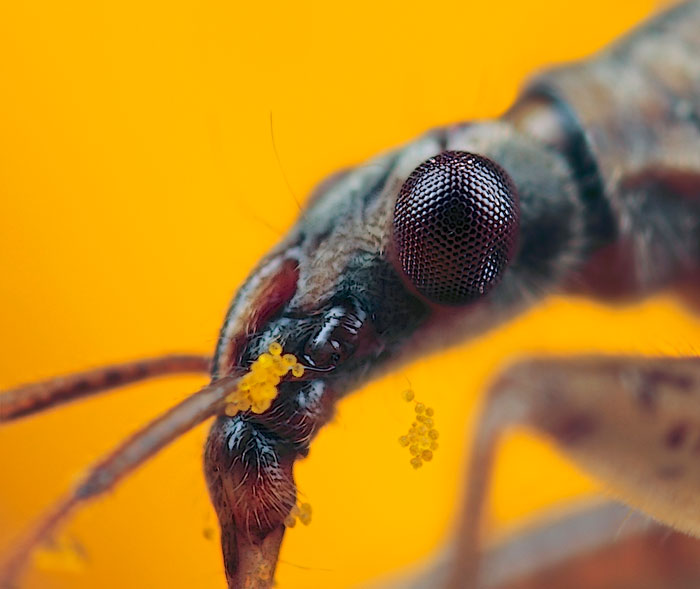
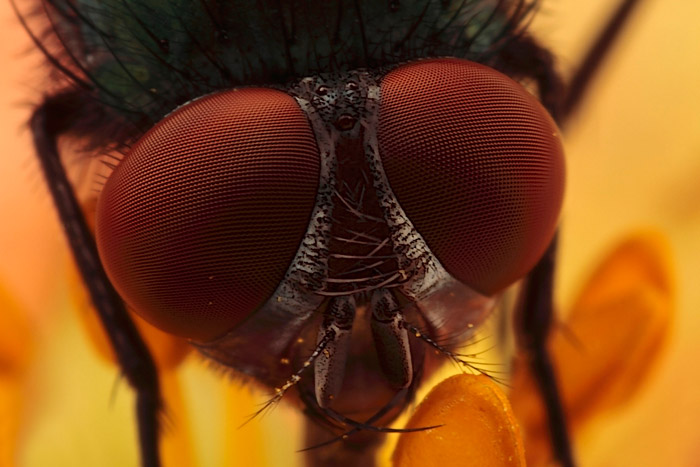
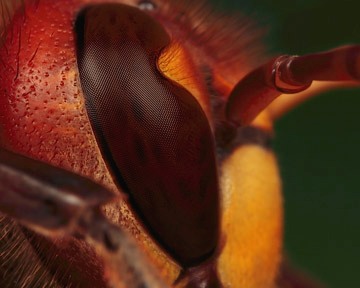
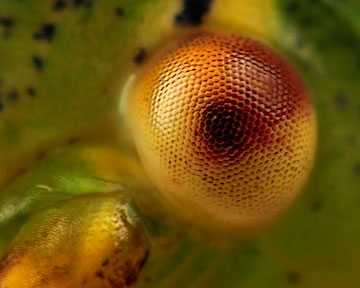
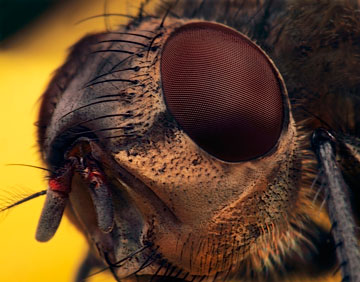
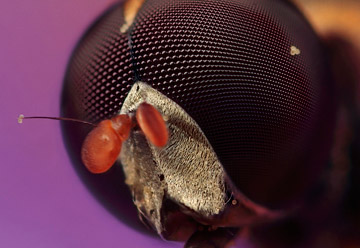
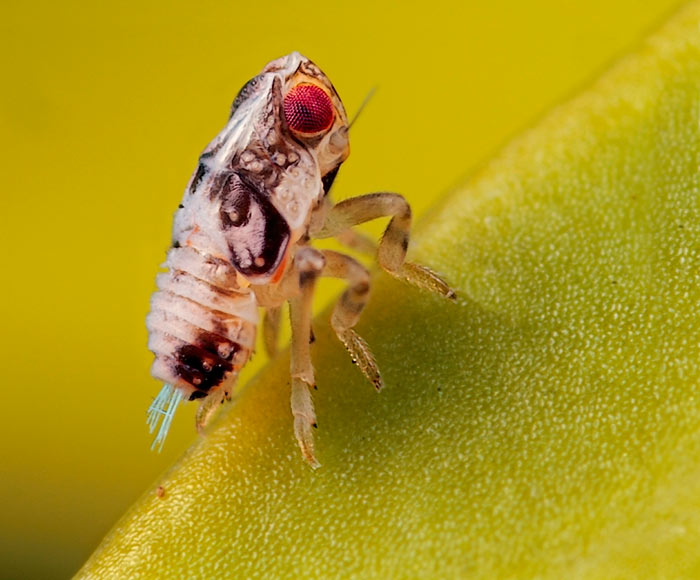
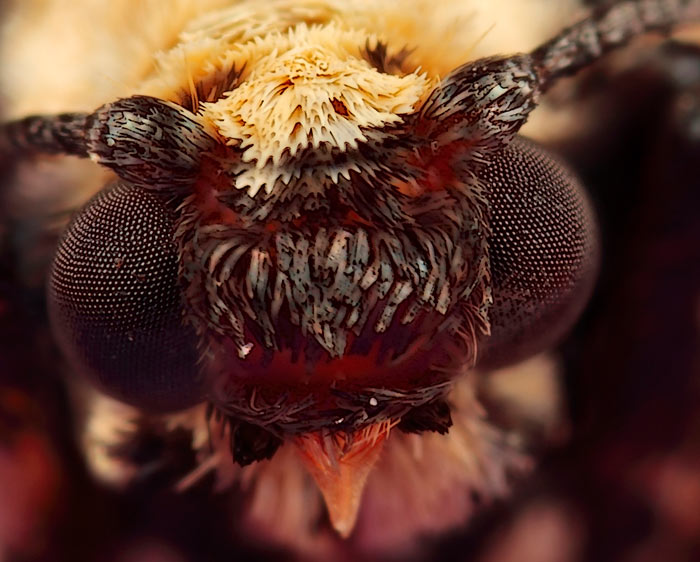
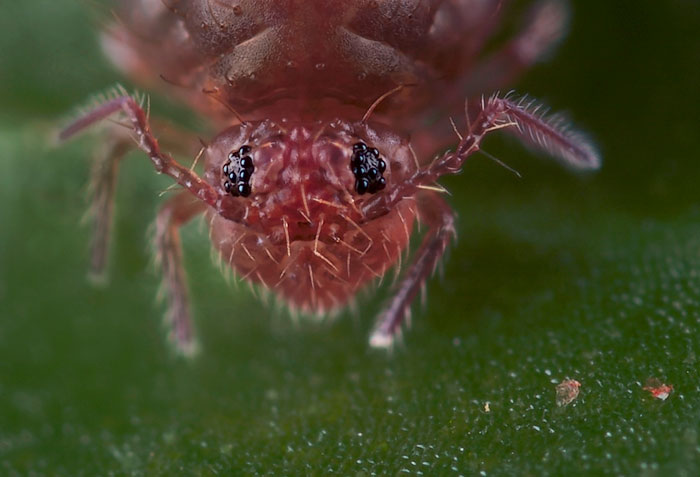
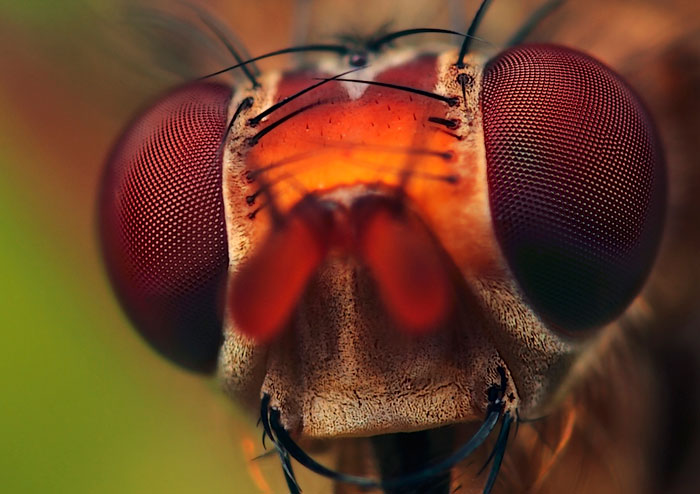
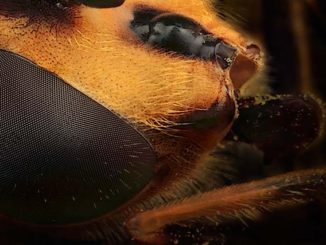
Most insects have a view of the world that is very different from ours, because their eyes are built unlike those of vertebrate eyes. Insects such as the housefly, the hornet, the butterfly, and the beetle, have what we call compound eyes.
These eyes are made up of many separate units called ommatidia. Each ommatidium samples a small part of the visual field. Having multiple ommatidia allows the animal to easily detect motion. Some, like the dragon fly, have as many as thirty thousand units per eye, each with its own lens.
With a compound eye the insect sees a mosaic image. This looks something like the highly magnified dots of a newspaper photograph. Because the lenses in the insect’s eyes have a fixed focus, and can’t be adjusted for distance, insects see shapes poorly.
As an object moves across the visual field, ommatidia are progressively turned on and off. Because of the resulting “flicker effect”, insects respond far better to moving objects than stationary ones. Honeybees, for example, will visit wind-blown flowers more readily than still ones. Houseflies and dragon flies have eyes that cover most of their head.
This gives them almost 360 degree vision, enabling them to see predators coming from any direction.
Most insects can see some color. While our eyes see a full spectrum of wave lengths from red to violet, many insects see a limited range of colors. The colors they detect are the ones most useful for finding food and shelter.
It is known that insects, especially flying insects, will try to escape from a predator by a simple escape reflex based on the direction and the velocity of a moving shadow or object. If a critical velocity is exceeded, the insect will try to fly away from the direction of the threat.
Slow moving objects or shadows often do not trigger this reflex. The lesson learned is that the best way to approach an insect is to move slowly and gently. Most of all, avoid casting your shadow on the insect.
Composition
Composition is more difficult for macro photography than for other types of nature photography.
Your subject might be a flying insect or an insect sitting on a leave at a very funny angle. Add the fact that you need to approach very carefully to not disturb your subject and you have a bit of a tricky situation. There are no golden rules to help you solve this one.
Play around with composition until you get something that works. Photos at high magnification have a corresponding shallow depth of field, so precise control over the location of focus is critical. This requires not only artistic decisions about what part of the subject should be tack sharp, but also technical decisions about how to make the most of this sharpness.
Fortunately, the location of sharpest focus appears much more pronounced in the viewfinder when the subject is under high magnification. However, just because it’s easy to see doesn’t necessarily mean that it’s also easy to position.
Even small errors in a camera’s autofocus can be disastrous for an image. This should only be used as a rough guide; precision adjustments should almost always be done using manual focus. It’s almost a universal rule that the subject’s eye(s) should be the location of sharpest focus and should have a well-chosen position within your composition.
For maximal sharpness throughout, adjust the angle of your camera so that the plane of sharpest focus aligns with the head/plane of your subject. If you’re off by a fraction of a degree, the complete subject disappears from view.
In macrophotography and microphotography, the background is often so out of focus that it appears as a solid or smoothly varying patch of color. It’s important to choose a background which complements the color and tone of your foreground subject.
Fortunately, one can often pick a different background by simply shifting the camera’s vantage point. One should also take care to avoid placing distracting out of focus highlights or other objects behind the subject.
Focusing
Due to the small working distance (the distance between the lens and the subject) involved with large magnifications, it is not practical to use a tripod. Because I am hand-holding a relatively heavy and bulky setup, it is not possible to focus using the lens focusing ring, which also determines the magnification.
Rather, I pre-set the focusing ring based on how much magnification I want. Once the focus is set, I will physically move the lens, mounted on the camera body, back and forth until the facets in the compound eye(s) of my subject are in perfect focus in the viewfinder.
This is the tricky part, obviously, as a fraction of a millimeter can significantly affect the focus. For instance, at five times life-size the depth of field of the MP-E 65 mm at f/16 is 0.269 mm. For higher magnifications, the situation is even worse. In order to stabilize the whole setup, I’ll rest my elbow on my knee or both elbows on the ground.
As soon as I see perfect focus being achieved, I’ll press the shutter button to take a photo.
If you’re on the path to taking macro or micro photos, be patient and enjoy the challenge of capturing these images. It opens the doors to entirely new world of photography.
An Explanation of Terms:
Macrophotography versus Photomacrography
Microphotography versus Photomicrography
A reader suggested changing the word microphotography to photomacrography to more correctly follow proper common convention. I checked his valuable suggestion with the online versions of the Oxford and the Merriam-Webster dictionaries.
The first dictionary did only mention the word macrophotography, but the second one did mention photomacrography. Both words have approximately the same meaning: photography producing photographs of small items either unmagnified or larger than life size.
In order to do macrophotography justice you will need a true macro lens, which is only capable of achieving maximally a 1:1 magnification.
Photomicrography is typically a photograph of a microscope image.
The reason to introduce a new concept like microphotography is to express the difference with macrophotography where only a true macro lens is used. Microphotography is usually taken with a true macro lens equipped with modestly specialized equipment e.g. extension tubes, bellows, a reversed lens or a conjunction of different techniques.
One way to tell the difference between these two photography styles is by looking at the images. Microphotography involves taking photos of extremely small objects which are very difficult to see with the naked eye and making them look very big.
Microphotography shows much greater detail than macrophotography, for example the different kinds of facets in a compound eye. Microphotography also allows for greater magnification–one of the reasons that it is used to photograph very small objects, such as insects with a size of smaller than 1 mm.
More formally, macrophotography produces photographs of small items, visible to the naked eye, up to life-size. Microphotography produces photographs of extremely small objects, very difficult to see with the naked eye, from life-size to modest enlargements of up to about 20.
With thanks to Jos Plas and Frans Mulder for their constructive comments and enthusiastic support.
by Huub de Waard
Article: © 2011 Huub de Waard. All right reserved.

Leave a Reply