
Who in their youth didn’t look skyward at night and say, “Star light, star bright, first star I see tonight?” Photographing the night sky was probably not on our minds back then!
We probably knew little about the star at which we were looking or even the names of most of the constellations overhead, but the thing we knew was that it was fun to look at the sky and that the stars seemed to go on forever. And probably the last thing on our minds was the thought of making incredible photos of those stars.
After all, we had to wish for our wish tonight!
Even today, we may find ourselves repeating the poem and still not know much about the details of the starry sky, but when we get far enough from city lights we can be amazed at its vastness, just as we were in our youth. But now, we can do more than just lie there and look in awe.
Latest Cameras Make Photographing The Night Sky Easy
With the latest digital cameras we can lay back and stare up into space with the shutter opening and closing as it takes a series of images of the endless sky.
With cameras now being able to handle high ISO settings and control noise, making photographs of the night sky has become a popular subject. As with most techniques, there’s a bit of playing around with settings to get it just right, but there are starting points for getting nice star shots.
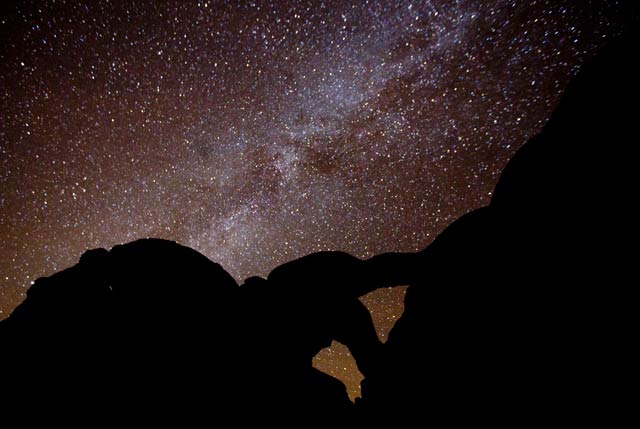
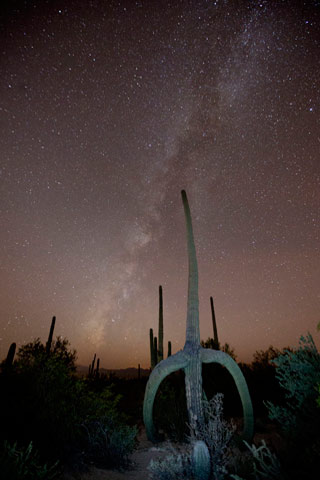
Stars, Milky Way and Star Stacking Techniques
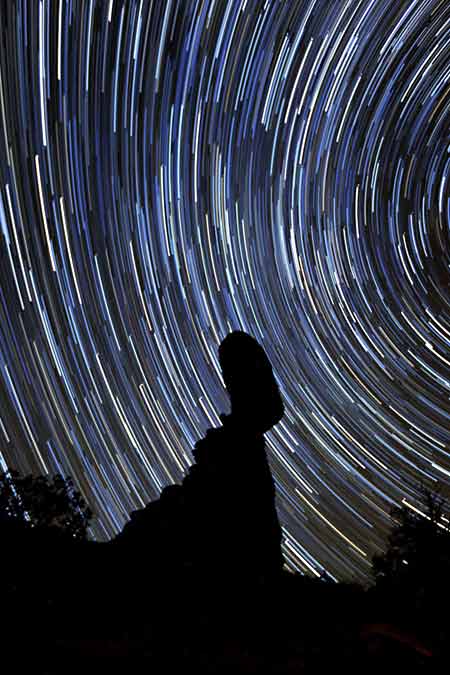
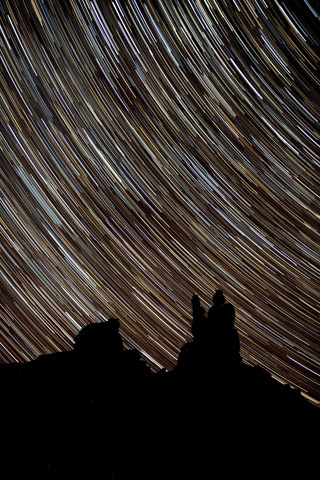
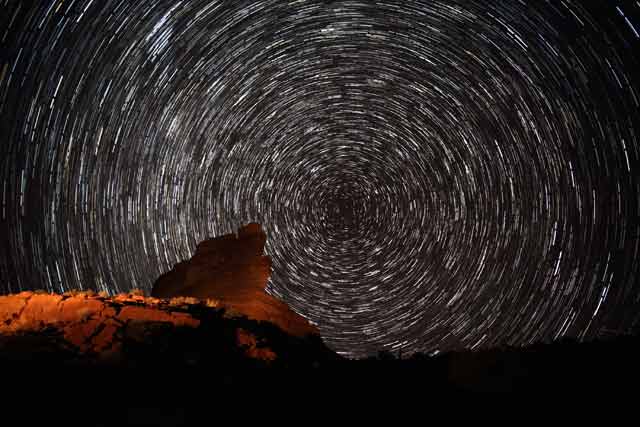
A good tip for photographing The Night Sky is to head out of town – the further you are from the city lights, the more stars you’ll see. Get your camera set up and aim for the stars. A nice foreground subject will make for wonderful silhouettes and can add interest. Go for individual photos or let the camera do its thing for as long as you want and then go home to create an interesting star trails image on the computer.
NEEDED EQUIPMENT:
Digital SLR
Tripod
Locking cable release (if wanting to do a stacked star trail)
Fast wide-angle lens (at least f/2.8)
Flashlight for seeing and painting with light
CAMERA SETTINGS
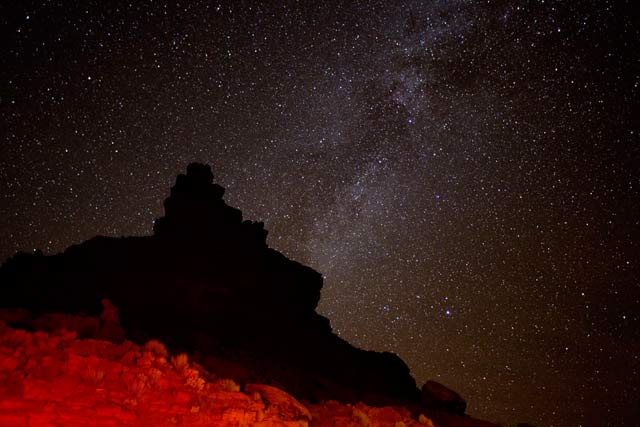
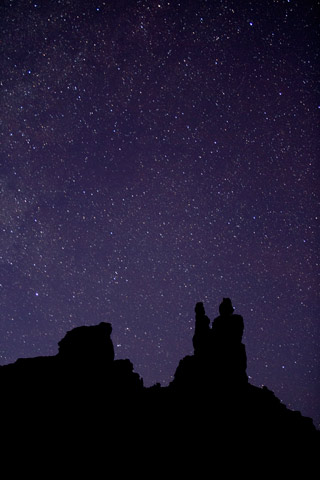
Basic Settings: Using Manual Mode, set the f/stop to wide open (f/2.8, f/1.4) and the shutter speed at 30 seconds. If you want to have your stars appear smaller in size and crisper, a shutter speed of 15 or 20 seconds works (Image below), as there’ll be less movement in the stars over a shorter length of time.

Note: If you do not own a fast lens, you can still make wonderful star photos with a slower lens (f/3.5, f/4). Just set you shutter speed at 30 sec. You can increase ISO to compensate.
Have the cable release locked in continuous shooting and set the drive to continuous so it keeps making photos for as long as you want. Note: At least 20 minutes of creating photos works best for star trail stacking.
Noise Reduction: Turn High ISO Noise Reduction on if your camera has this and Long Exposure Noise Reduction off as this causes the “write” time to memory cards to take as much time as the exposure. Note: When taking continuous photos to create star trails there will be gaps between images.
Pre-focusing: Put the lens on during the day, with the camera set on auto focus, focus on something at infinity and then switch the lens to manual focus. Note where the infinity symbol lines up with the focus line, as it’s not always where you think it will be.
Put a small piece of tape on the lens so you don’t chance changing your focus position – you don’t want to risk losing a night of photography because everything is out of focus.
White Balance: Just like other types of photography, different photographers have their own preferences for different occasions.
White Balance for star photography is no different. Some claim using Auto White Balance and adjusting later is best, while others say to set it on Daylight. Both will need post-processing in Camera Raw (ACR) or Lightroom (LR).
With experimenting in the field and in post-production, I’ve found setting Kelvin to 4000 to be my choice.
This allows for a cooler and darker sky than the other settings. Daylight on most cameras is around 5500 degrees Kelvin, which is a bit warmer than needed and may give off a golden cast if photographing towards city light pollution.
You’ll find you might need to do some adjusting in ACR/LR at 4000K, but it’s a good starting point, and you may find that no further adjustments will need to be made.
ISO: Several years ago it was unthinkable of to set the ISO higher than 1600 and even that produced a good bit of noise. Now, pushing ISO to 12800 is not unheard of. There will be noise at that level but it’s easily eliminated with the Luminosity slider in ACR/LR.
For photographing stars and the Milky Way, an ISO of between 4000 and 6400 is preferred. 5000 is a good choice for the latest cameras and 3200 if the body is a couple of years old.
Using too high of an ISO (i.e. 6400 and higher) will lighten the sky up quite a bit. If you want a bright Milky Way you can do this, but realize the sky will also be lighter.
TECHNIQUES
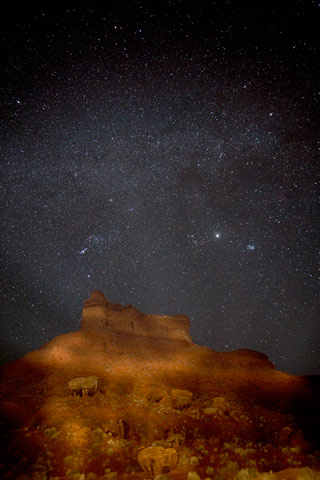
Light Painting: To put a little light on a foreground subject, it will depend on the proximity and size of the object included. If the object is near to you, use the flash of your camera with a flash compensation of between -1 and -3. If the object is large and further away, a large million candle-watt flashlight will be needed.
Paint the objects with the light of the flashlight, just as if you were painting with a brush. For object in the far distance, paint for 15 to 20 seconds total with just several seconds evenly on each part.For closer subjects only a swipe over the object is needed or the object will get “blown out”.
Star Stacking: StarStax is a great program for stacking photo in order to create star trails. This Mac or PC compatible freeware is found at http://www.markus-enzweiler.de/software/software.html.
It’s best to photograph in RAW so more data is retained (be sure to save your photos for individual image processing as well). Since this program only works with jpeg files, you’ll need to convert your series of photos before processing.
This is a very simple program to use, as it’s primarily drag and drop your images and click Start. It has several blending modes, but the best to use is Gap Filling where it allows for any filling of spaces within the trail. The online tutorial and Help in the program step you through the use of the program. The best thing about the program is that you see the trails grow with each processed image.
So with these tips for photographing the night sky, why not grab your equipment, head out where you can see the stars, make a wish and produce some star, Milky Way and Star Trail photos of your own.
by Andy Long
First Light Photo Workshops
All text & photos: © Andy Long. All rights reserved.
Leave a Reply