
There are many ways to capture motion in your images, but what camera settings should you use in stop action photography ?” If only it was an easy answer! I’ll try to get you headed in the right direction with these guidelines.
Shutter Speed
If you want to freeze the action, with no blur, without using a flash, you need to use a fast shutter speed. How fast? Giving a concrete answer is impossible, because there are a vast number of variables that are constantly changing and they have an impact on the result of the final image.
A few of these include: the light source, the speed of the moving subject, the subjects distance from the lens as it moves, the angle from which you are taking the photograph, and whether or not the subject has a reflective or absorbent surface.
Having said that, in respect of stop action photography, here are a few guidelines (in fractions of a second):
Wings of a humming bird: 1/2000 – 1/4000
Children playing soccer or football outdoors: 1/250 – 1/800
Children or pets posing for photos: 1/100 – 1/320
Velvety smooth waterfall: 1/10 – 1/50
Shooting Mode In Stop Action Photography
My basic rule for choosing a shooting mode is this: If there is motion involved, use Shutter Speed Priority. If there is no movement involved, use Aperture Priority.
The key word is “Priority”. If the subject or the camera is moving, then your priority is to use the shutter speed to capture or stop the motion. If there is no motion, and your priority is depth of field, then you can afford to have a slow shutter speed and focus on your aperture settings.
It does you no good to have a great depth of field in a photograph, but have it be blurry because the shutter speed wasn’t adequate.
Lenses
As you increase the shutter speed, less light will reach the sensor. That means that you will need to open the aperture wider. This is where a “fast lens” comes in handy. It has a wider aperture (f/2.8 to f/1.8), which allows more light in when it is wide open, which in turn compensates for the faster, low light, shutter speeds.


ISO
If you don’t have a fast lens, another option is to increase the ISO. As you increase the ISO, the sensor becomes more sensitive to the available light.
This lets you shoot at faster speeds. A drawback can be the “noise” that is created, but I have found that when you are shooting with a high ISO at night, or darker indoor settings, there is less grain than if you shoot with the same high ISO outdoors or in bright light.
Freezing Obvious Action
One key factor to keep in mind when trying to stop the action in your photos is that you need to make sure that the photo conveys motion. For example, if you capture moving vehicles and shoot fast enough to freeze the cars and the background, the cars will look like they are parked.
In order to convey motion, you need to freeze obvious motion or show some movement blur.
When you freeze something that does not normally happen without motion, it’s like stopping time. You are able to see the subject in ways that you can’t in real life and it can be quite beautiful; or scary.
Focusing on Moving Subjects
When shooting moving subjects it’s best to use Auto Focus (AF). Set your AF to Continuous (AF-C ~ Nikon), or AI Servo (AI-Servo ~ Canon), to allow the camera to re-focus as the subject moves. Using Continuous or AI Servo AF, press the shutter release halfway down as you move the camera to follow the moving subject.
This will activate the AF system and the lens will continuously re-focus to calculate the speed and direction of the subject. The lens is then adjusted to focus at the predictive location when the shutter is opened. When you have acquired a focus on the subject, press the shutter release all the way down.
The speed at which the AF system operates depends on the maximum aperture of the lens being used. The optimal lens, as far as focusing speed and accuracy are concerned (not figuring in the quality of the lens itself), are those with f/stops between f/2 and f/2.8.
The depth of field on faster lenses like f/1.4 or f/1.8 have such shallow depth of field that it takes longer to calculate the correct focus.
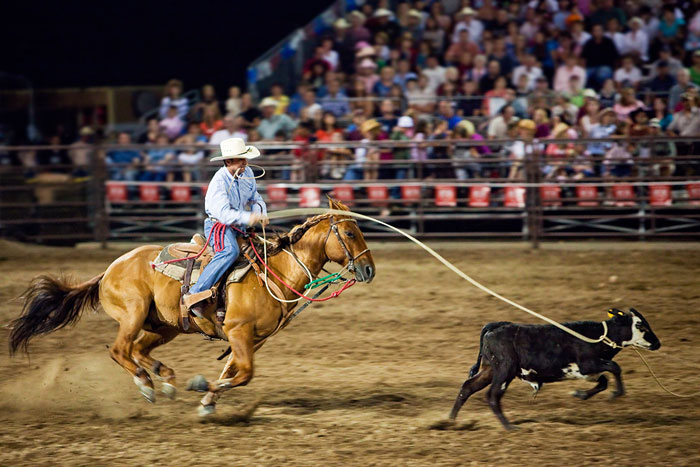
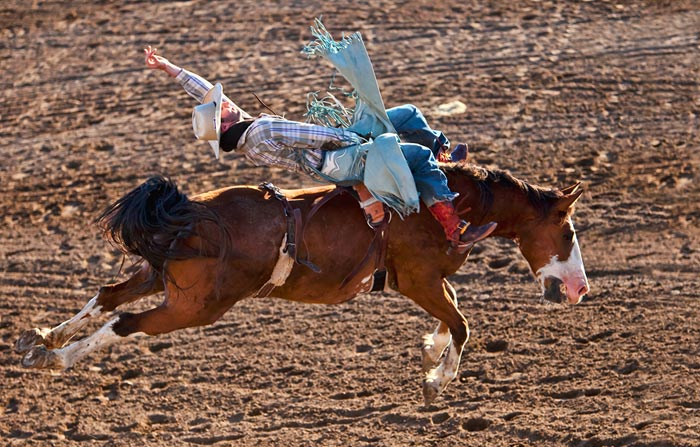
In order for auto focusing to work you must keep the subject in the AF target area in the viewfinder, or the camera won’t be able to keep it in focus. For the image below I used AI-Servo (AI stands for Artificial Intelligence), while keeping the horse and rider in my viewfinder.
Pre-focus In Stop Action photography
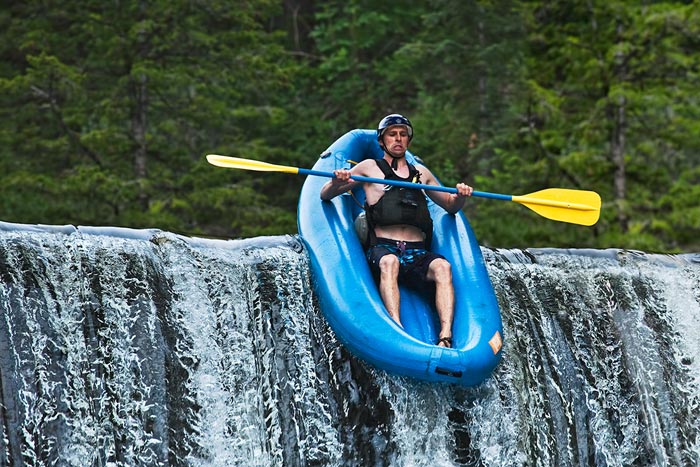
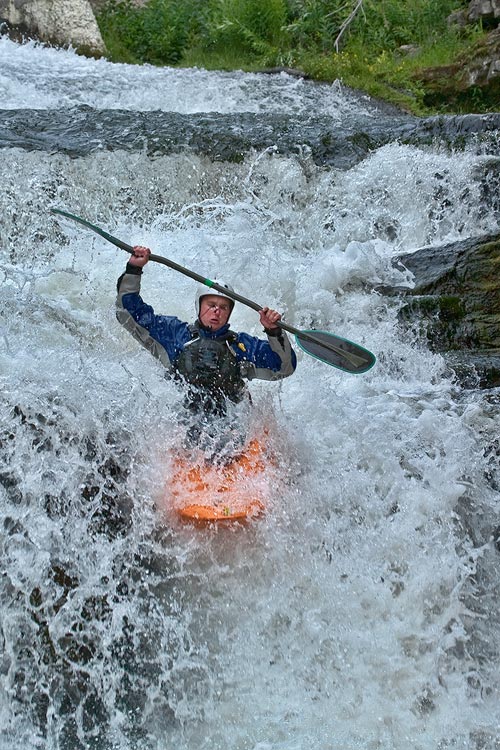
If you are photographing a subject that is coming directly at you, or that is moving so fast that you are unable to pan along with it, the best way to get an accurate focus is to pre-focus on a point where the subject will cross, then shoot when it hits that spot.
Pre-focus works well with sports like auto racing, baseball and swimming, where it is easier to predict where to take a great shot. It would be difficult with sports like football and soccer where the motion is erratic. It also works when trying to capture a bird in flight, or as in the image below, where the subject is approaching you.
To Burst or Not to Burst
Many photographers think the best way to shoot action is to use the “Burst Mode” or “Continuous Shoot Mode” (where you hold down the shutter release while the camera takes multiple images per second until you release the shutter; or the camera’s buffer is full).
While this method may work in certain situations where there is continual action, it is not always the best for other action shots. Remember, the whole purpose of taking action shots is to capture a “perfect moment” in time.
When you shoot in Burst Mode you may miss that “perfect moment” because it happened in between the bursts. This happens more often as the action event becomes shorter. For example, if you are trying to capture fruit as it falls into a bowl of milk, or a tennis racquet hitting a tennis ball, using a burst of images will more often than not miss the perfect moment. In these types of situations it is best to anticipate the perfect moment in time, and then press the shutter release.
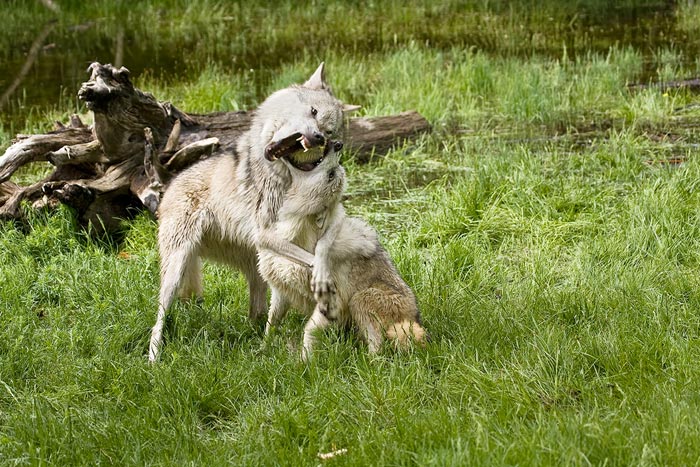
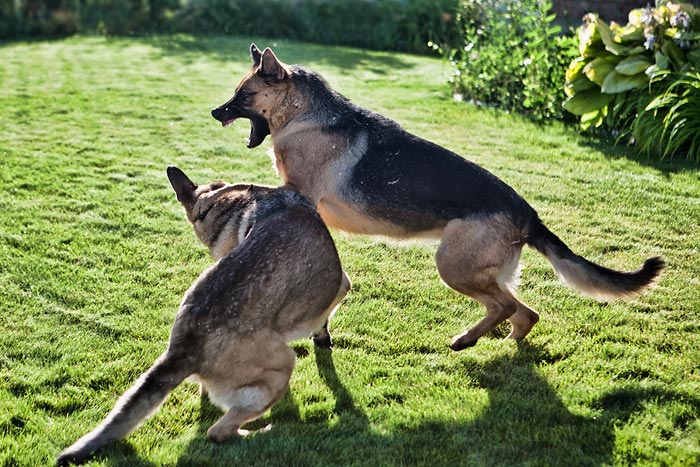
Another reason you may not want to shoot in Burst mode, is that you could end up with more images than Flickr. I was photographing my dogs playing and if I had used the burst mode during the entire session, I would have needed sixteen, 16 MB cards to hold all the images. Instead, I tried to time the shots to capture the best expressions of them playing.
The secret to good timing is practice. The more you practice, the more you will be able to anticipate when to take the shot.
MODUS OPERANDI
1. Hold the camera with your arms secure against your body for stability, or mount your camera on a tripod or monopod.
2. Select a spot where you can capture the “perfect moment”, while paying attention to and avoiding distractive elements in the background.
3. Follow the action or Pre-focus on the selected spot.
4. Set the camera to Shutter Priority Mode so that you can set your desired shutter speed and let the camera calculate the corresponding aperture setting.
5. Set the Auto Focus to One Shot (Canon), or Single (Nikon).
6. You won’t need a remote shutter release because you are shooting at fast enough speeds that you don’t need to worry about camera shake.
7. Preset your camera settings the best you can for the anticipated image and then take a practice shot.
a. Check the composition of the photo, and make sure that the composition is correct for when the subject will
be passing through the image and that you have the proper exposure.
b. Check to make sure there will be no background distractions.
8. As your subject approaches, anticipate the best time to shoot, then open and release the shutter quickly.
9. Check the histogram for exposure.
10. Check to see if you have the desired amount of blur in the background.
11. If need be, adjust the Exposure Compensation, focus, composition, and/or shutter speed, then shoot again.
12. Repeat steps 9-12 until you achieve the desired results.
Capturing motion is not always an easy task. While anyone can ‘get lucky’ once in a while and get a great photograph with motion, being able to do it consistently, and to capture what you are trying to accomplish takes a lot of work, practice, and knowledge. Yet, with an abundance of experimentation, trial and error, and practice, you will improve your chances of getting the shot you want when you want it.
by Brad Sharp
All text and photos: © 2012 Brad Sharp. All rights reserved.
Leave a Reply