
In this article we will look at real estate photography, in the form of photographing display homes.
For the uninitiated, display homes (sometimes referred to as “project homes” or “model homes”) are exactly what the title implies – real-life houses built for the sole purpose of simulating what new-home buyers will be getting for their hard-earned cash (or that of the bank).

All of the big builders have them, mostly in outer suburban growth areas and often in areas surrounded by other display homes (quaintly referred to as “villages”). From a photographic viewpoint, a good display home is furnished. (Don’t laugh. Some are completely empty.)
It’s also landscaped and features an assortment of accessories (i.e. flowers, magazines, bread, even fruit) designed to make the house appear to be a home. When accessories are missing, a judicious phone call to the builder or publicist is in order. Every homey detail helps!
Why photograph display homes? For one reason, builders need photos–good quality ones. They use them to market the homes (in ads, editorials, brochures, etc.), to enter their homes in competitions, and, to some extent, to create a record of their work in the form of a folio.
To a photographer, the beauty of display homes or real estate photography, is that their appearance remains fairly constant. You have the leisure to experiment with lighting and composition without feeling pressure to hurry from a homeowner. You also have ready access when a re-shoot is necessary.
The lessons you can learn when you photograph display homes are extremely useful later, when you’re confronted with an occupied or even an historic home. In many respects, display homes are more difficult to flatter, since you have less ambiance to work with, making your compositions all the more important.
Real estate agents can offer another large potential market for display home photographs, although they don’t pay as well as major builders do. While most of the work you do for new home builders will be shot on transparency film, the photography you do for real estate brochures, billboards, and ads will most often be on color negative film.
If anything, using color negative film makes perfecting exposure, color balance, and contrast considerably easier. Once you’ve mastered shooting homes on transparency, switching to using color negative film will be a breeze!
Real Estate Photography – Internal Shots
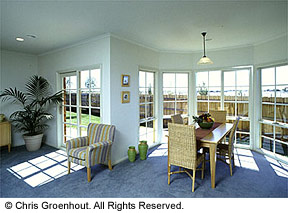
Ambient lighting only
Example of distortion to avoid when using a 20mm lens tilting down. (See discussion below)
The easiest time to capture internal shots of a display house is generally around the middle of the day for two reasons: color balance (which can be particularly blue in the morning and evening), and contrast (to avoid excessive direct light on and around the windows).
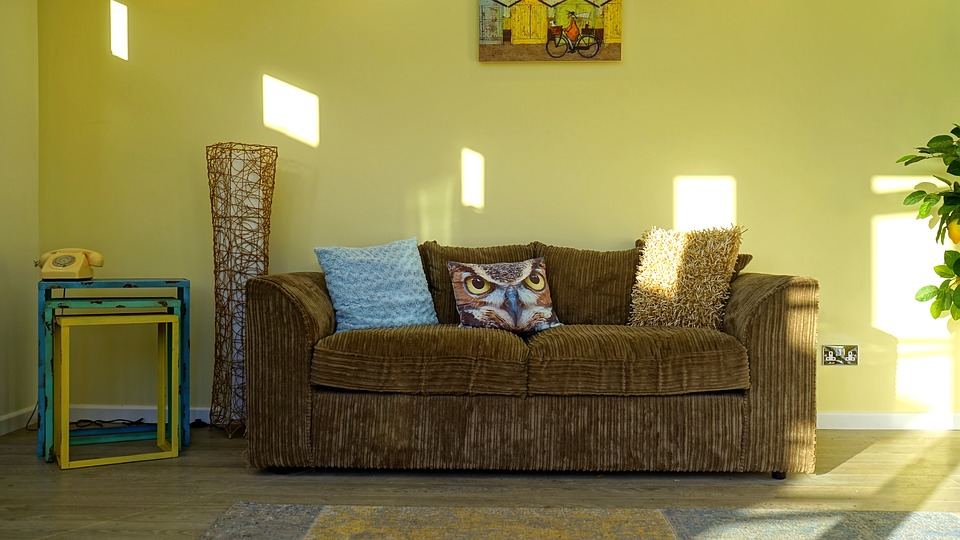
In many situations, the existing ambient and artificial light can be more than adequate.
Using such lighting is a good idea in rooms with two or more sources of daylight and/or rooms, such as a bathroom, which are too small to accommodate special lighting.
In other words, don’t automatically assume additional lighting is necessary in every situation.
First, consider subject contrast and the effect you’re trying to create. A simple detail of furniture or fittings may work perfectly well with no additional lighting, but shooting into a sizable room when the sole source of light is behind you won’t produce a great result.
Regardless of the subject, start by turning off existing lights, so you can evaluate the proportion of natural daylight to artificial illumination. This computation can be accomplished using an incident light meter – the EV reading, a direct comparison in stops.
Don’t discount the use of existing lights altogether, as some surfaces (such as wood flooring and furniture) can benefit from the warmth of tungsten light. Also, keep an eye out for other forms of artificial light that are already present in the home.
However, avoid using fluorescent tubes and/or energy-saving lamps, because they flicker. If you’re not sure about a particular light source, play it safe and turn it off!
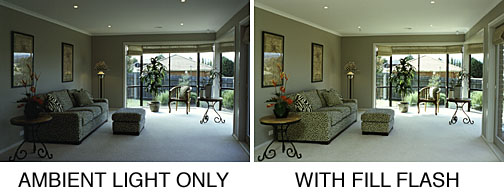
Ambient + Fill Flash
Another fill-flash example with nice highlights on carpet
When existing natural and artificial light just aren’t enough, you’ll need to consider outside help.
The most common choice is mains-powered flash, as it’s very bright and daylight color-balanced. The power from professional flash units is measured in watts (or joules) per second – more useful as a unit of comparison than as a real measure of light output. Up to 8000 w/s can be obtained using floor-pack units where the power is generated by a floor pack rather than inside the flash head.
If you’re looking to purchase flash equipment, I’d suggest sticking to the self-contained flash units (referred to as monoblocs) for their simplicity and versatility. I personally use a couple of Bowens heads, which are extremely reliable and are variable from 15 to 1500 w/s.
You may want to use a flash in the following situations:
* to balance a dark foreground with a bright background (e.g. window light).
* to light through a doorway and give a sense of life (and light) in another room.
* to enable an acceptable depth of field while maintaining good contrast in the image.
* to balance the internal and external light levels in order to show a view through a window without having the image overexpose completely.
Through a glass darkly…
Attempting to photograph through a window makes you appreciate a high-power flash, if only for the flexibility it permits. First, take an incident reading of the flash at full power (e.g. f16). Then, take a reflected reading of the window (1/60 @ f8) and adjust the meter so the aperture matches that of the flash reading (1/15 @ f16).
You’ll be left with a shutter speed and aperture combination which should balance the inside and outside illumination perfectly.
From this point, you have creative control in selecting the brightness in the window versus the level of natural light in the room. If anything, the window will look more realistic if it’s slightly overexposed by using a longer shutter speed and keeping the aperture constant.
If you reduce the power of the flash, the aperture will also drop, and the level of ambient light in the room will effectively increase. This sort of adjustment is an area where practice and experience will do wonders.
Try experimenting with a fixed aperture (perhaps f11) and a number of different exposure times (1/60, 1/30, 1/15, 1/8, 1/4 and 1/2 second). Evaluate the results. You might even try using two flash heads to avoid making the lighting look too directional.
Reflections
A problem that strikes near the heart of any photographer is reflections, and interior photography is no exception. Apart from the obvious dangers of windows, look for nasty highlights coming from television screens, pictures, and even silver tableware. A Polaroid back can help, but it’s useful only if the results are scrutinized closely.
To minimize the chance of reflections, position a light near the camera, or far left or far right of the subject. Umbrellas will reflect easily, which can make spotting the problem easier than when you’re bouncing light off surfaces such as the ceiling. Rooms with full-length windows are virtually impossible to light normally, so lower the window-coverings slightly (if any are available) or use cross-lighting, if you have the space.
Your method of lighting an interior is as subjective as the composition you choose for the image itself. Keeping this in mind, here are some basic rules:
1.) Don’t over-complicate the situation. One light is enough in most situations. First, consider why you’re lighting the room(s) and determine whether you’ve achieved your goal.
2.) Don’t over-light the room. Try to include a little ambient light, or your image can look too clinical. When metering, make the foreground slightly darker than the background. (Half a stop difference is enough on transparency film.)
3.) Avoid bouncing the flash off colored walls or ceilings. Doing so can give the image an unwanted color bias.
4.) Turn off the flash modeling light when the shutter speed is long and the color is critical.
5.) As an alternative, you can use the modeling light to introduce warmth into a room, but prevent it from falling on blue carpet or walls, because the result will approximate gray. (Yellow and blue tend to cancel each other out.)
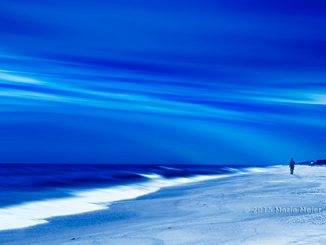
Interiors at night
For a different look when engaging in real estate photography, try shooting interiors at dusk or nighttime. Just after dusk, tungsten balanced film is particularly pleasing. The effect will be very moody and appropriate, evoking a feeling of warmth inside, contrasted with the blue-coldness outside.
The big advantage to evening shooting is the ease of lighting, because there’s no dilemma with mixed color temperatures, reflections are easy to spot, and the existing lighting compliments what you bring in.
Personally, I feel that nighttime internal shots suit the more expensive and dramatic homes that have extensive halogen lighting and high quality finishes and furniture. Cheaper homes lit with domestic grade bulbs tend to look better when lit with daylight, plus a little fill-flash, as previously outlined. Try both techniques, if you have the time and budget.
Another technique to try is placing a light outside the window to simulate sunlight.
This is especially effective when the light is shone through something such as ivy in order to cast artistic shadows in the room. The Hollywood cliche of Venetian blind shadows can also add visual interest and mood, although you must be careful not to overdo it!
Composition hints:
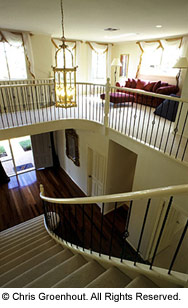
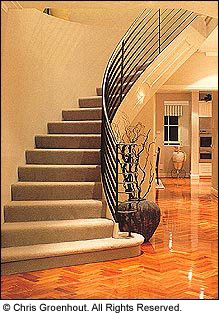
* Utilize the room’s perspective (i.e. the line of the windows, an archway, or a stairway) to make interesting and dynamic shots.
* Avoid including large areas of “nothing” or the backs of couches.
* Use tabletops and their settings to lead into the rest of the room (e.g. looking from the dining room into the kitchen).
* Keep your camera parallel in both directions, tilting down only if no lines are near the side edges of the frame.
* If you’re shooting a wall square-on, make sure your camera is also perfectly parallel to the wall to avoid converging cornices and perspective distortion.
Part two – external photography of display homes
by Chris Groenhout

Leave a Reply