
The more practice time put in the higher the chances are of getting that desired photo. If you’re working on landings, pick a subject and stay with it.
In Part 1, we learned how to get your camera equipment prepared in order to photograph birds in flight. Now I’ll share some tips and techniques on how to actually focus on and track them so you can create some great images of your own.
FOCUSING ON THAT BIRD
Pick Up Focus Early
No matter what size lens is being used to make images of birds in flight, the further away the subject is when first starting out the easier it will be to pick up and maintain focus. Get the subject in focus, track with it and once it gets close enough for a nice shot fire off a burst. Over time, it will become easier to pick up focus when the subject is much closer, but this only comes with practice and repetition. Don’t feel bad if you’re standing next to someone who is picking up a landing bird just 20 yards out, while you need to track them when they are100 yards away.
When there are a group of birds coming into the area, pick one. Keep a focus on it and stay with it until it gets into position for the desired shot.
A good place to start… The larger the bird, the easier it is to achieve sharp focus. And when the bird is closer it will fill the frame more and the camera will have an easier time picking up a focus point.
Where to Focus
Just like with any wildlife photography, having a sharp focus on the eye is important. While it might not be easy to see and get a focus point right on the eye, realize that with just about every bird, the eye is on the same plane as the head and neck, so focusing on this area will work well for getting the eye sharp (if it is visible). There are times when the action within the image is where the viewer concentrates, but even then, they eventually look at the eye. If it’s out of focus then the positive reaction towards the overall image can turn into a negative.
TECHNIQUES – TRACK THAT BIRD
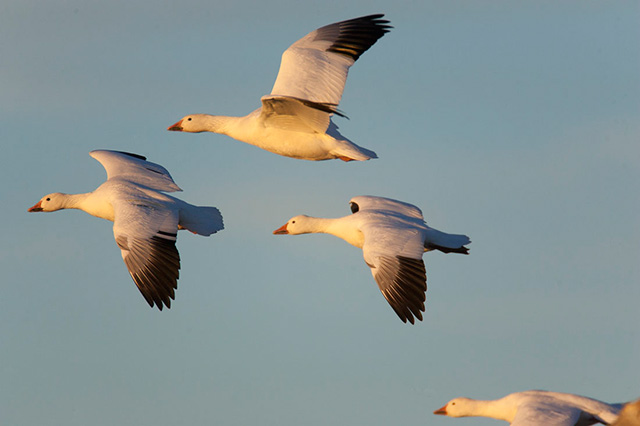
Pick One Bird Out of the Flock
This is where the key to making a great image over just getting a photo plays out.
If you see a flock of birds preparing to land on the water or in a field, quite often they’re in small groups. Pick one bird, get a focus on it and stay with it. It may not turn into position every time for the desired photo, so chalk it up to practicing picking the subject up and keeping a focus while tracking. After awhile, picking out one as it turns into the right position will be easier, but at the beginning, select one and stay with it. You may miss out on more desirable photos by practicing this technique, but all the practice is important in order to get to the stage where picking a closer subject will come automatically.
Panning
For a simple image of a bird flying past, getting the timing of panning is key. Once a focus is picked up, try to maintain the same flow of the camera with the speed of the birds’ flight. You know you have it when the focus square is maintaining the same position on the bird as it flies by.
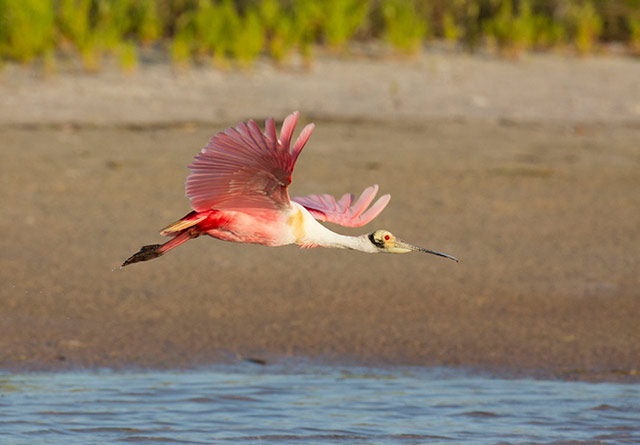
Roseate Spoonbill: Keeping a steady panning technique with a bird in flight will allow for sharp images as it passes in front of you.
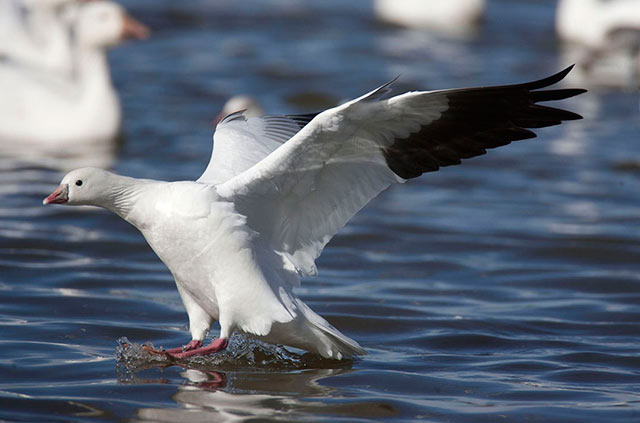
Splash Down and Landing
Birds coming in for a landing, whether on land or water, will do so against any wind there is as they will use this to help slow them down as they spread and turn their wings.
To make an image at the moment of landing, wait to fully press the shutter release until the bird is just above its landing spot. When using Servo AF Mode with the Drive Mode set to Continuous, timing is critical during the bird’s approach, as the buffer can fill up before it’s time to capture that special image. When you think you have timed it just right, fire a short burst of four or five images by holding the shutter button down for approximately one second. This will allow for a photo of just before, during and after impact. Images of a water landing have much more oomph than of a bird landing in a field or a branch as the splash pulls the viewer into the action of the photo.
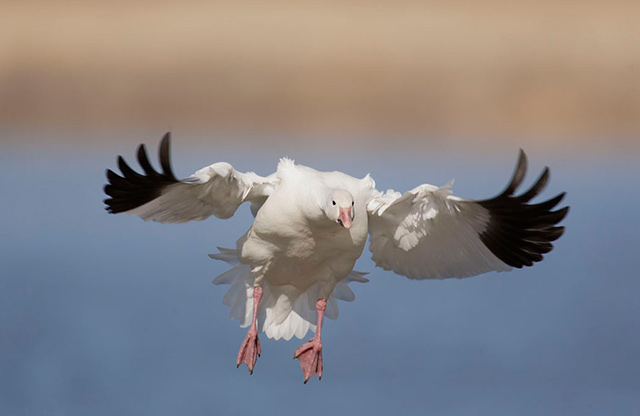
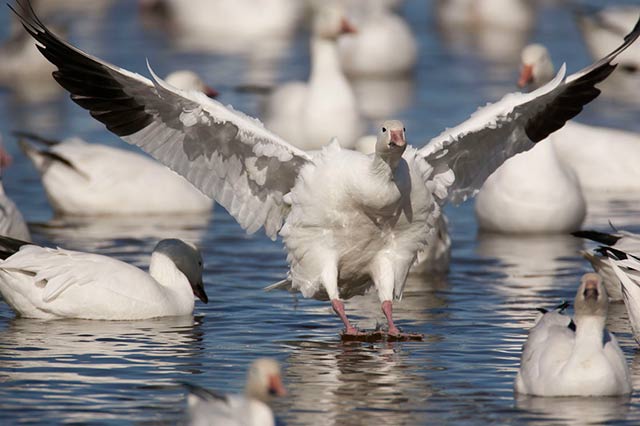
After a single Snow Goose was selected from a group coming it, it turned to get in perfect position as it moved away from the others for making a landing in the water.
These two images were from a set of nine in Continuous High Drive and Servo to maintain focus as it came in for a landing.
Even with getting a burst of a bird in perfect position, the actual splash of the water might not be captured. There is a tiny lapse between frames and the most exciting splash action could happen during that lapse. It’s just a matter of more practice – doing this repeatedly to make that one fantastic image.
Launching Off the Water
The setting being played out is of a group of birds in the water and it’s time for them to take off. Some just burst off of the water and some have to run across the water before taking flight. The first thing to realize is the larger the bird, the more space it needs to take off. As with a landing bird, it typically takes off into the wind, so getting into the right position plays an important role in making the image for which you are hoping.
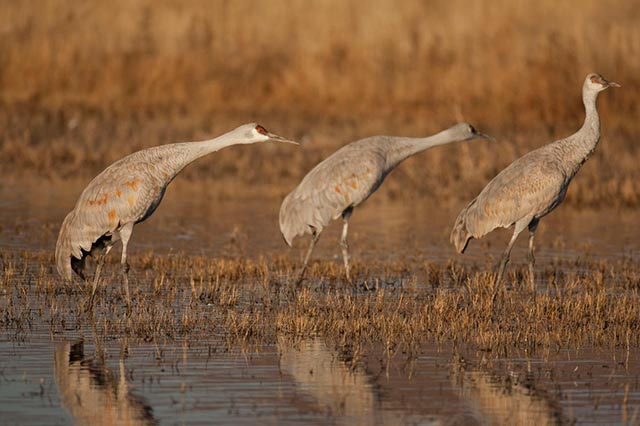
Before taking off, Sandhill Cranes will lean forward when standing in the water – a sign they are preparing to take flight. Other large birds give off other signs while some birds offer no clue.
A change of the focus selection and subject placement is needed here. To give room for the bird to move into the frame, the focus square needs to be adjusted depending on the situation. If the photo is of a duck blasting out of the water and it’s facing right, move the focus point in Dynamic Focus to the far left and to the lowest row of the points in the viewfinder. This allows space for it to move into the frame when it takes off. Patience comes into play as an eye must be kept on the viewfinder and the finger on the shutter button so at the moment of any movement the trigger can be fired. There may be times when the bird moves so fast or your reactions are a little too slow and only a portion of the bird is within the image frame. Again, practice and repetition will pay off in the long run.
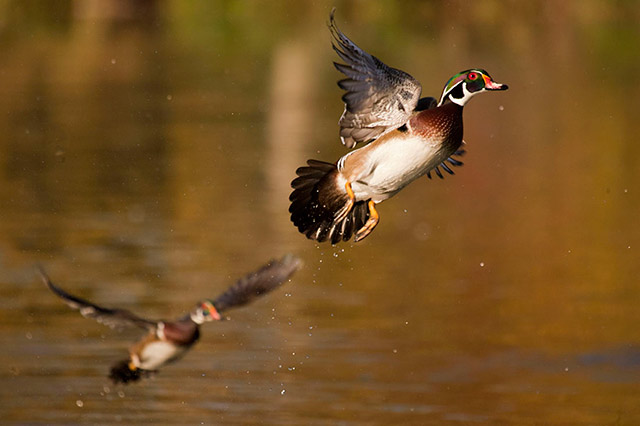
By having the focusing square to the far left and the bottom row, there was room for this Wood Duck to fly into the frame. Press the shutter release at a burst to get photos as soon as it moves and hopefully it will be in the frame.
There’s another way to look at birds taking off from water. For birds that run before launching skyward, do you want to capture the launch itself or get the trailing splashes as it runs across the water? If wanting the launch, use the focus point that allows for there to be room for the bird to move into the frame. If wanting the series of splashes within the frame, put the point of focus on the opposite side so there is more space behind the bird.
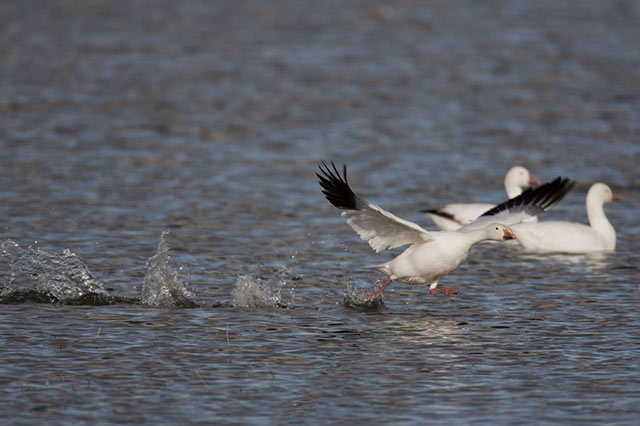
As this Snow Goose runs to take off, the selected focus square was on the right and put on the bird, leaving room to the left so the splashes in the water could be included.
No matter what the desired photo is, stay with one bird until it does what you have in your mind. It’s a fact that if you think you’ve stayed with it long enough and it’s not going to do what you think it will and you move to another bird, the one you were watching previously will do what you want. Patience and practice are the keys to getting that perfect bird in flight photograph.
The info above is just a small portion of the information that will appear in Andy’s next eBook – Bird Photography Tips and Techniques.
by Andy Long
First Light Photo Workshops
All text & photos: © 2013 Andy Long. All rights reserved.
Leave a Reply