
In landscape photography, depth of field is a critical component of every image. Some photos require minimum depth of field to place more emphasis on a single element of the scene. Classic landscape images have extensive depth of field to provide front-to-back sharpness.
Since depth of field is so important to landscape images, we’ll address several questions, such as what is it, how do I control depth of field in landscape photography, how do I know if I have enough, and can I estimate depth of field when in doubt?
Many photographers labor under the misconception that depth of field refers to a specific zone of some size that’s sharp throughout its range. It’s important to understand that the only point in a scene that is tack sharp is the actual point of focus. Everything else in the scene is out of focus to some degree. In that case, what is depth of field?
Depth of Field is the zone of acceptable sharpness in the image.
It’s a portion of the image in which all of the elements ‘appear’ to be in focus. There are no sharp lines indicating the beginning or end of this zone. Instead, there’s a gradual fading in and out of the zone. It’s not centered on the point of focus. Approximately one-third of the size of the zone lies in front of the point of focus; the remainder falls behind. The extent of the zone is determined by several controls available to the photographer.
We can predict that a shutter speed of 1/4th of a second will provide a blur when you’re photographing a waterfall, and that a shutter speed of 1/200th of a second will freeze the droplets of water. Depth of field isn’t quite that easy.
Shutter speed is simple to predict, because there is only one factor involved. Predicting depth of field is more difficult because there are three factors. Many people believe that if you use an f-stop such as f/16, you will get all the depth of field you might need. In some cases, that may be true. In other cases, the depth of field provided will either be excessive or insufficient.
Let’s work under this concept: We should only have the amount of depth of field required to render the scene according to our interpretation. Both, more and less depth of field than required can have negative effects.
The photographer has three camera controls to determine the depth of field in an image. The most commonly known control is the f-stop. Before discussing this aspect, let’s clarify two terms that are used interchangeably: f-stop and aperture. Aperture refers to the physical opening of the lens. F-stop is a relationship between the aperture and the focal length of the lens.
If we didn’t have the f-stop relationship, we couldn’t have photography. An f-stop of f/8 means that the same amount of light will strike the film plane no matter whether you’re using a 20mm lens or a 600mm lens. Compare the diameter of a 20mm lens with the diameter of a 600mm lens, and you’ll understand why the f-stop relationship is necessary in depth of field in landscape photography.
F-stop: When just considering the f-stop, a smaller f-stop number (e.g. f/2.8 or f/4) provides little depth of field in the scene; a larger f-stop number (e.g. f/16 or f/22) provides a lot of depth of field in the scene. Many photographers don’t go further than f-stop when considering depth of field. They don’t realize that the depth of field provided by the f-stop is either a lot or a little in relationship with the other two controlling factors.
Focal Length: The second control over depth of field is the focal length of the lens. Just considering the focal length of the lens, a smaller focal length provides greater depth of field; a longer focal length provides less depth of field. If you’re using a 20mm lens, you’ll have more depth of field at any given f-stop than you would with a 600mm lens at the same f-stop. This is a “rule of photography” that you should remember. There is only one exception to this rule:
If you were very close to your subject with a 20mm lens and filled the frame, you would have the same depth of field as with a 600mm lens if you were much farther away and the subject was the same size in the viewfinder.
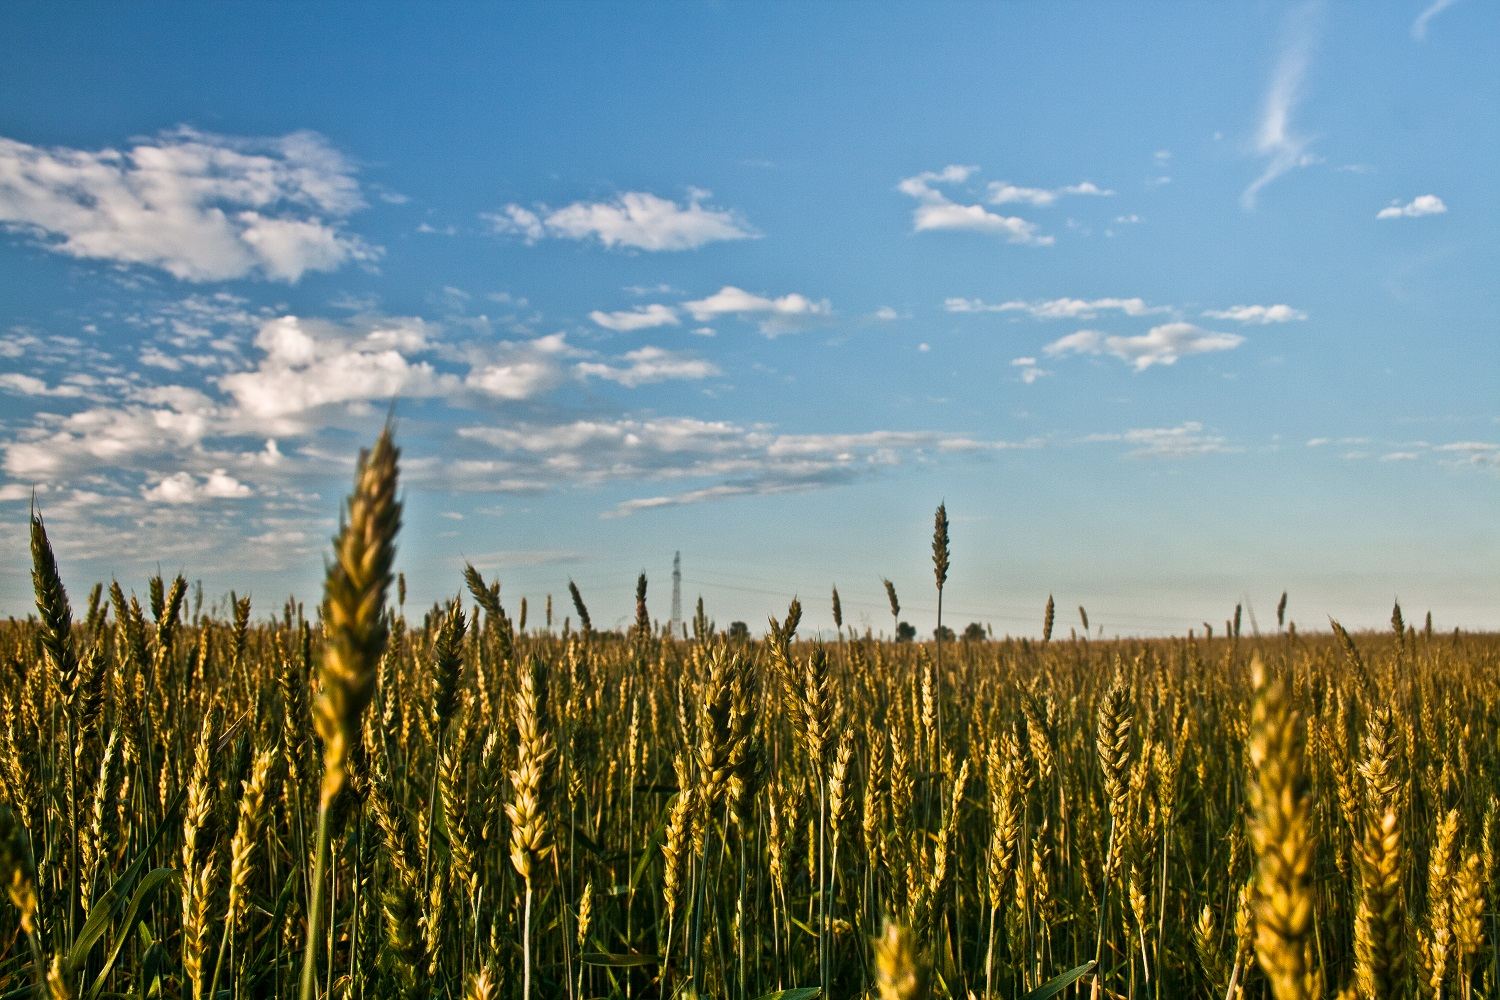
F-stop and Focal Length Combined: Please note that the discussion of depth of field with f-stop and focal length considered only one of the factors to show how they work independently. However, they’re interdependent when you’re photographing in the field. Let’s use an example of photographing a field of flowers with a 20mm lens. If we just consider f-stop, we might use f/16, since we know a high f-stop number provides a lot of depth of field.
However, we get “extra” depth of field because we’re using a 20mm lens. We might find that f/8 or f/11 provides enough depth of field to make the scene’s photo the way we want it. (We’ll discuss how to determine if you have enough depth of field later.) If that’s the case, then we have “excessive” depth of field; more than we need. The downside is that the extra stop or two of depth of field at f/16 versus f/8 or f/11 means that the shutter speed is a stop or two slower. That might be enough to cause blur in a breeze.
Let’s go to the other extreme of using a 600mm lens to isolate a portion of the field of flowers. Again, we might select f/16, because a high f-stop number should provide a lot of depth of field. However, the term “high” is relational. A 600mm lens might have an f-stop range of f/5.6 to f/45. In that case, f/16 is not a “high” f-stop number. Since it’s not at the high range of the available f-stops and you “lose” depth of field with a telephoto lens, a choice of f/16 would probably not provide the results (sharp front to back) that you desire.
Camera-subject Distance: The final control available to the photographer, and the one most commonly missed, is camera-subject distance. Just considering camera-subject distance, you’ll have less depth of field when you’re close to your subject than when your subject is farther away. This is apparent to macro photographers. As you move closer to your subject and the magnification increases, depth of field falls off rapidly.
At very high magnifications, depth of field might be 1/16th of an inch. When you’re shooting star trails, you can use any f-stop and get sharp images, because all the stars are far way at the same plane of focus (infinity). In this case, you select the f-stop only to determine how long to have your exposure. A longer exposure gives a more complete star trail circle if you’re shooting directly north or south.
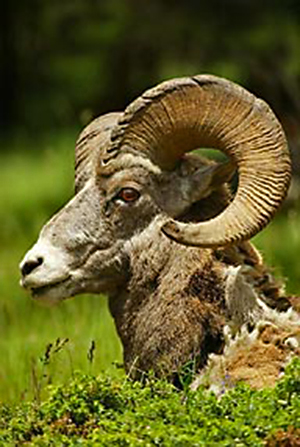
In the image on the left, I used a 400mm lens set at f/16. My subject was on a hill just off the highway. I was able to move very close and fill the frame. My f/16 setting allowed me to achieve good focus on my subject and still blow out the background grasses and trees. All of my depth of field controls indicated shallow depth of field.
My f-stop number was not a high number for the lens; a 400mm lens gives shallow depth of field; I was close to my subject. Having a shallow depth of field enabled me to hand-hold the shot (with image stabilization) since I was standing on the edge of a roadway (please note that I had a companion on guard farther along the road to warn me about on-coming traffic).
Another scenario: Let’s say you were lying on the ground with a 15mm ultra wide-angle lens (lots of depth of field) and wanted to shoot a 4-inch flower as a foreground subject (close to the lens) with a lake and mountain in the background. What f-stop would you need? f/11 would probably be the best choice due to the proximity of the flower. It would also provide a shutter speed fast enough to freeze any movement.
Now, if you focused just behind the flower, one-third of the depth of field that falls in front of the point of focus would cover the flower. If you focused on the flower, about one-third of the depth of field would be “wasted,” because it would fall in front of the flower.
How can we know that f/11 would the correct selection?
There are several methods of determining if you have enough depth of field in landscape photography
1. Depth of field Preview: The most common method is using the camera’s depth of field preview. (For an explanation of this feature, see my article “depth of field Preview-Friend or Foe?” Apogee, January 2005). Most cameras have this feature, so check your camera manual to learn how to access it.
However, if your camera doesn’t have this feature, you have other methods at your disposal.
2. Distance Scales: Manual cameras have excellent distance scales built into the outside of the lens. They indicate the range of acceptable focus for a selected f-stop. As long as the elements are within that range, they’ll appear in focus in the final image.
3. Hyperfocal Distance: Another way of gaining maximum depth of field is by using hyperfocal distance. The hyperfocal distance is a point of focus in which everything will be in focus from halfway between that point and the camera and infinity. The exact size of the range of focus depends upon the f-stop and focal length of the lens.
4. One-third / Two-thirds rule: This is one technique for estimating front-to-back sharpness for your image to determine the range of the depth of field in the image.
It’s an easy two-step process for depth of field in landscape photography:
First, set your camera to an f-stop that’s one stop open from the minimum available f-stop. If the f-stop range for your lens is f/2.8 to f/22, then select f/16. If the range is f/2.8 to f/32, then select f/22. We aren’t selecting the actual minimum f-stop in order to reduce the effects of diffraction at very small f-stops. Diffraction is the perceived loss of sharpness due to the rapid spread of light after it passes through a small opening.
Next, focus on some subject approximately one-third of the way into the scene. By focusing at that point, the depth of field area before the point of focus will keep the foreground sharp, while the two-thirds of the depth of field that falls behind the subject should keep the background in focus. Using a wide-angle lens and having a significant camera subject (point of focus) distance would help even more. This technique, however, is still effective with longer lenses.
How can we determine where one-third of the scene is located?

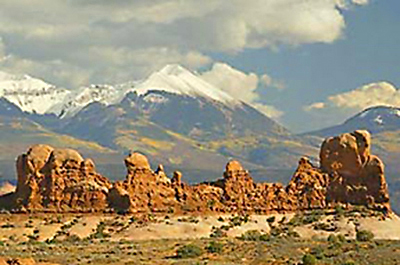
Is it determined by physical measurement, or is there some relative way to determine the answer? The answer is fairly simple. Remember our old composition friend the Rule of Thirds? It divides the viewfinder into thirds, both vertically and horizontally. The diagram (shown on the right) is an approximation of the Rule of Thirds. I’ve made the bottom horizontal line red in color to make it stand out. By focusing on an element in the scene that lies on the red horizontal line, you’re focusing one-third of the way into the scene. Note that your desired subject(s) may not fall on that line and will appear out-of-focus in the viewfinder. That is because you’re viewing the scene at your maximum (smallest) f-stop number, not the high f-stop number you selected for the image. Use your viewfinder to approximate where that line falls in the scene you’re photographing, and you can apply this technique successfully.
The image at the top of this article is a good example of this technique. The rock formation in the foreground lies approximately on the lower horizontal line of the Rule of Thirds (the red line in my diagram). Focusing on that point in the image allowed the one-third of my depth of field in front of the point of focus to keep the lower foreground in focus. The mountain in the background is still in focus due to the two-thirds of the depth of field that falls behind the point of focus.
The goals of this article are to show the interrelationships between the components of depth of field in a photograph and to remove some misconceptions about depth of field. It’s easy to simply select your minimum opening (largest f-stop number) and make the photo. However, you’ve seen that such a simplistic approach may have negative consequences in terms of shutter speed or diffraction. Obtain the depth of field you need for the image – no more, no less.
by Jim Altengarten
Leave a Reply