
To understand the question, what are lightroom presets, let’s look at a cooking analogy. In almost every cooking recipe, there are steps we repeat. When we are baking, for instance, our cookbook instructions tell us to preheat the oven, and lightly grease the pan.
Lightroom Presets are just like these repetitive and transferable baking steps. They let you record a series of often-used, highly useful steps. For creative photographers with limited time, Lightroom Presets are a recipe for success. They let you enliven and enjoy your photography processing workflow.
My goals here are to define a Preset briefly, and offer a few examples of how to use Presets to see how useful they can be in combination . We’ll look at installing Lightroom Mobile as we wrap up.
What are Lightroom Presets?
A Preset let’s you save a selection of sliders adjustments, those you make in your Develop Module, that you often use. I think of my favorite Presets as tried-and-true recipes.
There are Presets for converting images to grayscale using the B & W and HSL panels. You can also apply a Preset for toning using the Split Tone and Tone Curve panels. You can even create post-crop vignetting Presets using the Effects panel.
For your photo editing, the power of Presets lies in creating custom Presets to fit your workflow needs. Then, you can speed your workflow by launching them singly, or in a series that acts somewhat like a Photoshop action.
CREATE YOUR OWN
Of course, Lightroom comes with a few Presets installed, such as those for burning jpegs and email downsizing. However, as you keep exploring Lightroom, you may find you want a variety of Presets to speed your workflow.
So, the fun part is to create your own Presets. For instance, let’s see how to create and use a Black and White Preset in Lightroom 5. Of course, you can also do this in CC and Adobe Photoshop Lightroom Mobile.
BLACK AND WHITE CONVERSION IN the DEVELOP MODULE of Lightroom DESKTOP
Select your image.
Click on the Black and White checkbox in Develop. Lightroom will analyze the values in your color photo and create a conversion from color to black and white, automatically.
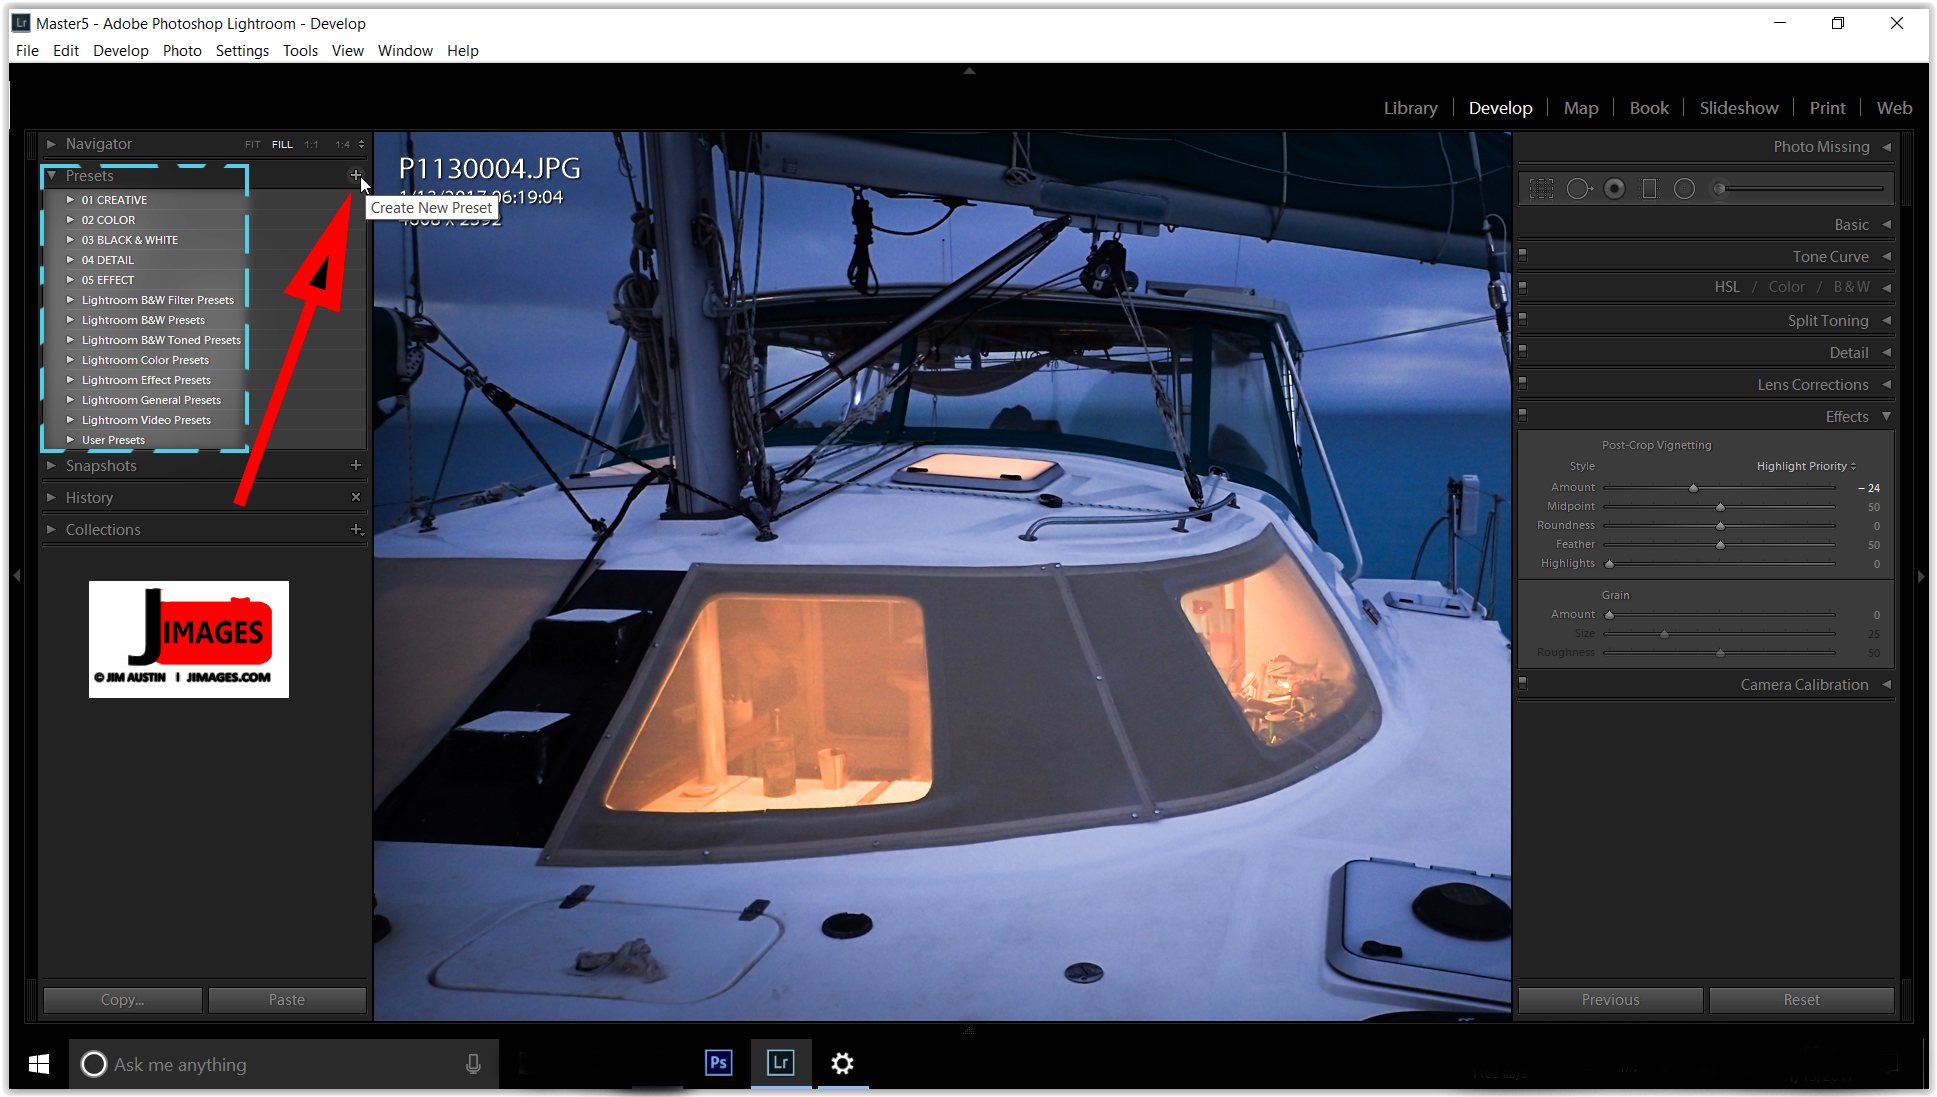
Now, to save this conversion edit into a new Preset, look at your Preset pallet. In its upper right, click or tap the Create New Preset Plus (+) icon.
Un-Check all the settings in the dialog box that appears. Next, still in that dialog, click the “Auto Black and White Mix” check box. Name your Preset by typing in a new name at the top space. Tap enter. At the bottom right, click Create. LR will add it, as a separate Preset, to your Presets list.
Post Crop VIGNETTE PRESET
In the Develop module, go to Effects.
To add a subtle post-crop vignette, slide the post crop vignette AMOUNT slider a little to the left. If you like, in the Effects module, increase the feathering of the edges by sliding the Feather slider to the right.
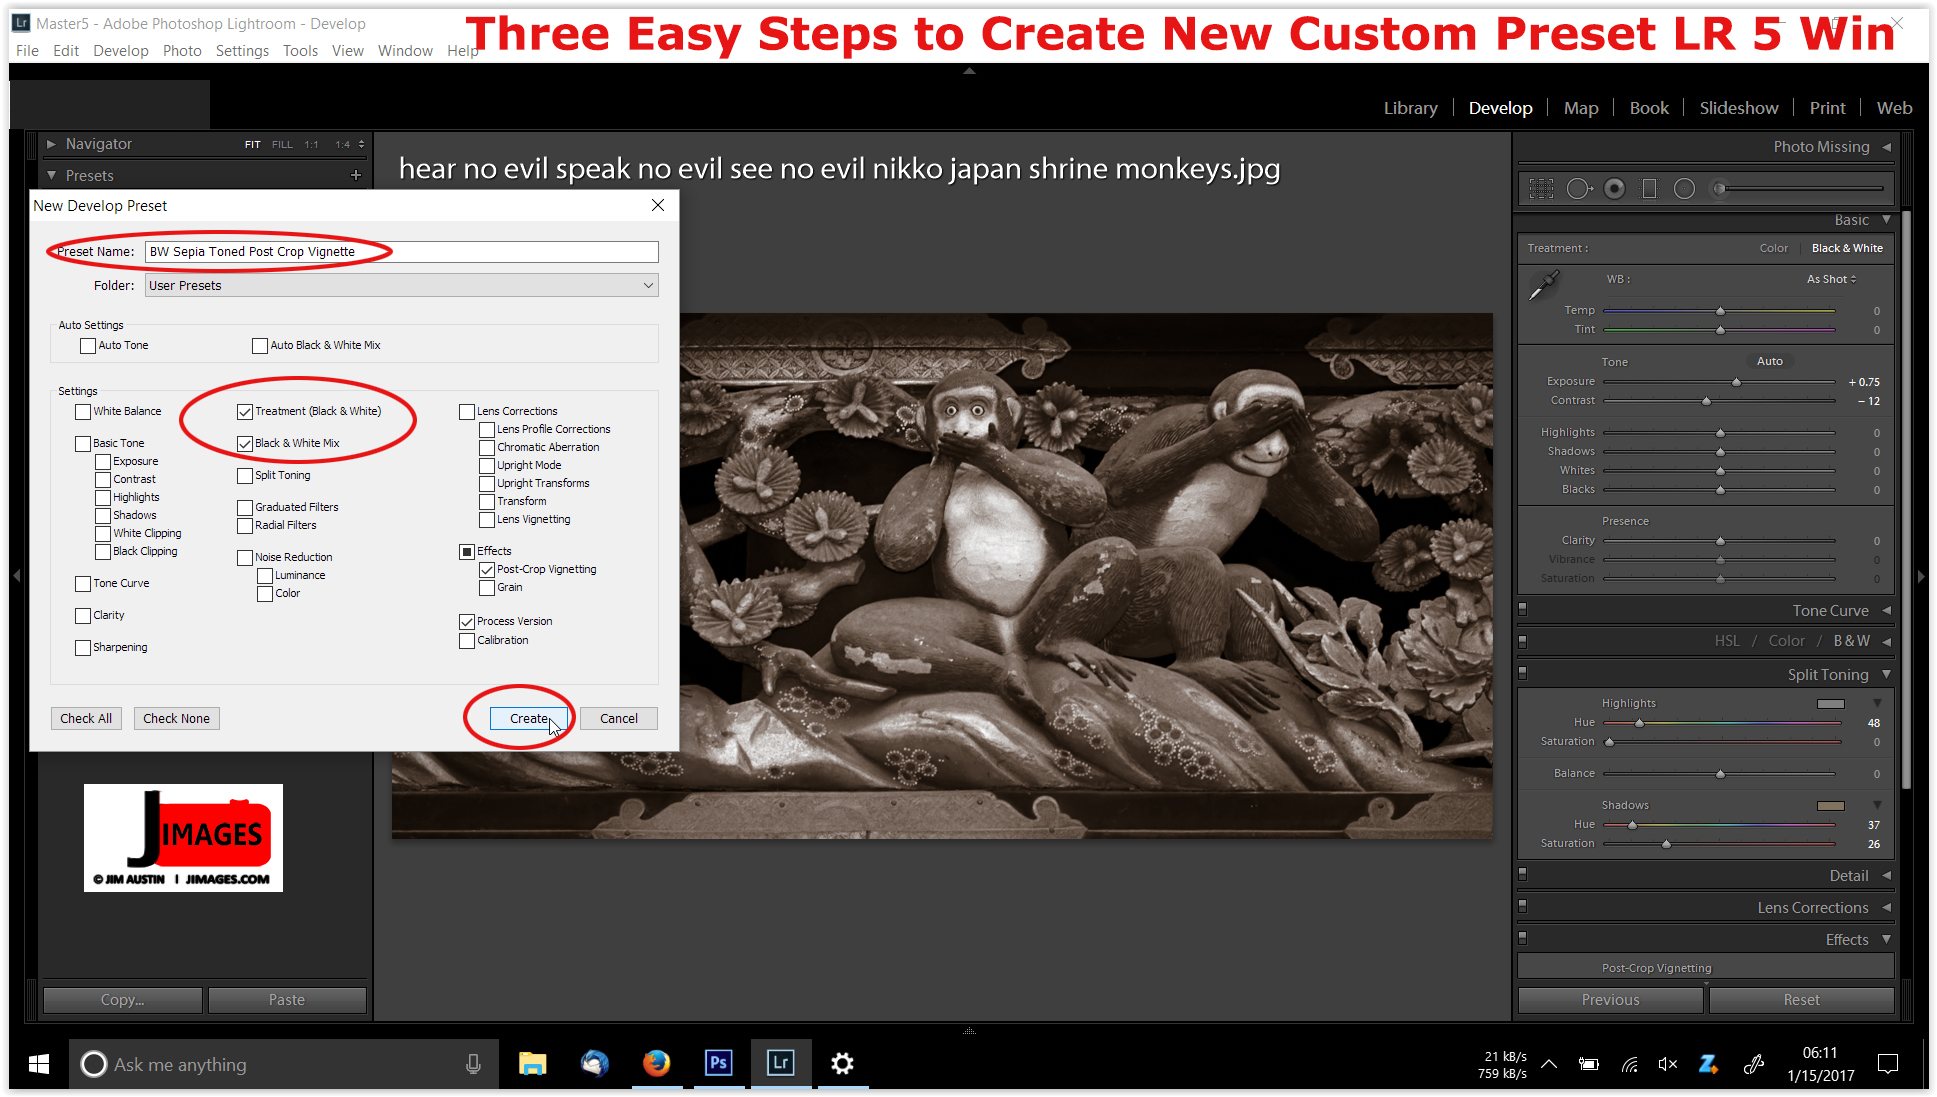
Return to your Preset pallet, and click the Create New Preset ( Plus [+] symbol) so a dialog box pops up (shown below left). Check None (Uncheck all the boxes. Name it Vignette or a name you prefer.). Enable the Post-crop vignetting box and click Create. This adds your custom Vignette to the LR Presets list.
 Combining PRESETS
You can combine, or add together, single presets into a new Preset with multiple steps. For instance, it is easy to create a Black and White + Post-Crop Vignette Preset. To do this, just click the Plus symbol and check both Black and White and Vignette in the dialog. Remember to give your combo Preset a new name, such as Black and White with Vignette. Specify a folder to place it into. Click Create as the final step.
DELETING and UPDATING PRESETS
In the Lightroom Develop Module, to get more Preset options, you first have to select a preset. After you select it, you can delete it. To apply a Preset and then update it, just Right Click and update it with the current settings. You can also rename a Preset when you update it.
PRESETS in LIGHTROOM MOBILE
When we edit our photographs in software, we can think of Lightroom Mobile as our personal “smart car” that drives Presets using commands we give to automatically get us where we want our images to go.
Here’s how.
Download and install the Lightroom Mobile app on your iPhone, iPad, Android, Samsung or other device. Use the 30-day free Trial, and/or Sign Up for CC, creative cloud. If I’m not mistaken, at the time of writing this costs $9.99 USD per month, with some yearly discounts from international camera stores such as B & H Photo in NYC. Next, go to Lightroom Mobile’s top menu and Click Help > Check for Updates.
I started going mobile with Lightroom version 5.4, a free release. As mobile camera updates became available, I added the camera plug-in for the Nikon D810. This allows LR Mobile to edit Nikon’s proprietary .NEF files.
Got an EOS 1DMark IV? Canon, Fuji and many other makers cameras are also supported at Adobe’s Help site here (https://helpx.adobe.com/camera-raw/kb/camera-raw-plug-supported-cameras.html)
WHERE ARE THE MOBILE UPDATES?
To download Lightroom Mobile Updates, go to the Adobe Blog (http://blogs.adobe.com/lightroomjournal/2016/07/lightroom-mobile-july-updates.html).
Anywhere you have a connection, you can share your processed RAW photos – after you have imported them to your mobile device- to Snapchat, Twitter, Instagram, Facebook or any social media.
Let’s say we want to create a Collection for mobile editing. You’d think we would use mobile, BUT, the place to do this is in the desktop Lightroom version.
In the desktop “Create Collection” dialog box, we can transfer the Collection to mobile. Under Options, check the Sync with Lightroom Mobile check box. Sort your photos on your mobile device, flag them, and you no longer need the desktop. You are now truly mobile.
SPECIAL TIP IF YOU GOT HERE:
Hopefully, you enjoyed my article on What are Lightroom Presets . Although Lightroom Mobile comes with a batch of User Presets, you can add a powerful set of free Presets to desktop and mobile. You can see the set in the first screenshot above at top left. I installed them and find them easy, fast and useful. I’m grateful to Julianne Kost, Principal Adobe Digital Imaging Evangelist, who created this excellent set of Lightroom Mobile Presets. Find them on Kost’s blog for June 24, 2014. Download them to install them free, by searching Google for: Kost lightroom presets mobile.


Leave a Reply