
Jim Austin Jimages shows how AUTO-ISO plus Manual can be a flexible choice for wildlife photography, and why this 5th exposure mode is an effective approach to better exposures with your DSLR.
TOPIC: An Exposure Mode for Wildlife Photography that uses the camera’s Auto ISO setting combined with setting shutter and aperture to manual settings.
LEVEL: Intermediate and Advanced Photographers
PASM : Four Exposure Modes You Already Know
You have probably used all four exposure modes already. Briefly, they are Program, Aperture Priority, Shutter Priority, and Manual modes (PASM is the acronym). In Program Mode, you set your ISO, and your camera picks the shutter speed and aperture. However, program mode is not ideal for creative photography. You want to express your vision by controlling motion with shutter speed and selecting the depth of field with aperture.
Exposure Mode #5: Auto-ISO + Manual Exposure Mode (M)
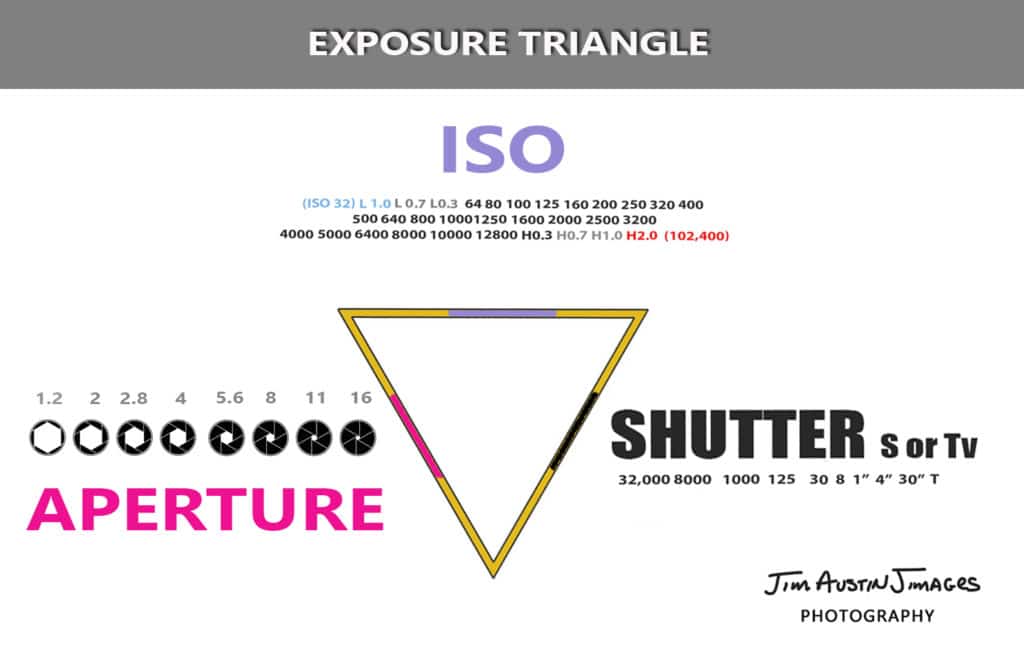
Setting the three elements of exposure (shutter, aperture, and ISO), we lock in two of them and vary the third element to let it “float.” In Aperture Priority exposure mode, we choose the F-stop and lock it in. Then, the camera automatically sets the Shutter Speed and ISO. Similarly, in Shutter Priority (labeled S or Tv on the mode dial atop a digital camera), we prioritize and lock in the Shutter Speed value, letting our camera set the F-stop.
What Does it Mean? Better Exposures and Ergonomics
The goal is to optimize your exposure for tonality and dynamic range.
AUTO ISO means the camera adjusts (floats) the ISO to balance these aspects of correct exposure. Our purpose for using AUTO ISO is to get the exposure correct even as conditions change.
Photograph in a dark room with a digital camera, then go outside in the sun, and AUTO ISO may adjust the sensitivity of the sensor. The ISO may move, automatically, from 2000 inside to 200 out on a bright day. We no longer have to manually change the ISO, or change rolls like we used to do with film. Combine AUTO-ISO feature with Manual exposure mode, and you can quickly make changes to your exposure settings, faster and more smoothly. Why? You use your index finger to adjust one dial. Your thumb changes another setting. All the time, whether you change shutter speed, or F-Stop, you are still looking through the viewfinder. For daylight, a good starting point might be ISO 200, aperture f/8, Shutter Speed 1/125th (125) or 1/250th of a second (250).
Modern digital cameras have the ability to combine AUTO ISO with Manual Exposure Mode, but check your menu for AUTO ISO. We need to learn to use Manual Exposure Mode so it is second nature, and this comes with practice. With Manual, what you set is what you get.
Turn your dial to M (Manual). Pick a shutter speed like 1/2000th. Pick an aperture like F/8. Or, let’s say you are in low light. Pick a shutter speed of 1/60th with OS or VR, and set your aperture to F/2.8. You are in control of both the aperture and the shutter when you choose Manual exposure mode.
If you have not used Manual Mode, grab your digital camera now and go practice!
Next, we’ll take a look at the how and why of setting AUTO ISO.
How to Set Auto ISO: Three Easy Steps
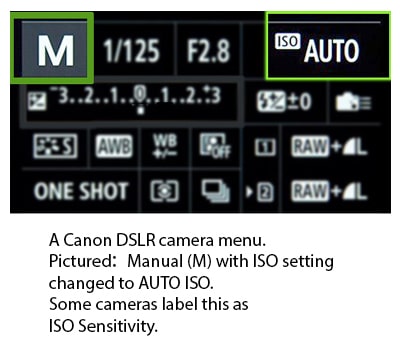
#1: Look in your camera menu, and find AUTO ISO.
Nikon, for example, calls this ISO Sensitivity Settings. Almost all camera makers now offer this feature in the menu.
Set your maximum ISO that you will accept. This is subjective because the number you choose affects the amount of noise and grain you’ll see – and can live within your photographs.
I have my ISO set to ISO 6400 as a maximum value for a two-year-old Nikon model. Your experience will differ.
[Note: Dialing in a high ISO, like ISO (ASA) 3200, 6400, or higher is not a fix for taking pictures in low light with fast shutter speeds. Why? You will get more noise and lower contrast, and dynamic range is also affected.]
#2: Enter the lowest ISO you want in your camera ISO settings menu. Try to choose the lowest ISO the camera has, like ISO 25, 50 or 100. This is called the Base ISO. If set to 100, the camera will not use a lower setting like ISO 50.
#3: Set the minimum shutter speed that you want the camera to stay above. This might range, for instance, from 1/15th of a second for nature shots on a tripod to 1/8000th of a second for sports or fast-action imagery.
Why Use AUTO-ISO Plus Manual?
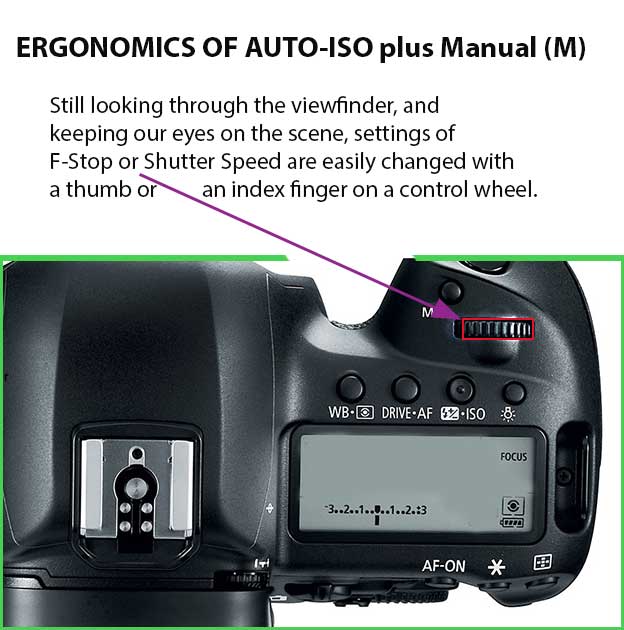
Why AUTO-ISO + M? Setting the 5th exposure mode is ergonomic. It frees your hands and mind and lets you operate the controls smoothly. Nikon, Leica, Canon, Fuji and other makers let you first set Auto-ISO, then easily change shutter and aperture with just a single dial in front or behind the shutter release button.
This is an excellent way to free your mind from the menu and keep your eyes in the finder for creative compositions. Without taking your eye from the viewfinder, you can easily rotate the dial to move from 1/125th of a second to 1/4000th of a second. Or, you can quickly change your aperture for more depth of field.
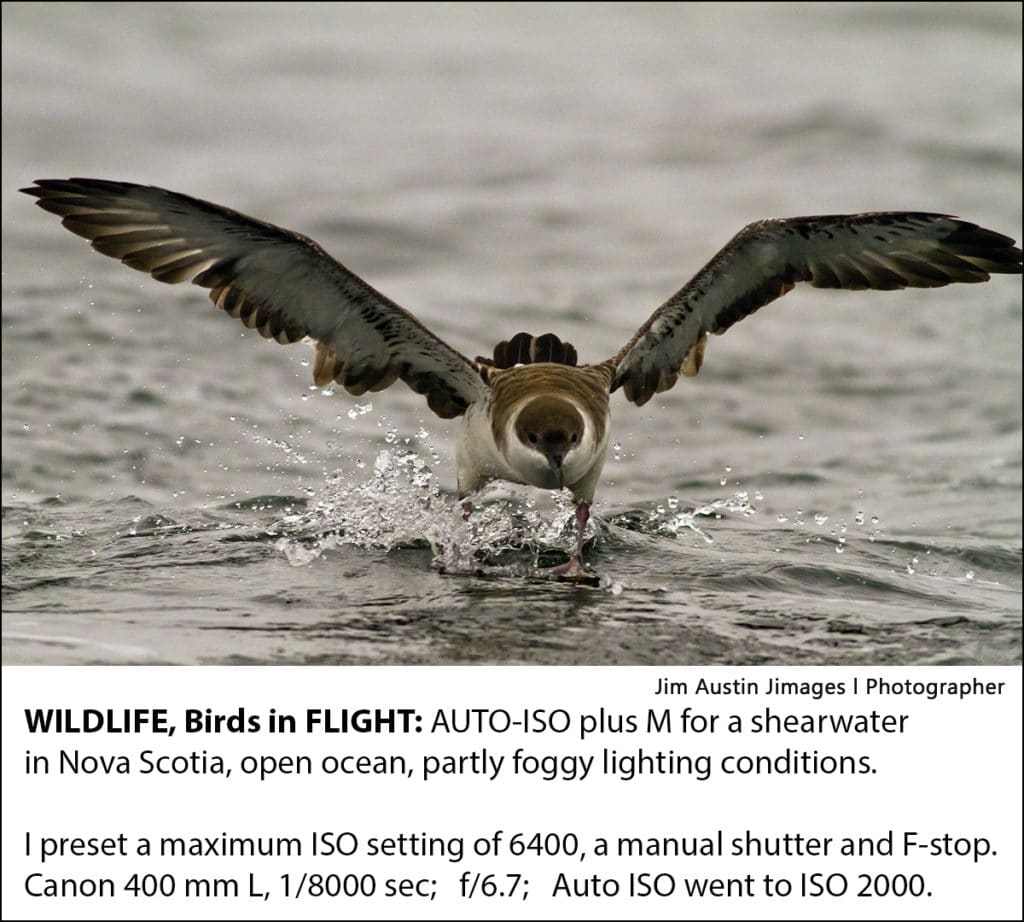
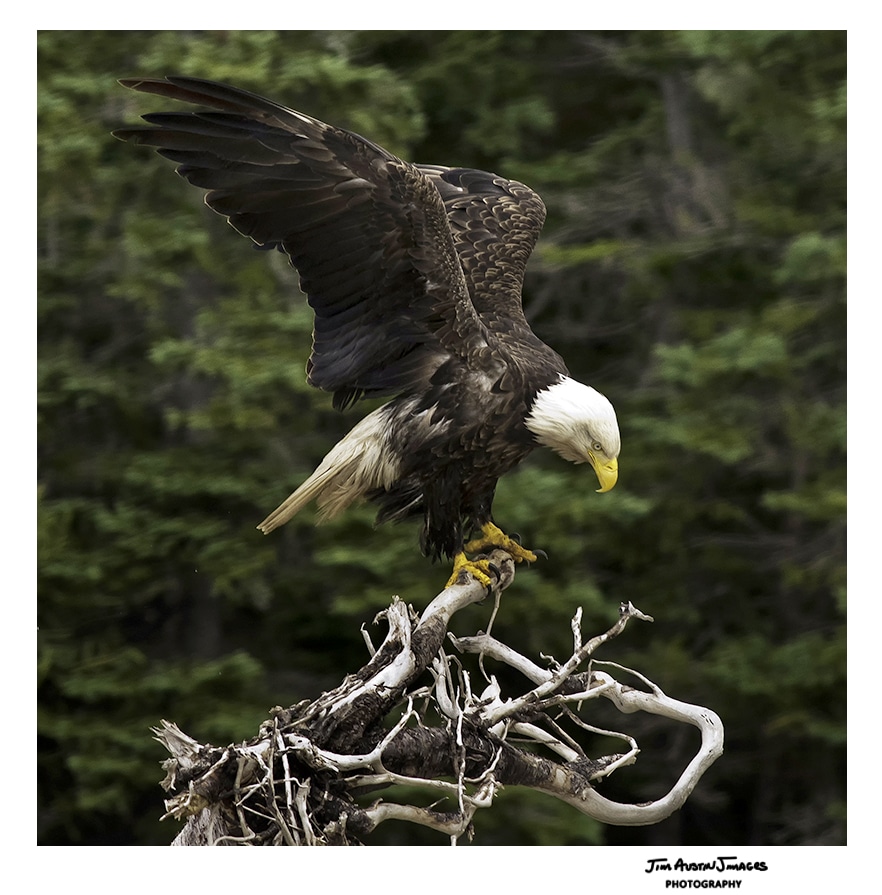
The AUTO-ISO plus M exposure mode is effective for much wildlife photography with birds landing, mammals on the run, and large fast wildlife in changing conditions. Why? You are concentrating on the subject and wasting ono energy fiddling around with exposure modes.
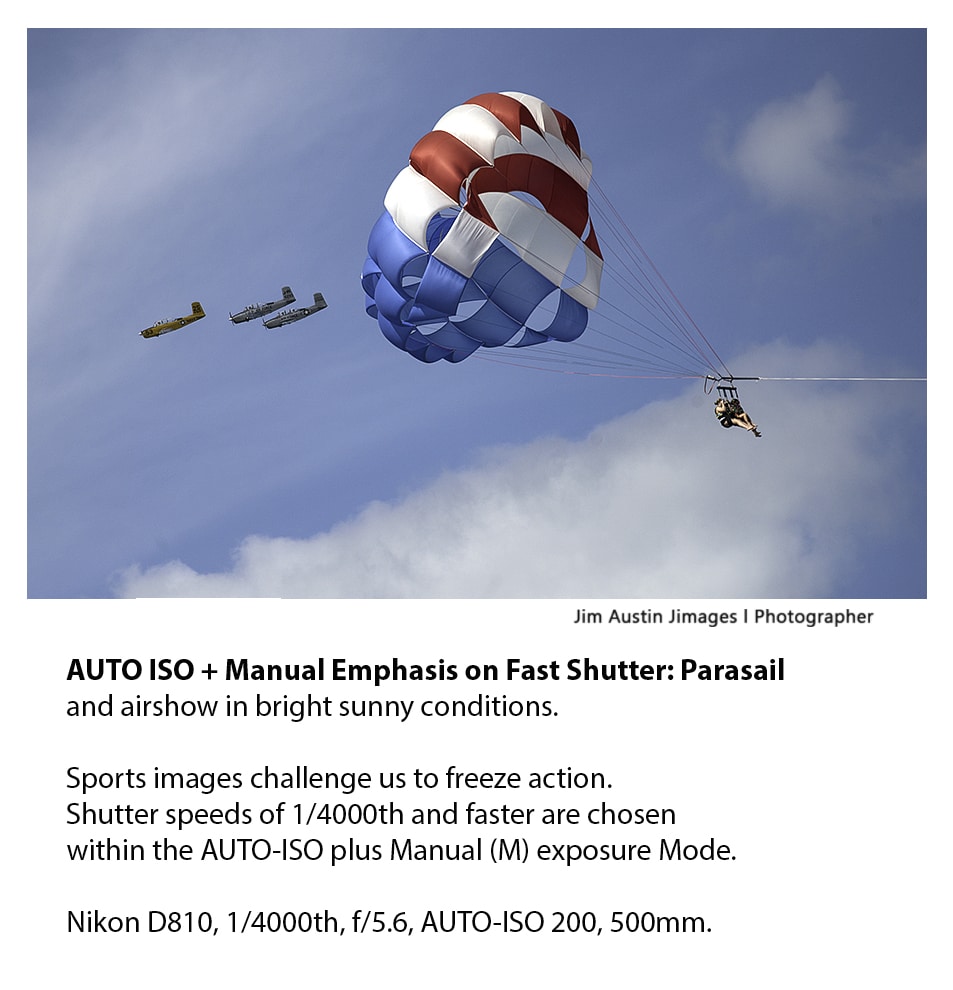
As we saw above, Shutter Priority mode is an effective choice to control motion within the frame. Slow shutter speeds allow motion blurs. Fast shutter speeds let us stop action, as with birds in flight. As you know, Aperture Priority is a way to control the plane of focus and depth of field. Therefore, setting your camera for Auto-ISO + Manual gives the advantages of controlling depth of field and stop-motion control for sharpness or motion blur.
Delightfully, AUTO-ISO + M lets you choose shutter to control motion, AND set an F-stop to control creative depth of field, with the camera automatically on a range of ISO values you’ve set up in its menu. AUTO ISO plus M is the most flexible of all exposure modes.
Three Final Advantages
Using AUTO-ISO + M technique also avoids two problems.
First, I’ve had blurred motion with Aperture priority. AUTO-ISO + M lets me raise the shutter speed for sharpers pictures at this higher S or Tv value, like 1/2000th.
Second, the camera might set an F-stop of F/22 in Shutter Priority mode. Depth of field is lost with everything in focus, and diffraction, as a result. With AUTO-ISO + M, I can use a wider aperture. This lets me set the lowest ISO possible when photographing subjects that don’t move. It’s easy; I just program in my shutter speed as low as I can for that scene.
For instance, photographing for blurred background for a perched bird, I open the F-stop to f/2.8 or f/4, which is near the widest lens opening. Then, I use the lowest possible ISO (50, 100, 200, or whatever is native to the camera) when I want to reduce noise in the image file. The payoff is efficiency: there’s no time spent searching the camera’s menu or fiddling with buttons.


My name is Dhruv
Sir I am studying in class 10
So I can do Wildlife photography I am interested in wildlife photography
Dhruv, Yes, you can do wildlife. Keep making photographs every day. Be persistent, patient, and you will have enjoy a lifetime of experiences with nature in the wild. Thanks for writing. Jim